
There are almost zero manuals online on how to setup the Dell PowerEdge Expandable RAID Controller version 6/i (PERC 6/i) to add additional virtual disks to an existing configuration, so I decided to write a quick instruction manual here. Even Dell’s website either has dead links or does not have enough information on the steps. These steps are identical if this is the first time you are setting up the RAID on the server, and not just for adding a new set of drives.
In my scenario, I have several Dell R710 PowerEdge servers that required additional disk drives. I am running RAID-1 on the existing server with 4 physical drives (Samsung EVO SSDs) pretending to be 2 virtual drives to the operating system. I wanted to add 2 more SSDs and hence create another virtual drive for the Linux operating system to be able to access it.
The process is very simple and takes about 5 to 10 minutes. Read below for the instructions described using images.
Step 1: Shutdown your server, if running. It is advisable to do a cold start rather than a reboot. Wait for the BIOS to boot up fully. If your BIOS is old and not the latest version, first update the BIOS by following the instructions on Dell’s website for your server.
NOTE:Remember to first add the new physical drives into their respective slots before booting the server up.
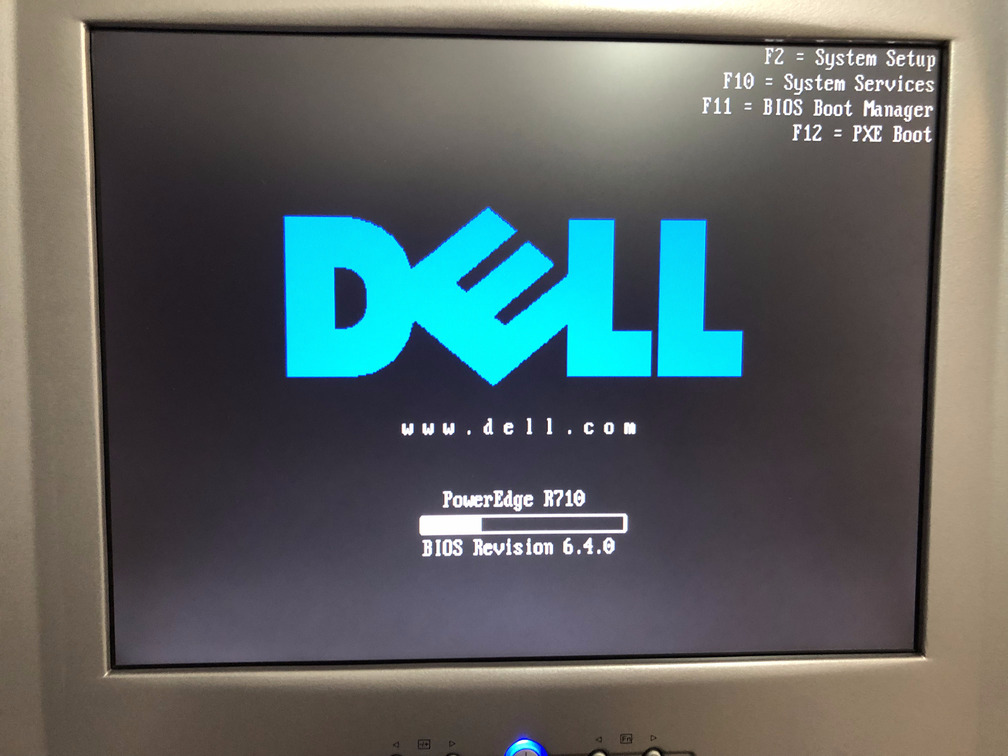 Figure 1. Perform a cold boot on the server
Step 2: Wait for the controller prompt to show up as in Figure 2a and press the Ctrl R keys. The PERC controller will now go into configuration mode as shown in Figure 2b and 2c. This may take about 10-30 seconds, so be patient. The configuration utility will detect the current number of virtual disks first and that’s why it takes a slight amount of time.
Once the utility has loaded you can navigate to the controller screen shown in Figure 2d to compare settings as in the image.
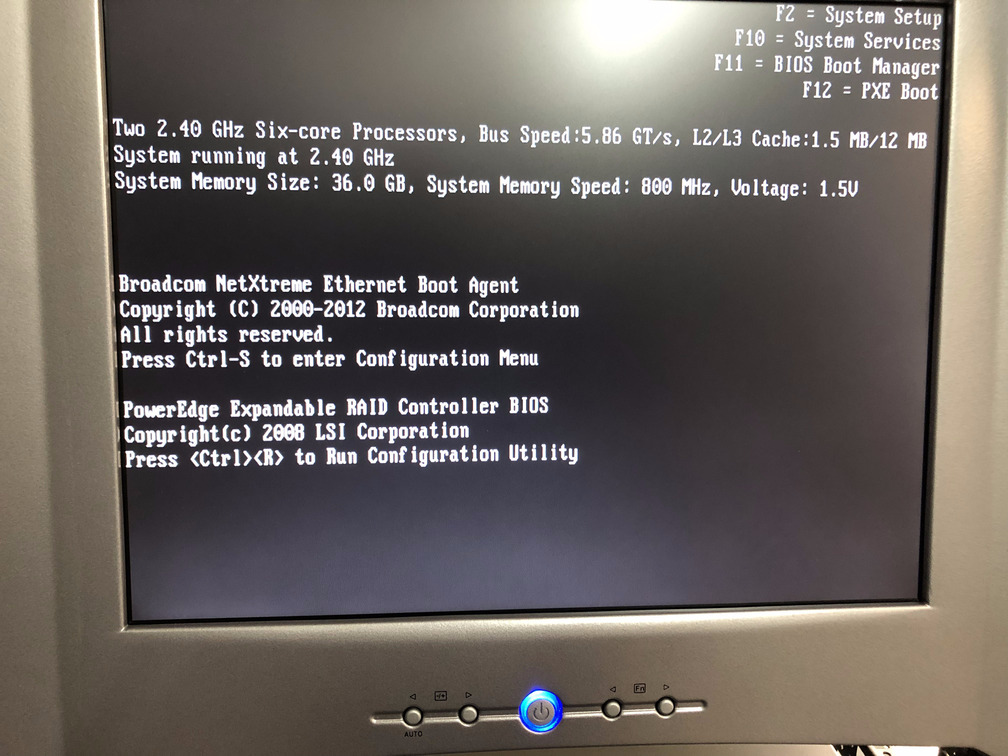 Figure 2a. Press Ctrl R when prompted
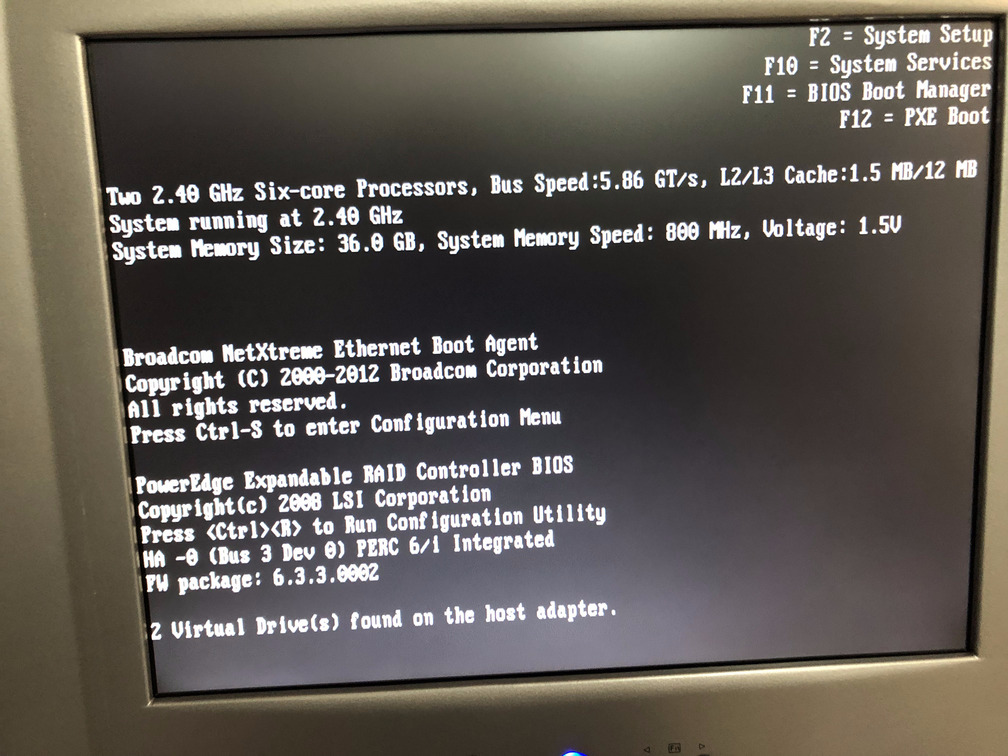 Figure 2b. The configuration utility detects the number of virtual disks
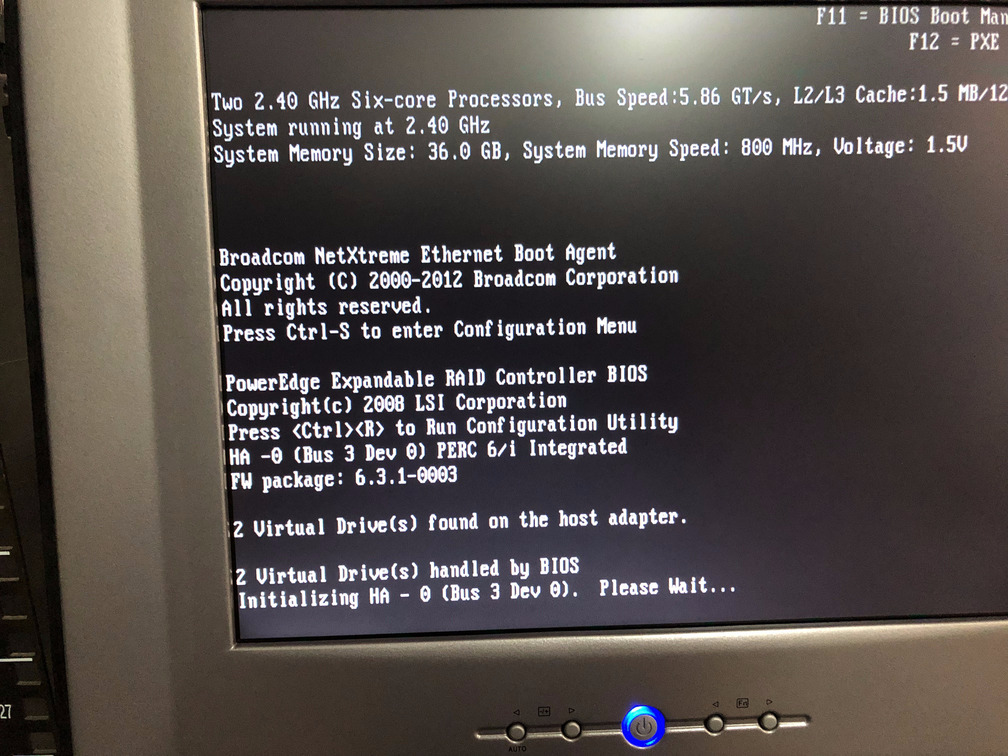 Figure 2c. Finally the configuration utility is loading
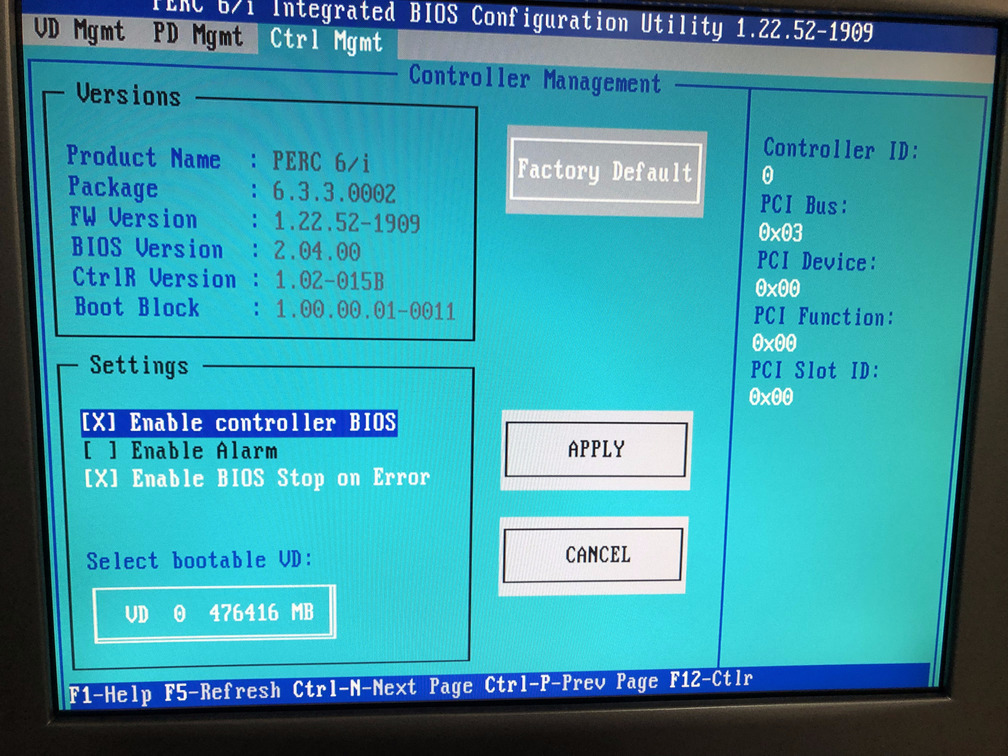 Figure 2d. Configuration utility controller screen
Step 3: Navigate to the VD Mgmt option in the configuration utility. In our server, we have one PERC Controller, denoted by Controller 0 in Figure 3a. Since we already have two virtual drives setup, we can see two disk groups each with their own virtual disks as in Figure 3b and 3c. In our configuration, each virtual drive has 2 500GB SSDs in a RAID-1 configuration working effectively as a single 500GB, which is shown as 465.250GiB (Gibibyte not Gigabyte) in the images.
You must use the keyboard arrow keys to navigate the tree view. I do not recommend using a mouse even if the mouse works.
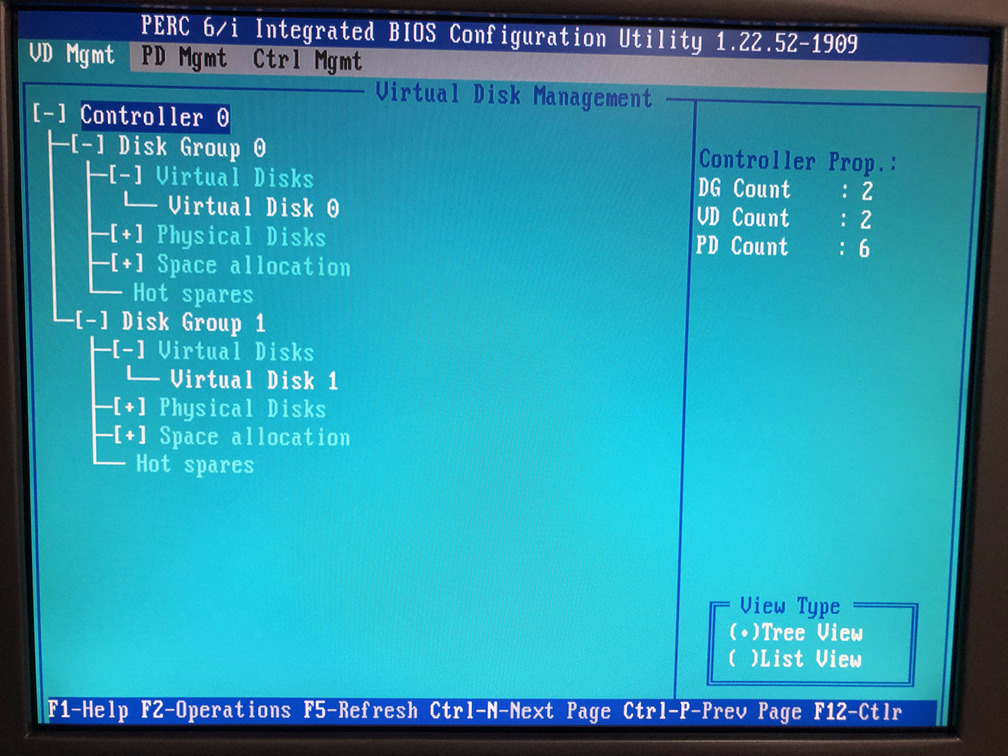 Figure 3a.
 Controller 0
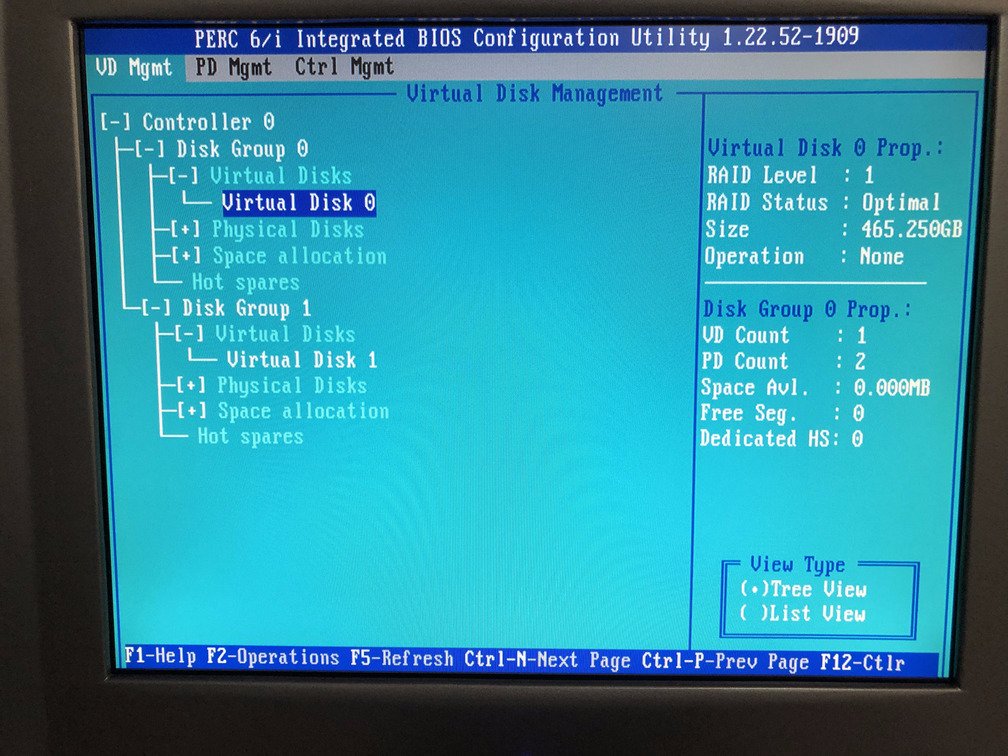 Figure 3b.
 Virtual Disk 0
 Figure 3c.
 Virtual Disk 1
Step 4: In Step 1, we reminded you to add the new physical drives that you want to add to the existing controller. Navigate to the PD Mgmt (physical disk management) screen. We assume you have done that as shown in Figure 4, where you can see additional two disks that do not have a DG (disk group) column value. This means they have not been setup yet and that’s what we are going to do next. This is also a positive sign that you have installed the physical disks correctly in the server.
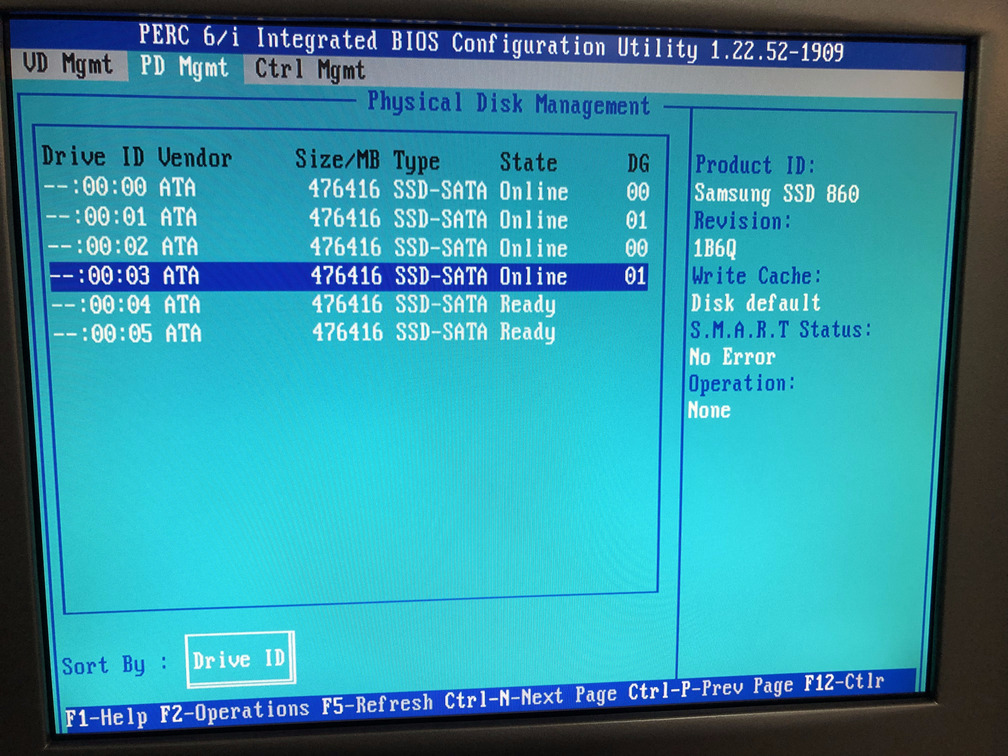 Figure 4. Check the physical disks in the
 PD Mgmt view
Step 5a: Navigate back to the VD Mgmt (virtual disk management) screen, highlight Controller 0 and hit F2 to get the Create New VD menu option as shown in Figure 5a. Press the Enter key.
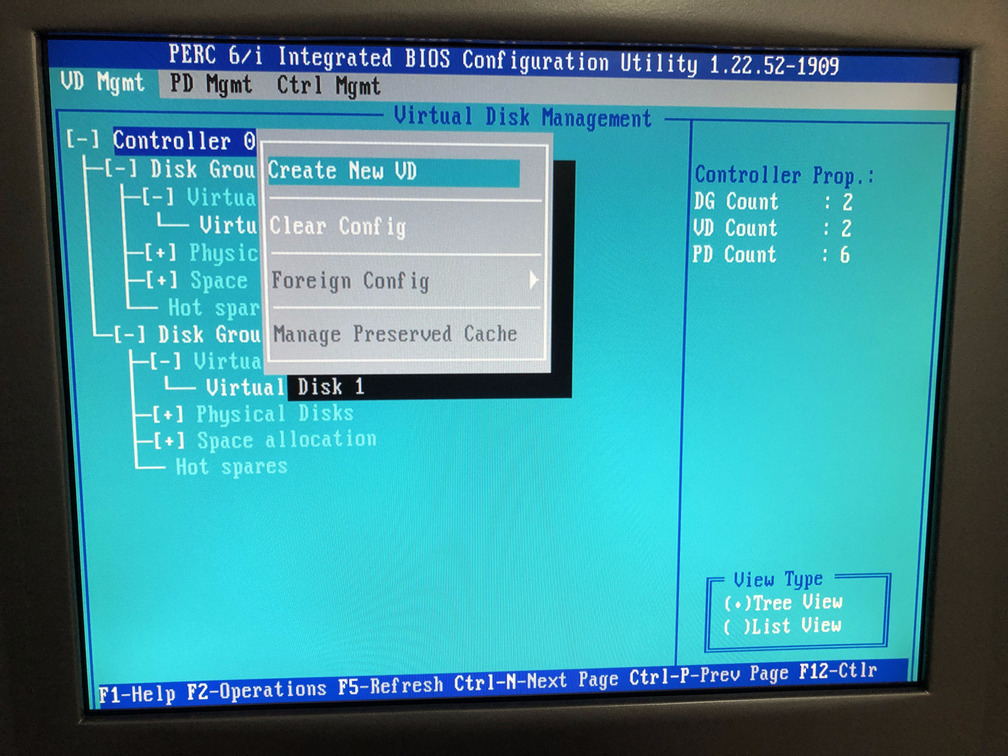 Figure 5a. Create New VD menu option
Step 5b: When you press the Enter key a new screen appears. This screen lists the physical drives that are not part of any disk group and allows you to select the RAID configuration you want. In my case I wanted the RAID-1 configuration as shown in Figure 5b. However, maybe you just want to use RAID-0 to maximize the disk space available to you. If that’s the case, you should select RAID-0.
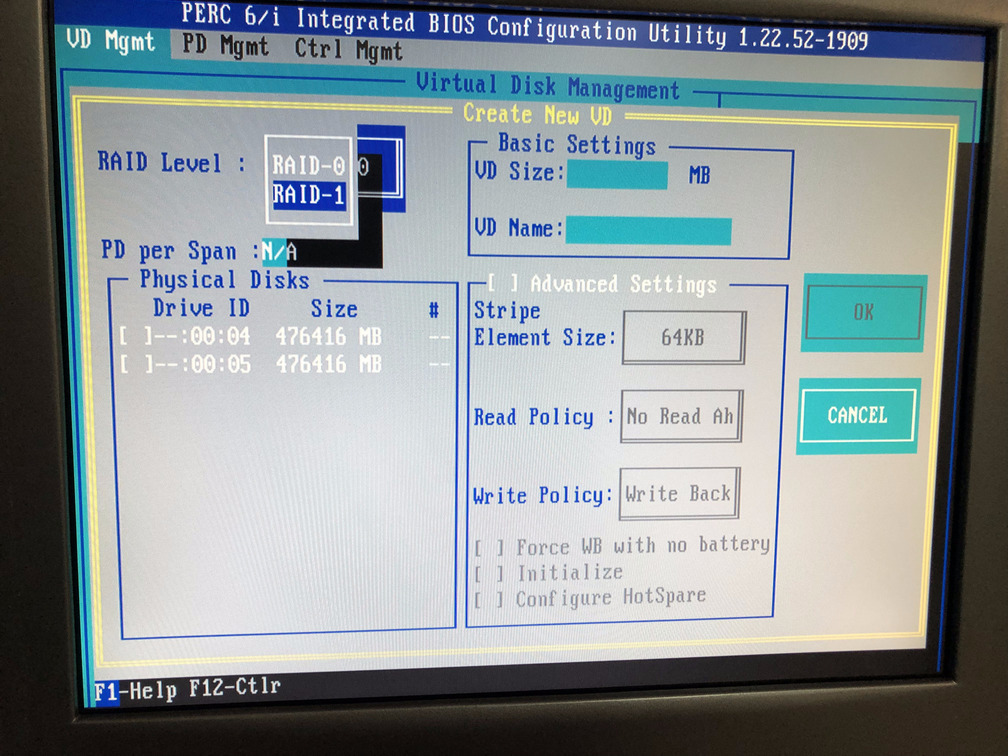 Figure 5b. Select
 RAID-1 Option
Step 5c: If you are using RAID-1, select two physical disks to be part of this virtual disk that you are creating. If you are using RAID-0 select one physical disk. You may use the Tab key to navigate and press the Enter key to select a disk.
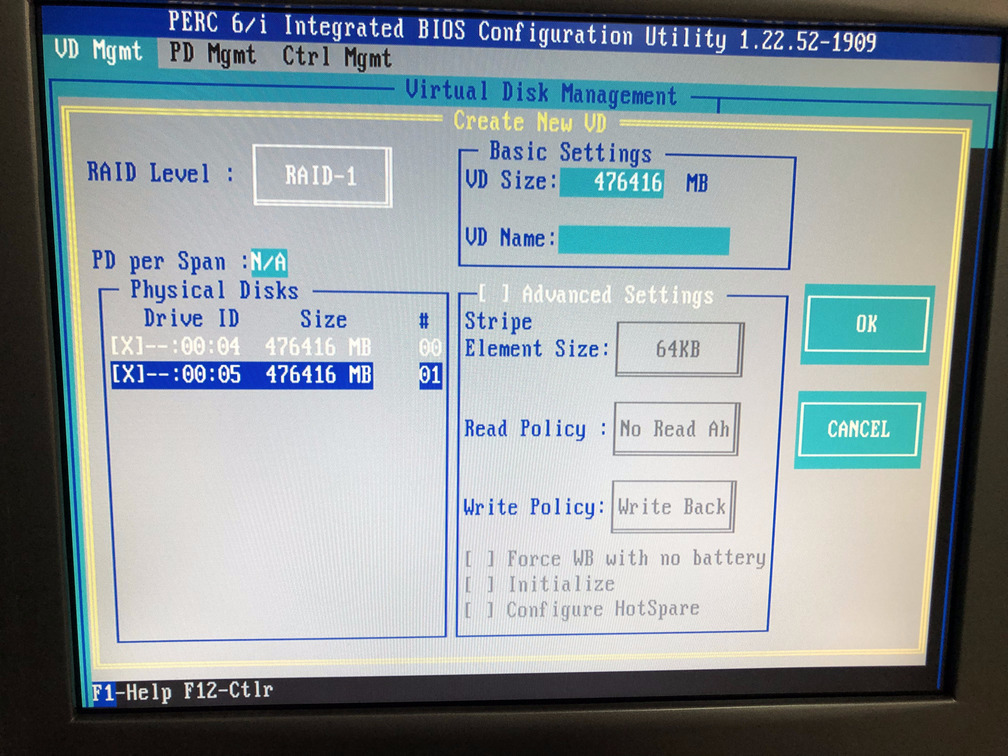 Figure 5c. Select physical disks
Step 5d: Now that you have selected your physical disks, navigate to the OK button on the far right of the screen (as shown in Figure 5d) and press Enter. You will then see a prompt as in Figure 5e and you must press Enter again. That will bring you back to the VD Mgmt screen and you should see a new virtual disk created. In our case, in Figure 5f, you can see Virtual Disk 2 has been created. You can see the properties of the disk on the right hand side column.
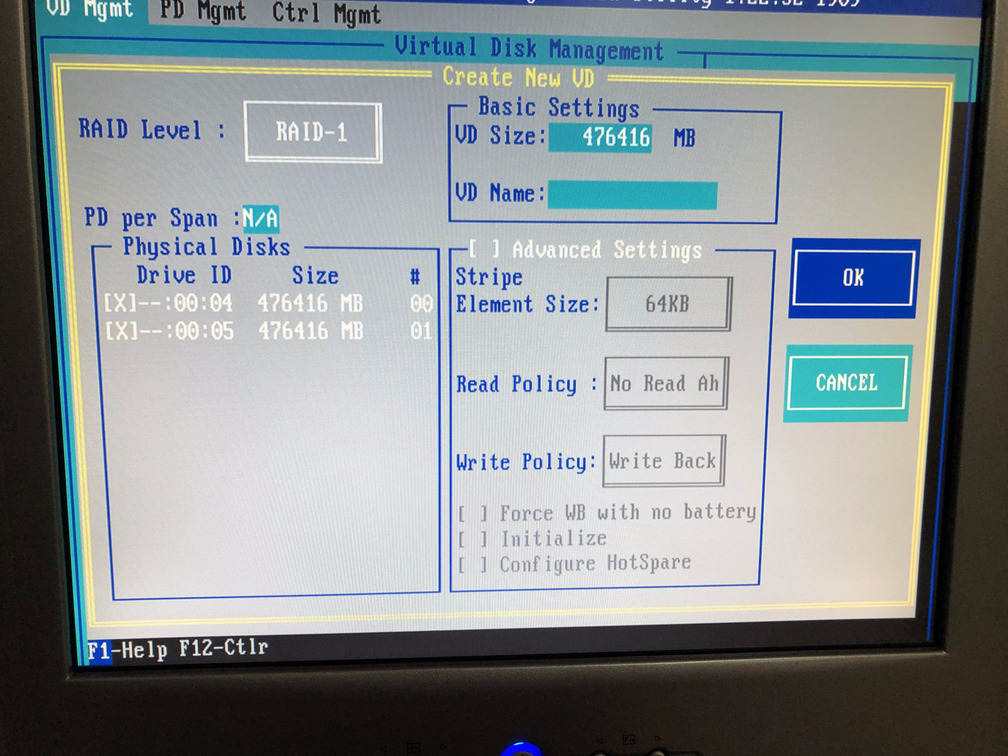 Figure 5d. Navigate to the
 OK button
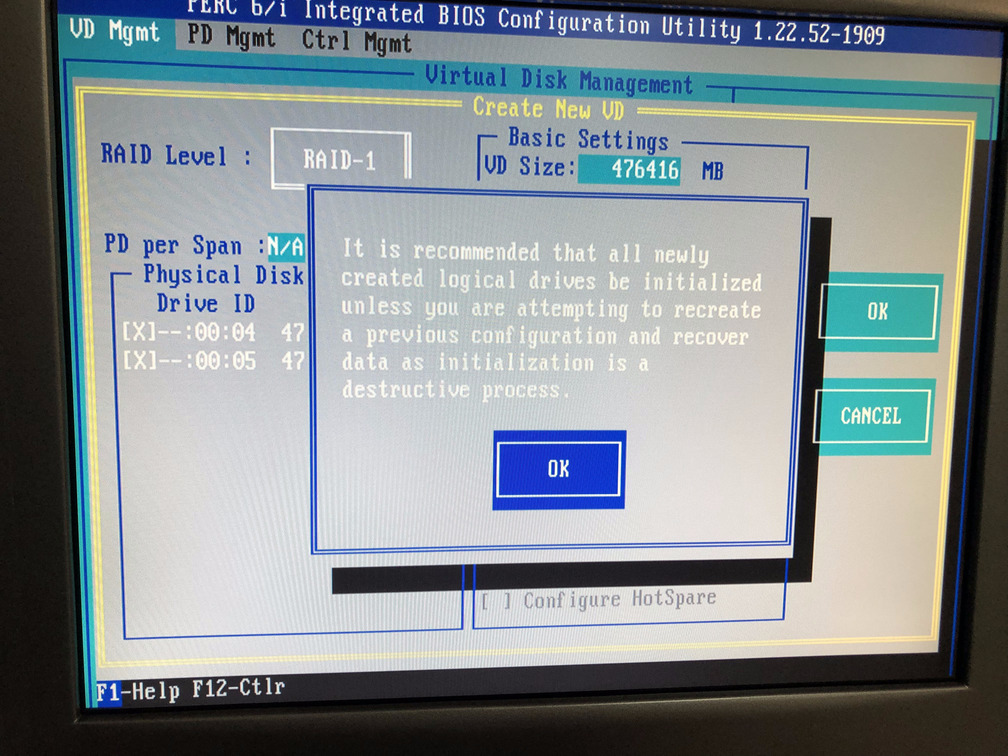 Figure 5e. Press
 Enter when prompted
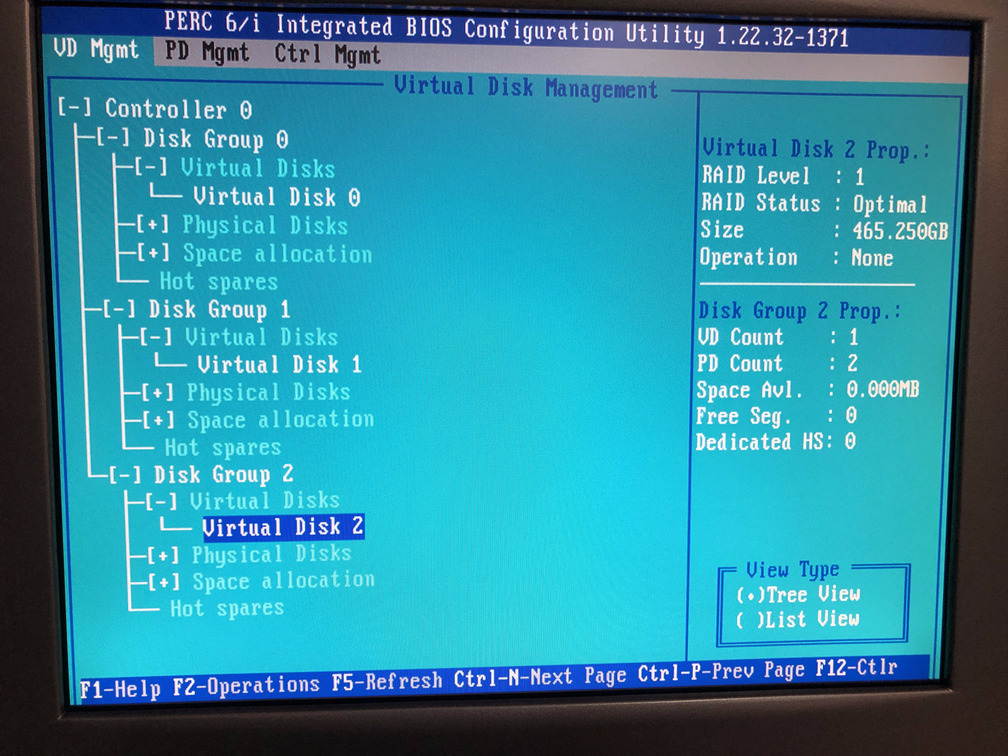 Figure 5f. New virtual disk has been created
Step 6a: Now we need to initialize the virtual disk. Press F2 and access the initialization menu as shown in Figure 6a.
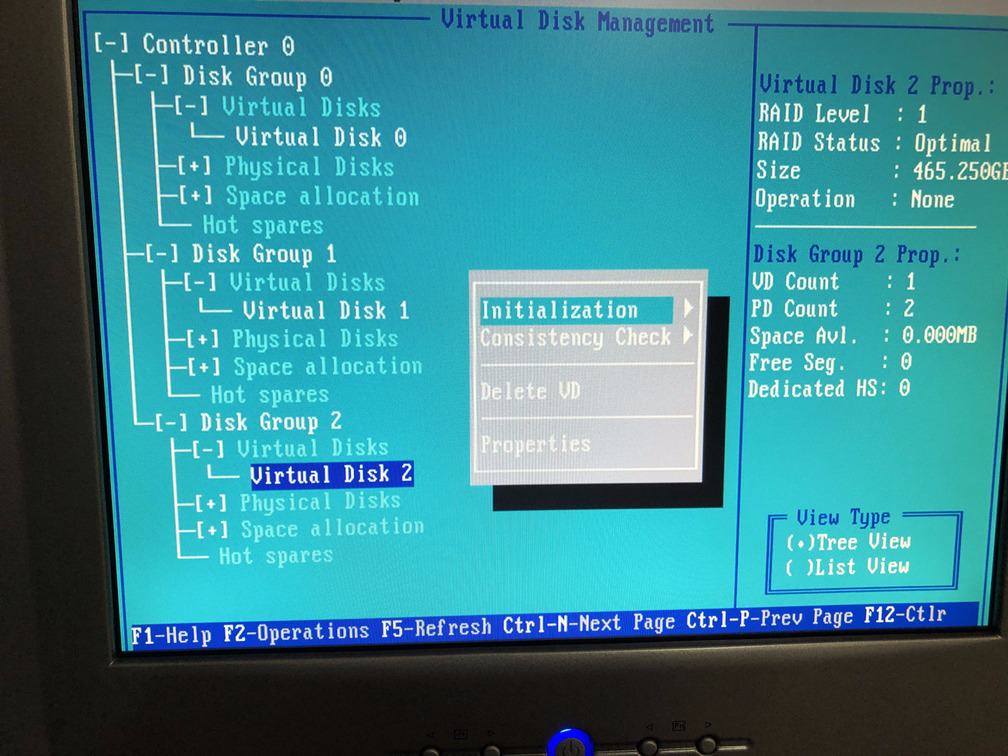 Figure 6a. Initialization menu for the new virtual disk
Step 6b: You can choose to perform slow initialization, but since these are new drives a fast initialization is good enough. You can then update the file system from within the operating system of the server directly and that will save time. Fast initialization takes a few seconds whereas slow initialization can take hours. We select the Fast Init. option as shown in Figure 6b.
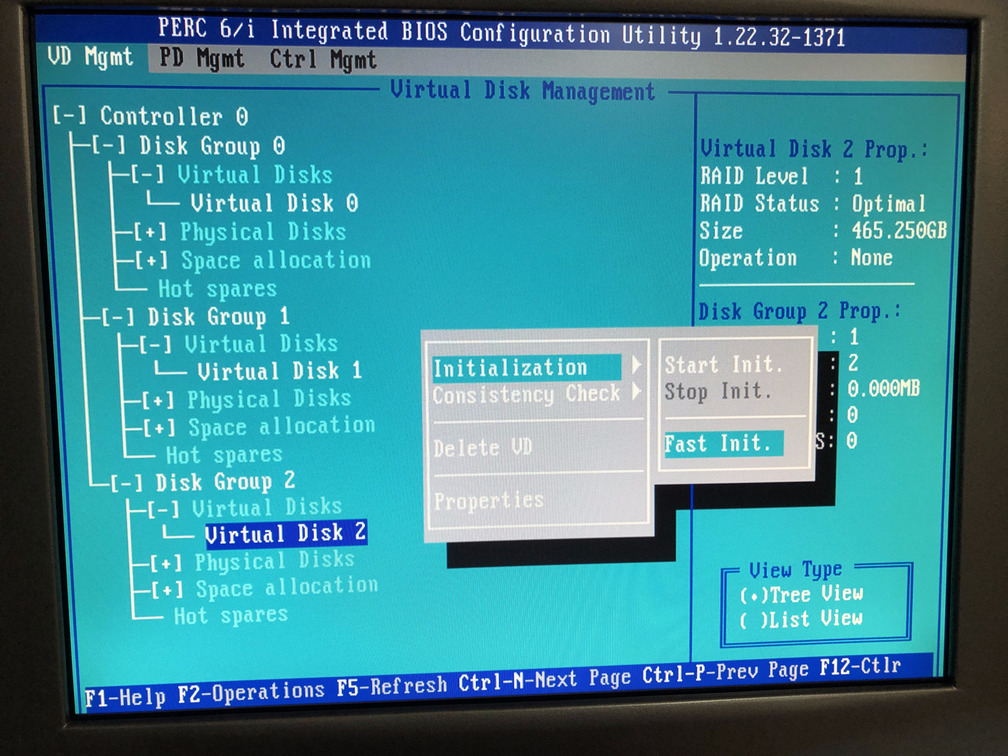 Figure 6b. Select
 Fast Init. option
Step 6c: The utility then displays a prompt as shown in Figure 6c, and you should select Yes and press Enter. Figures 6d and 6e show the progress of the initialization till it completes. Once completed, press Enter on the prompt and you should arrive at Figure 6f.
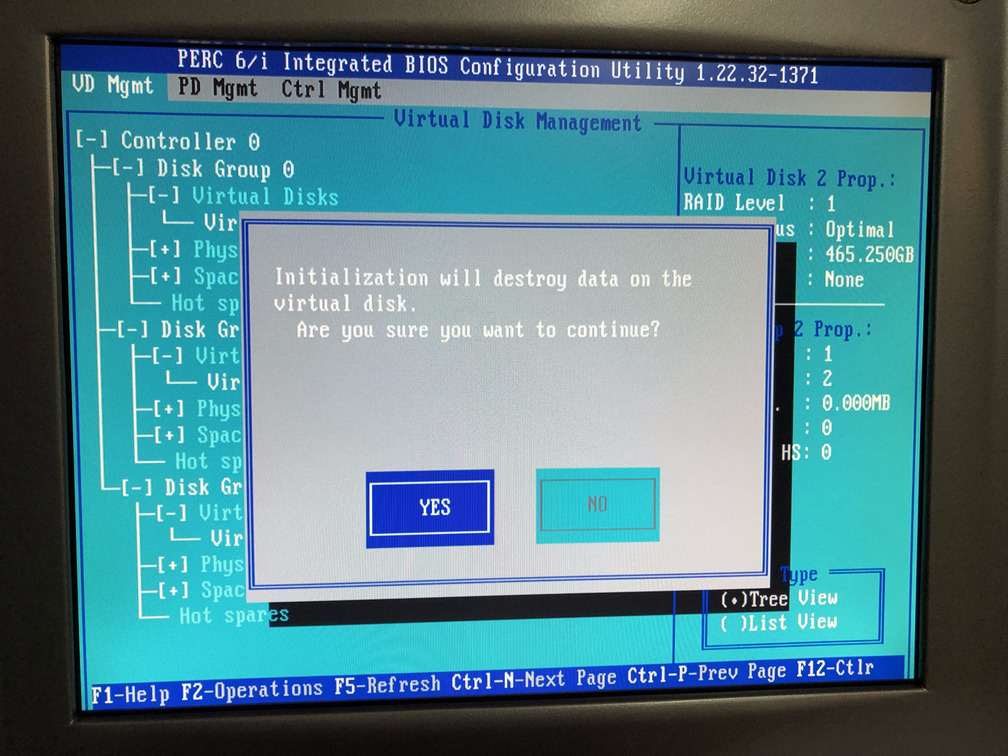 Figure 6c. Select
 Yes on the prompt
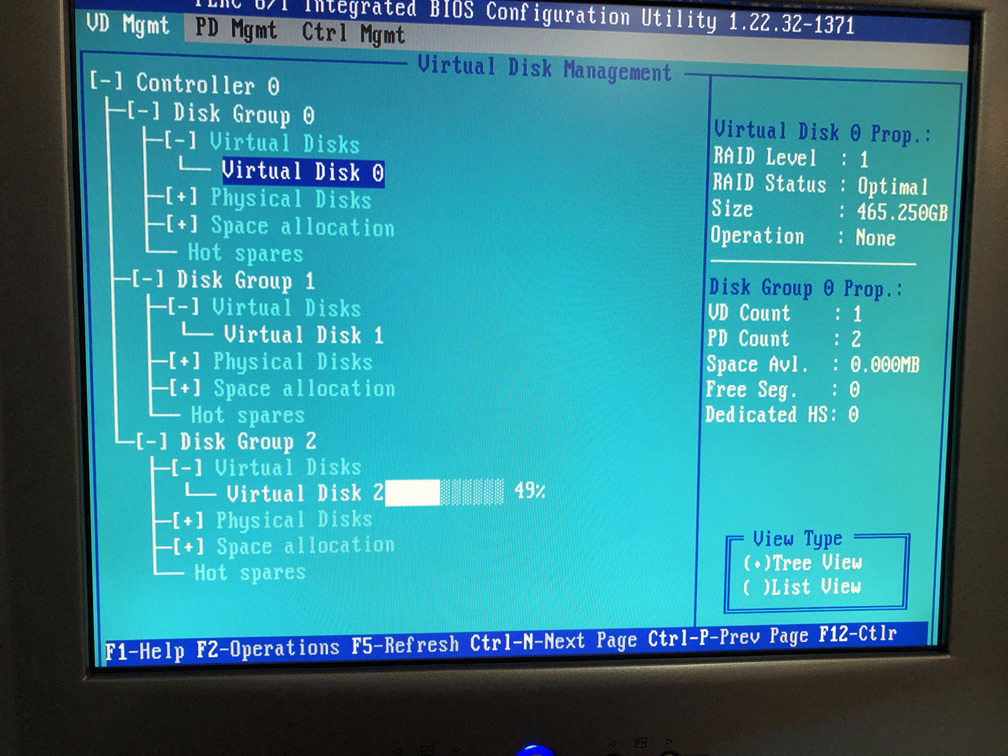 Figure 6d. Initialization is in progress
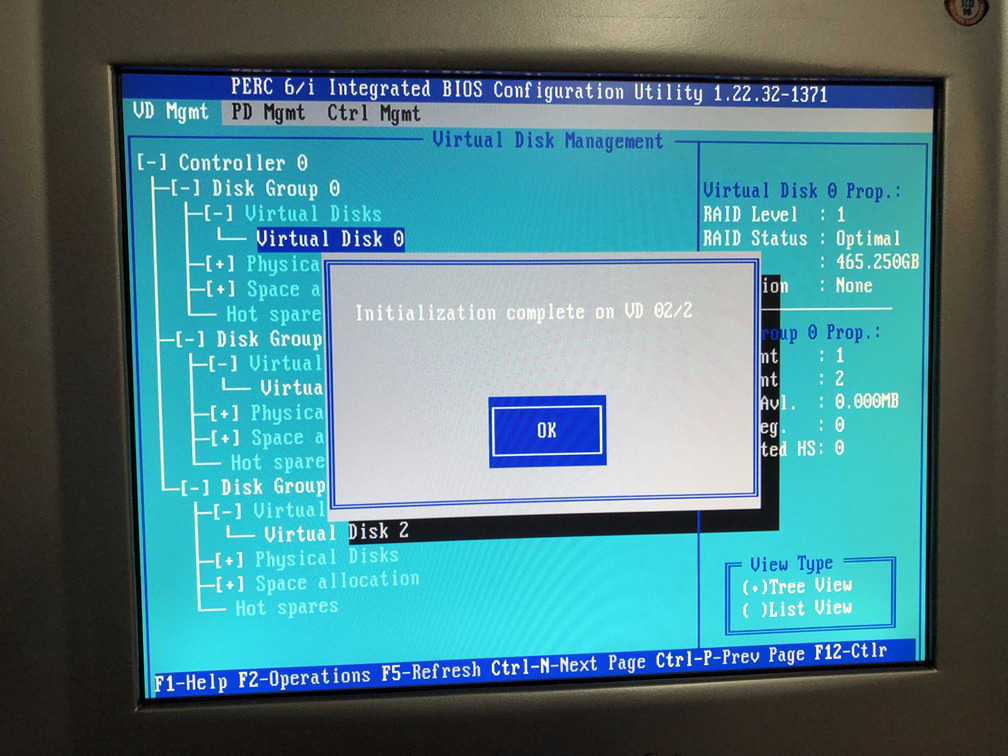 Figure 6e. Initialization has completed
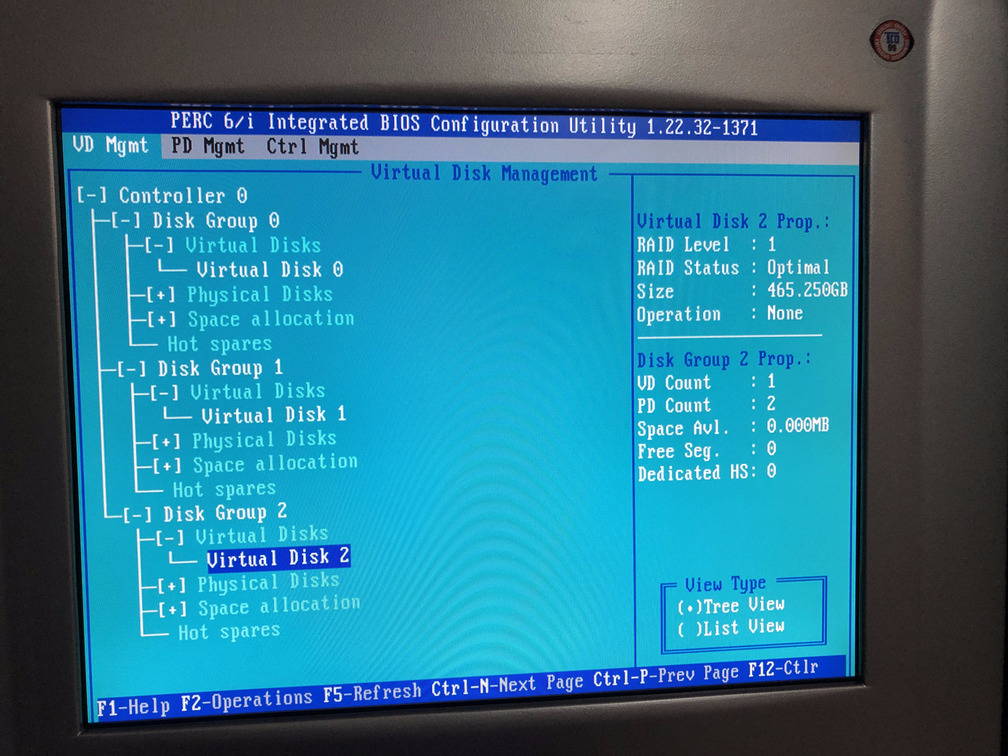 Figure 6f. Back to
 VD Mgmt menu
Step 7: Press Esc or F12 to exit the configuration utility and press Enter on the OK prompt as shown in Figure 7.
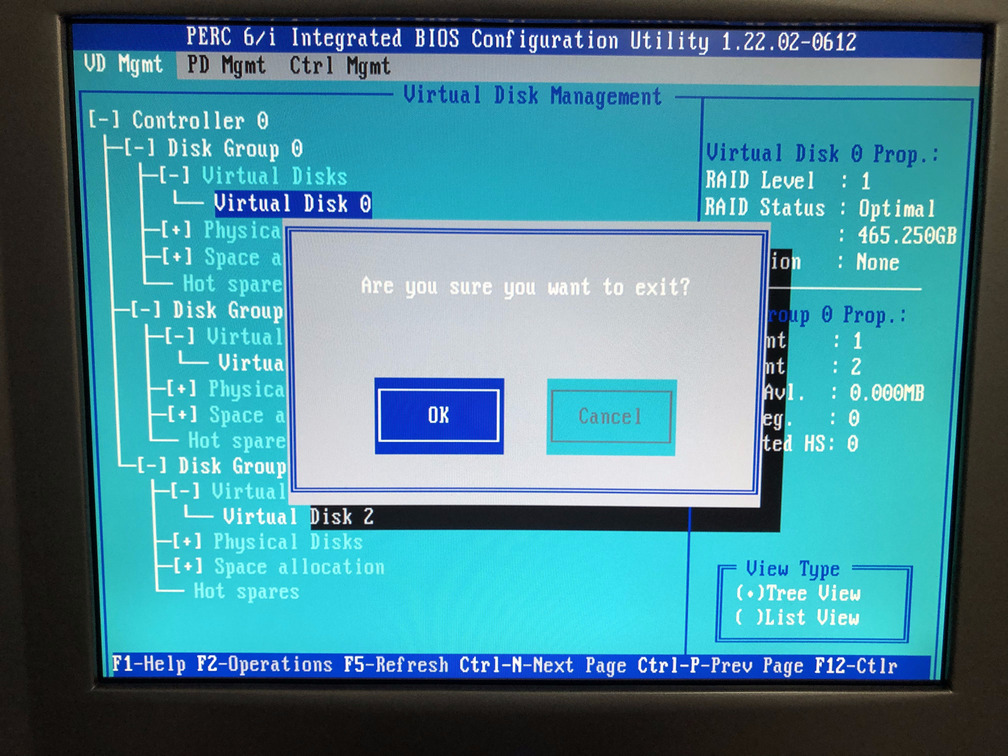 Figure 7. Exit the configuration utility
Step 8: Once you exit the configuration utility, you are presented with the screen in Figure 8 asking you to press Ctrl Alt Del to reboot the server.
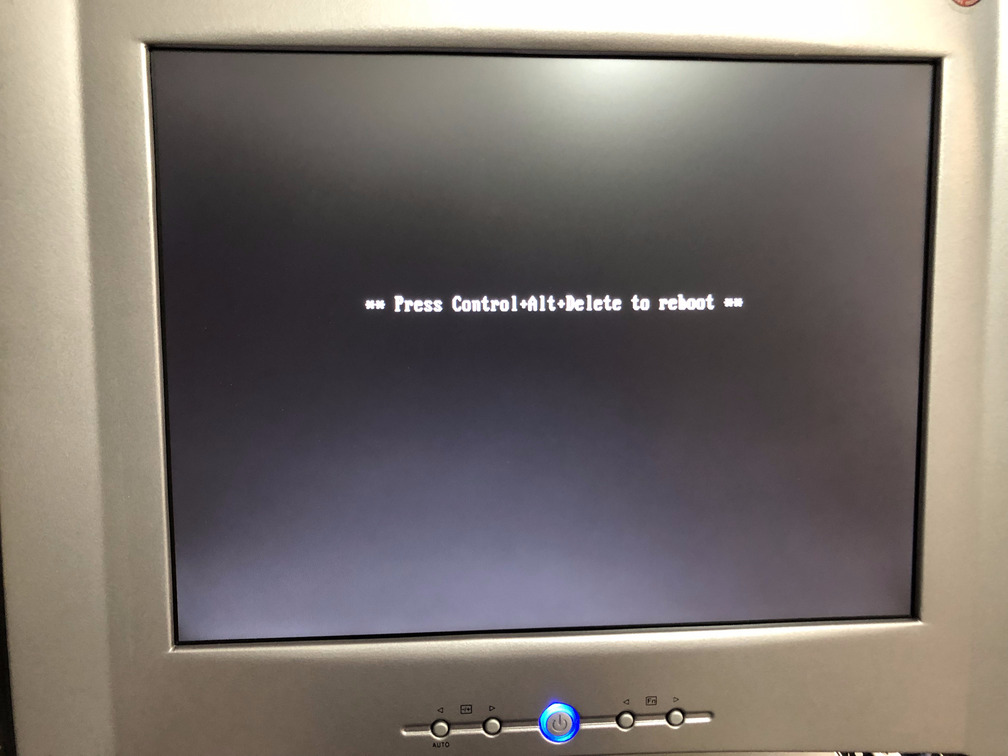 Figure 8. Press
 Ctrl Alt Del to reboot
Step 9: Once your server boots up into your operating system you must add the newly created virtual drive to the OS for use.
If you are using Windows, you are on your own. If you are using a form of Debian/Ubuntu Linux, below are some helpful instructions. The output of each instruction is not shown here, but it is assumed you will RTFM. This assumes you are running LVM which if you are not, then ask yourself why.
### login as root ###
$ sudo su - root
### scan for disks to verify that newly created disks show up###
### a virtual drive will appear as a single physical disk ###
$ pvscan
### find the new drive device number ###
$ fdisk -l
### let us assume the new virtual drive is /dev/sdc since we already have 2 others installed before ###
### create a new physical volume ###
$ pvcreate -v /dev/sdc
### scan for LVM virtual drive groups and find the virtual group name ###
$ vgscan
### add the physical volume to the existing virtual group named "server-vg" in our case. ###
$ vgextend server-vg /dev/sdc
### verify that the physical volume got added to the virtual group ###
$ vgscan
### note the current size of disk drives in the logical volume ###
$ lvscan
### now extend the logical volume to the newly added physical drive ###
### in your case the logical volume path must be taken from the output of lvscan or vgscan ###
$ lvextend -l +100%FREE /dev/server-vg/root
### verify that the logical volume has the correct size of disk ###
$ lvscan
### resize the file system to the newly added disk space ###
### the name of the device here could be found in the output of lvscan or df ###
$ resize2fs -p /dev/mapper/server--vg-root
### verify the sizes
$ df -h
### you are done, and can optionally reboot ###
$ reboot
Once your server boots into the operating system that is installed, follow instructions for your operating system of choice to add the newly created virtual drive to your system and start using it.
 Donate BITCOIN to 19hrWWw1dPvBE1wVPfCnH8LqnUwsT3NsHW.