
Keeping the theme of re-using old hardware, I have always wanted to build a directional antenna from an old satellite dish and this is what I demonstrate in this post. I wanted it to look professional so no zip-ties were used. I also wanted the directional antenna to be generic and not limited to just a WiFi dongle. Using a 10’ SMA-connector extension wire from Amazon, I was able to pass this through the LNBF assembly that comes with the satellite dish, and convert it to a professional looking re-usable directional parabolic antenna. This is more generic than strapping a USB WiFi dongle using zip-ties, and can be used for any other radio that accepts an antenna with an SMA connector. Here is how I did it.
Tools Needed
- Satellite dish with mast and LNBF, preferably used. The reader can procure one on Craigslist or Facebook for free or $10.
- Flat screw driver
- Torx screw driver
- Trim removal tool (optional)
- Heat gun or blow dryer
- Blade or box cutter
- Wire cutter (optional)
- Hacksaw and bench vice
- SMA connector extension cable from Amazon or other vendor. To test the parabolic antenna, a USB WiFi dongle with an omni-directional antenna is required. I used an Alfa AWUS036H with a 5dBi antenna which I had lying around from a few years ago, and it works perfectly on Linux without any issues.
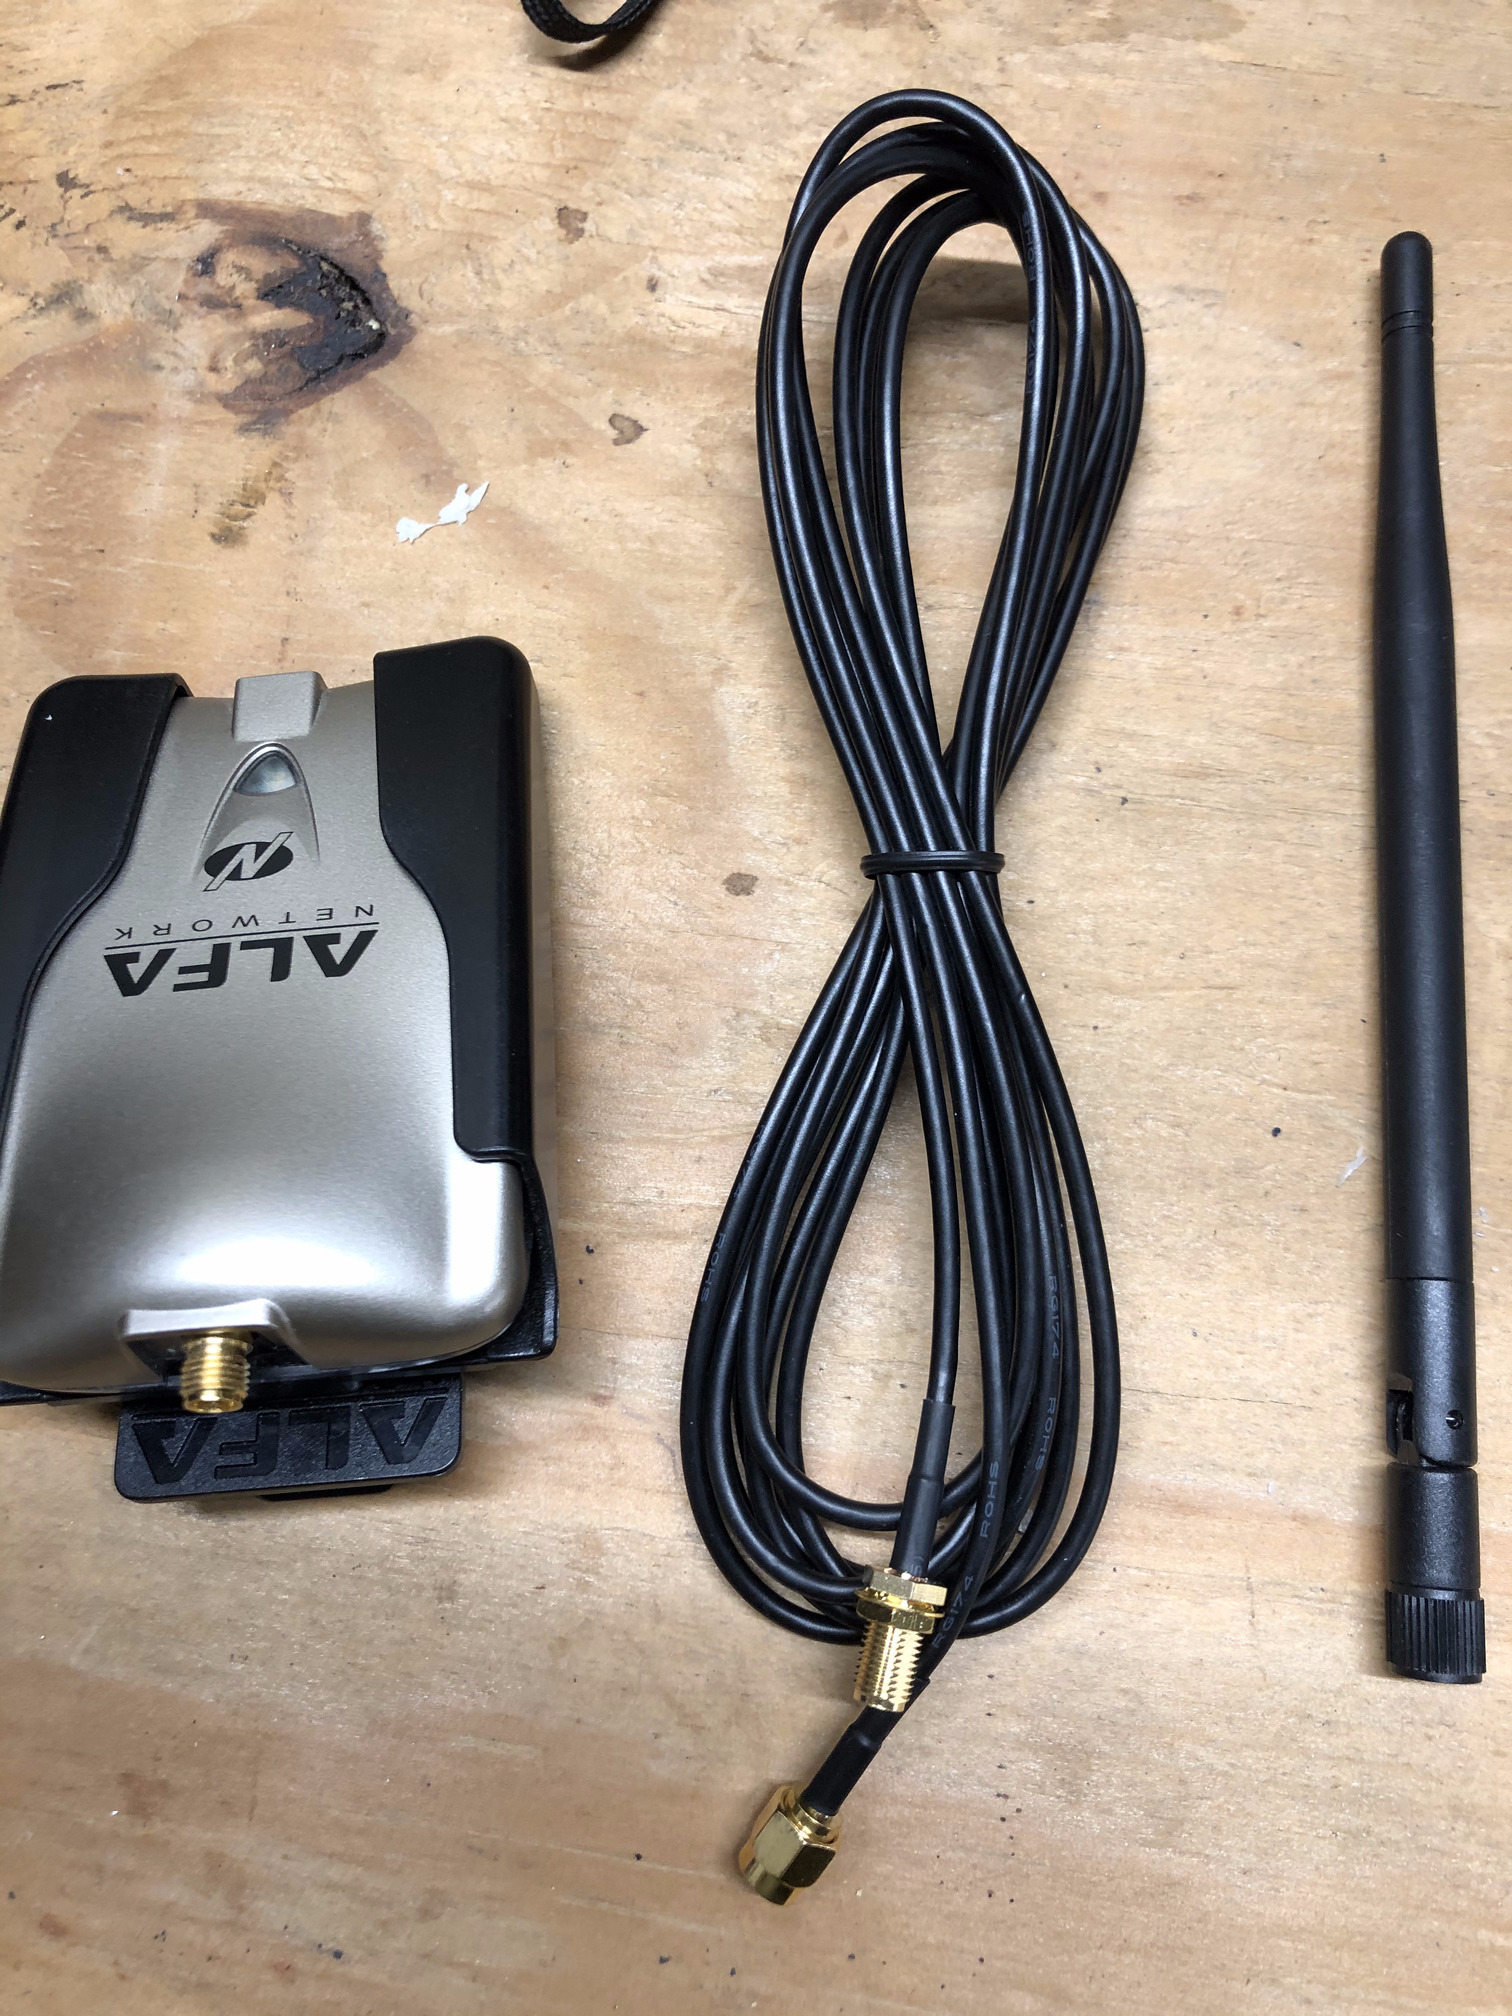 Figure 1. USB WiFi dongle, SMA connector cable, omni-directional 5dBi antenna
Disassemble the LNBF
First the LNBF assembly needs to be carefully disassembled, the circuitry removed, and replaced with the SMA connector extension cable. The goal is to be able to reuse the full assembly so that the SMA connector is perfectly centered and pointed towards the center of the parabola dish, as designed.
The waterproof assembly for housing the antenna cable is a better option than using zip-ties or other poorly designed hacks, despite the fact that such hacks may be easier to implement.
Step 1: Remove the LNBF from the main dish assembly by unscrewing it out of the dish.
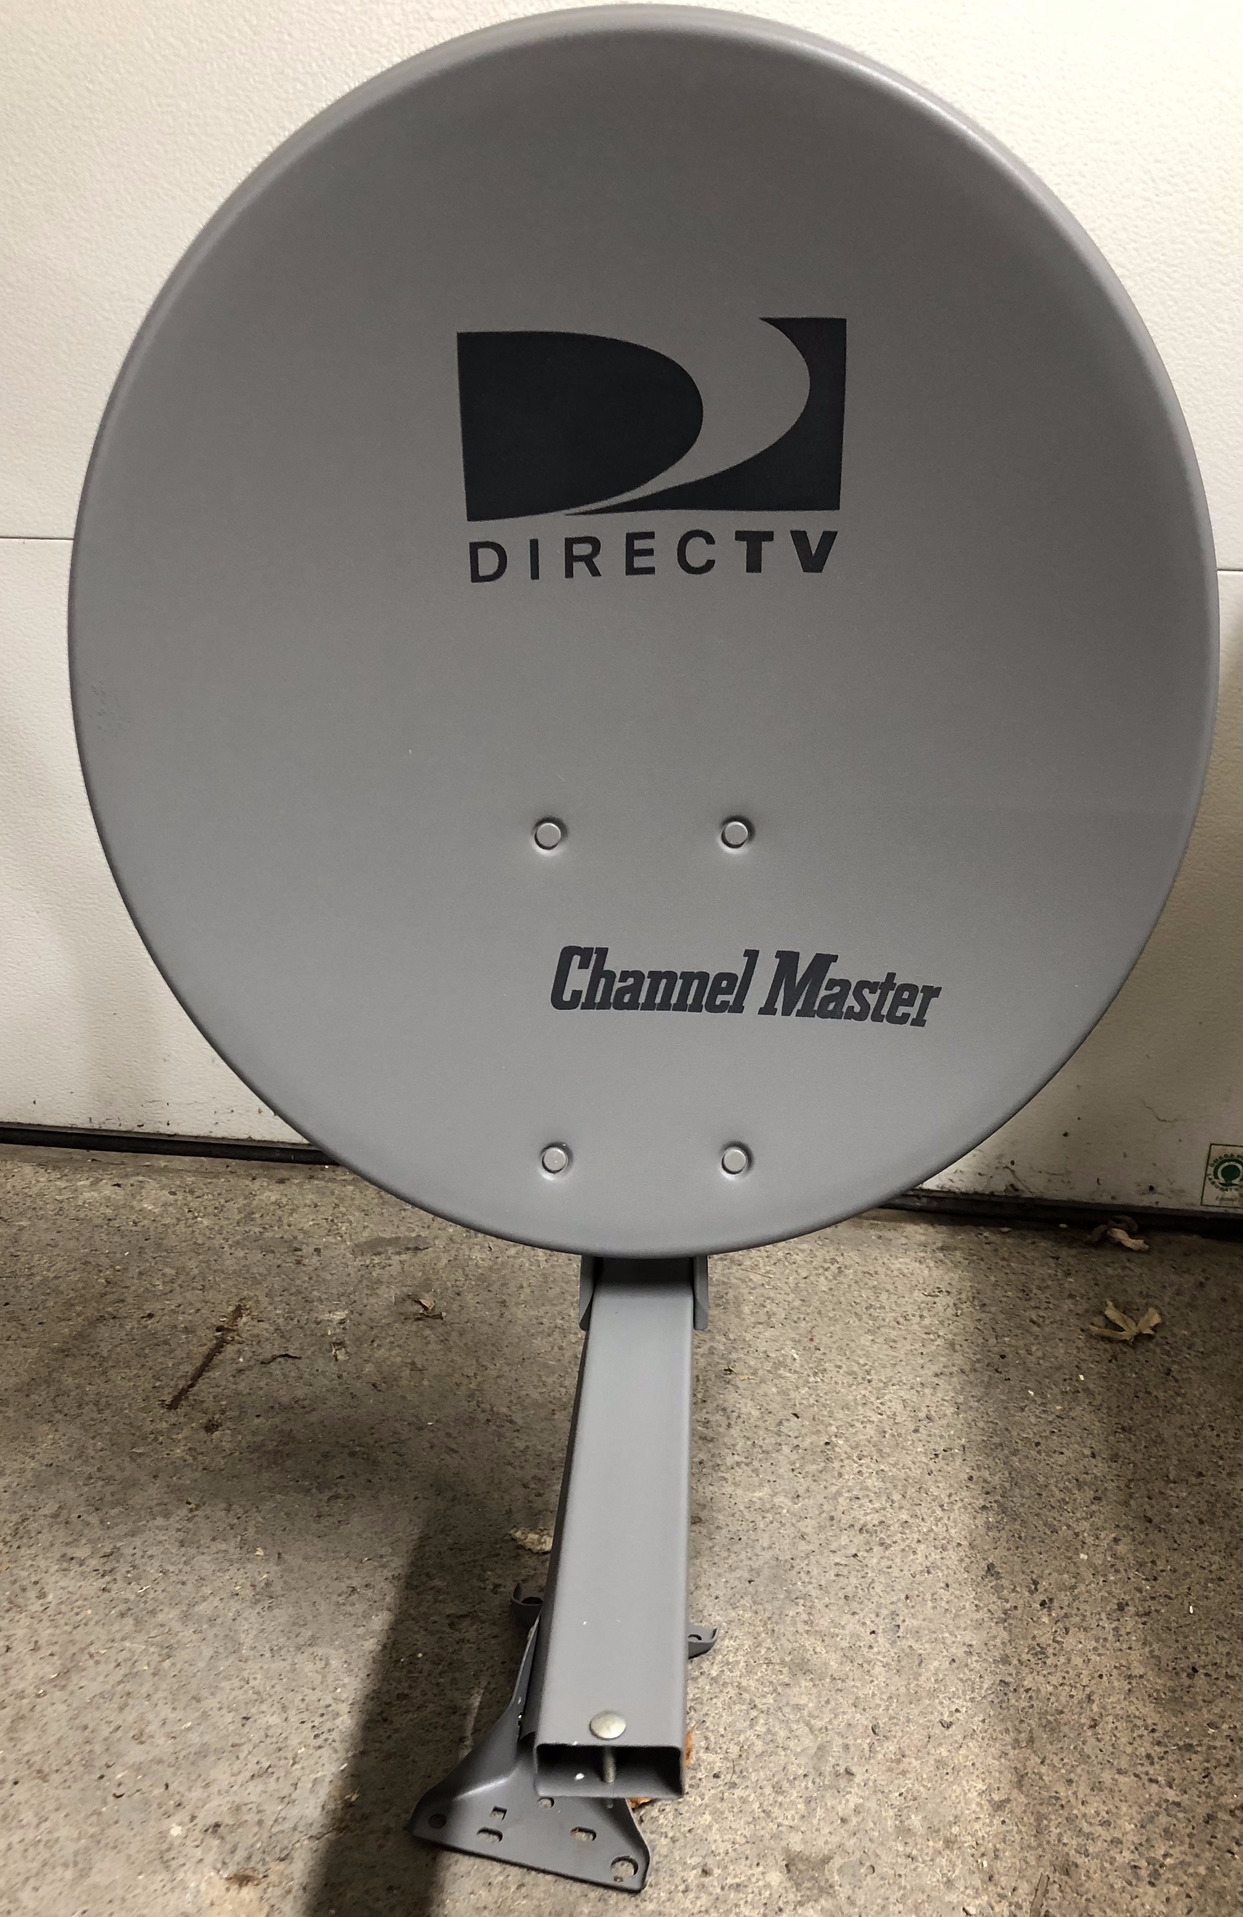 Figure 2: Satellite dish with LNBF assembly removed
Step 2: Carefully using a flat screw driver and optionally, a trim removal tool (the blue color tool in Figure 3), open up the LNBF plastic covers by unscrewing the white lid first and then separating the gray side covers apart. The middle metallic core is the most important part of this project, and will be taken apart.
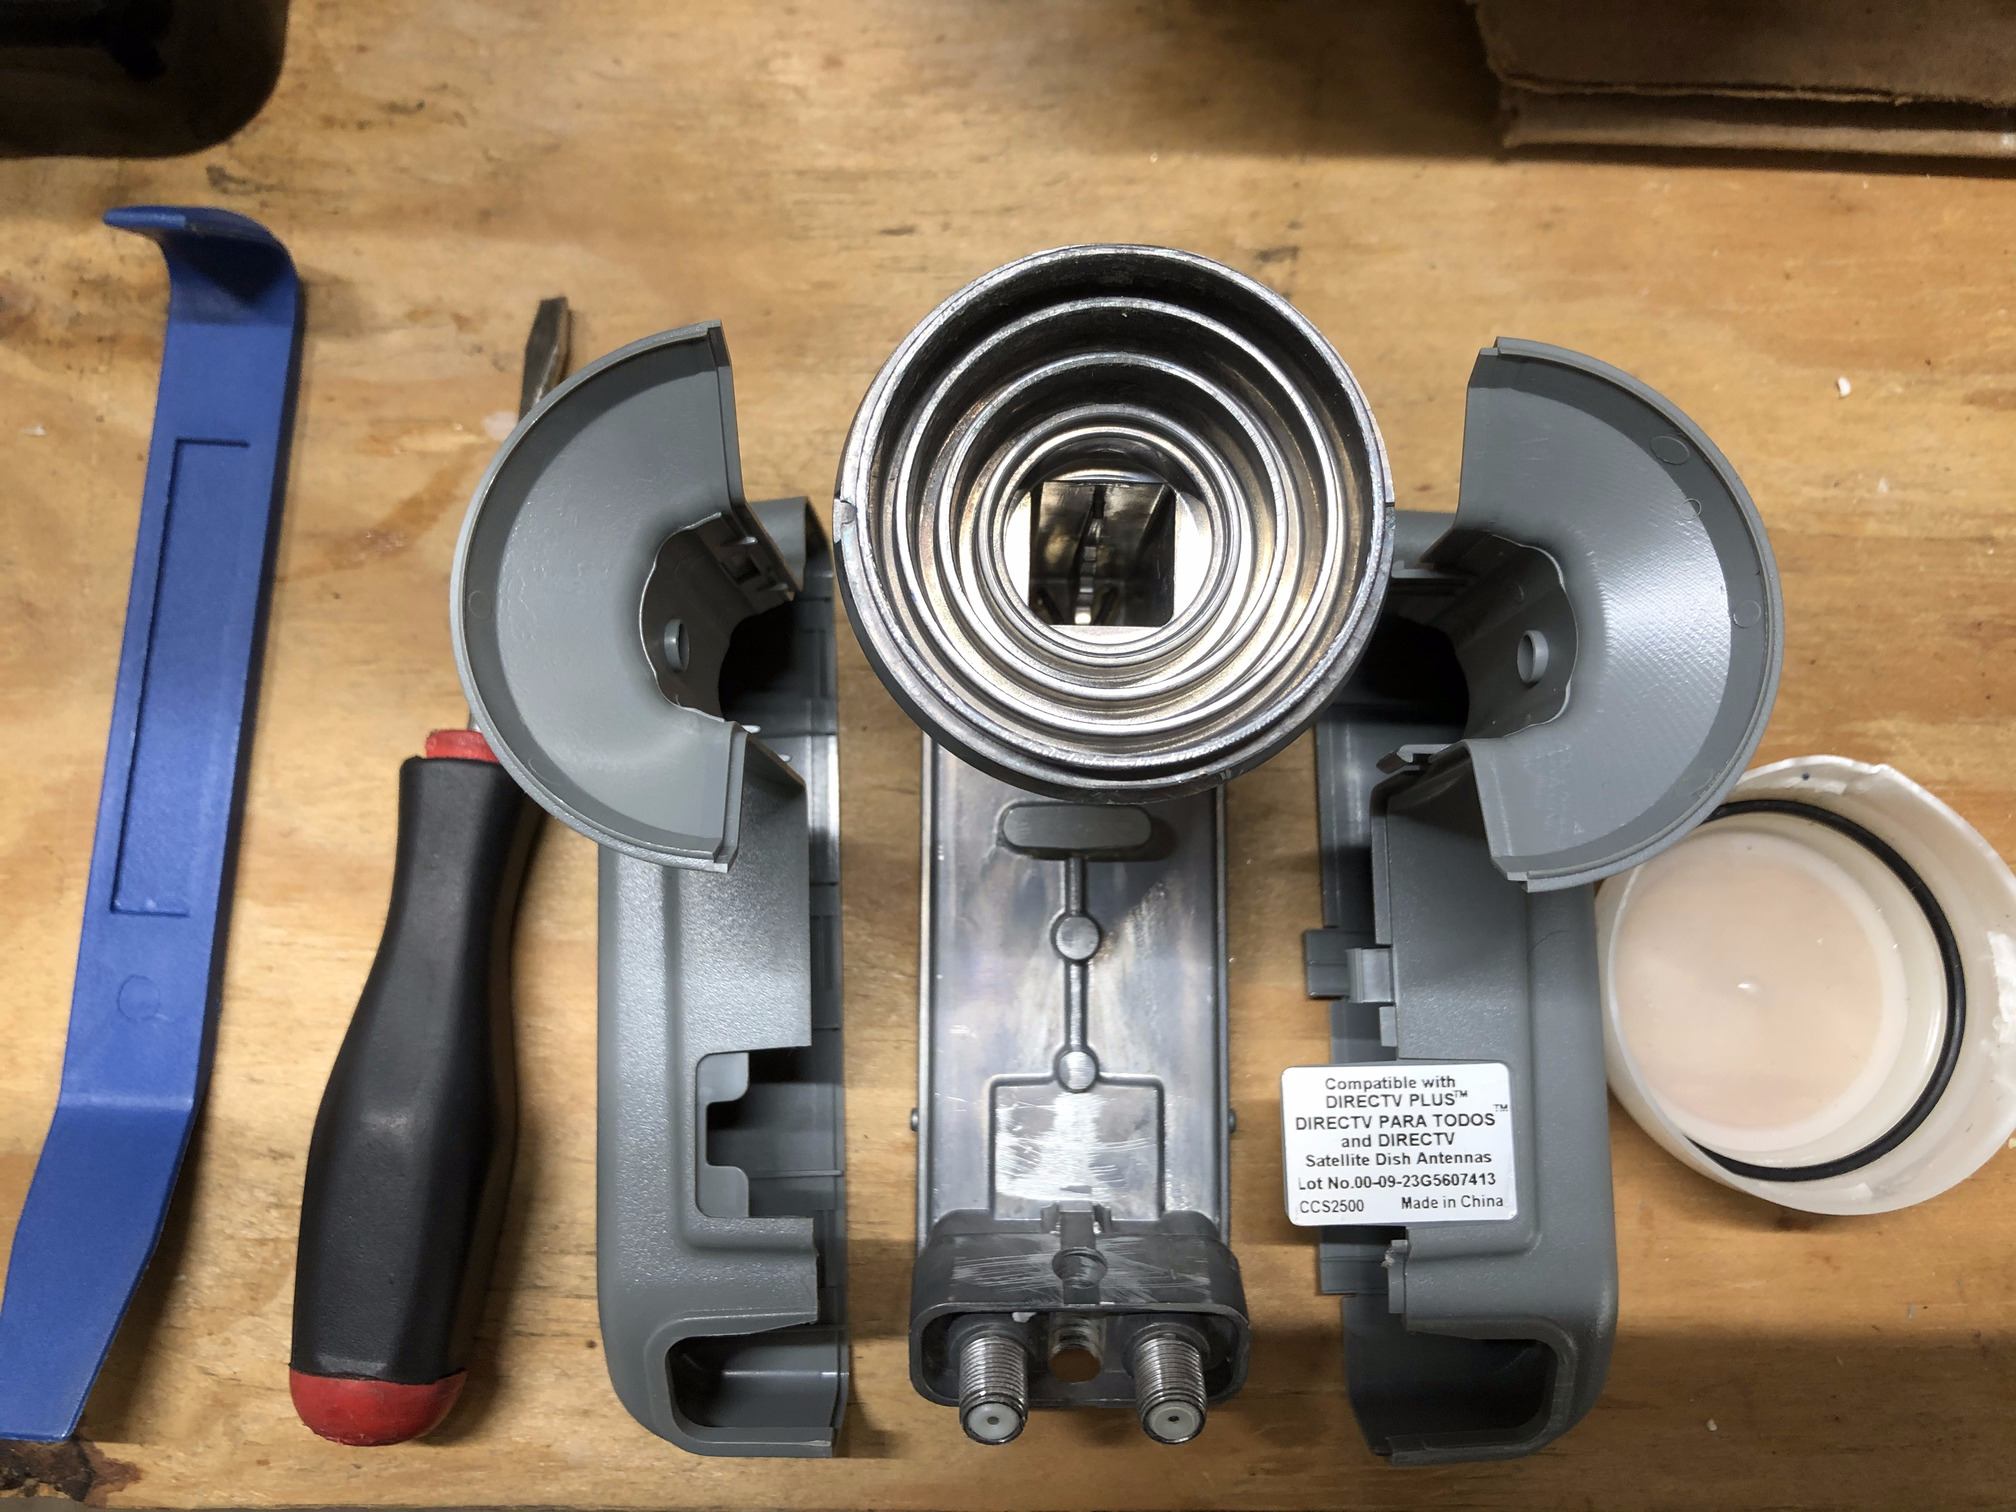 Figure 3: Open up the LNBF assembly
Step 3: The back plate of the metallic core of the LNBF (Figure 4a) has a silicone/epoxy seal that needs to be removed. With a cheap heat gun, the silicone softens up and can be slowly cut out with a blade(Figure 4b). Please remember to wear gloves while doing this step.
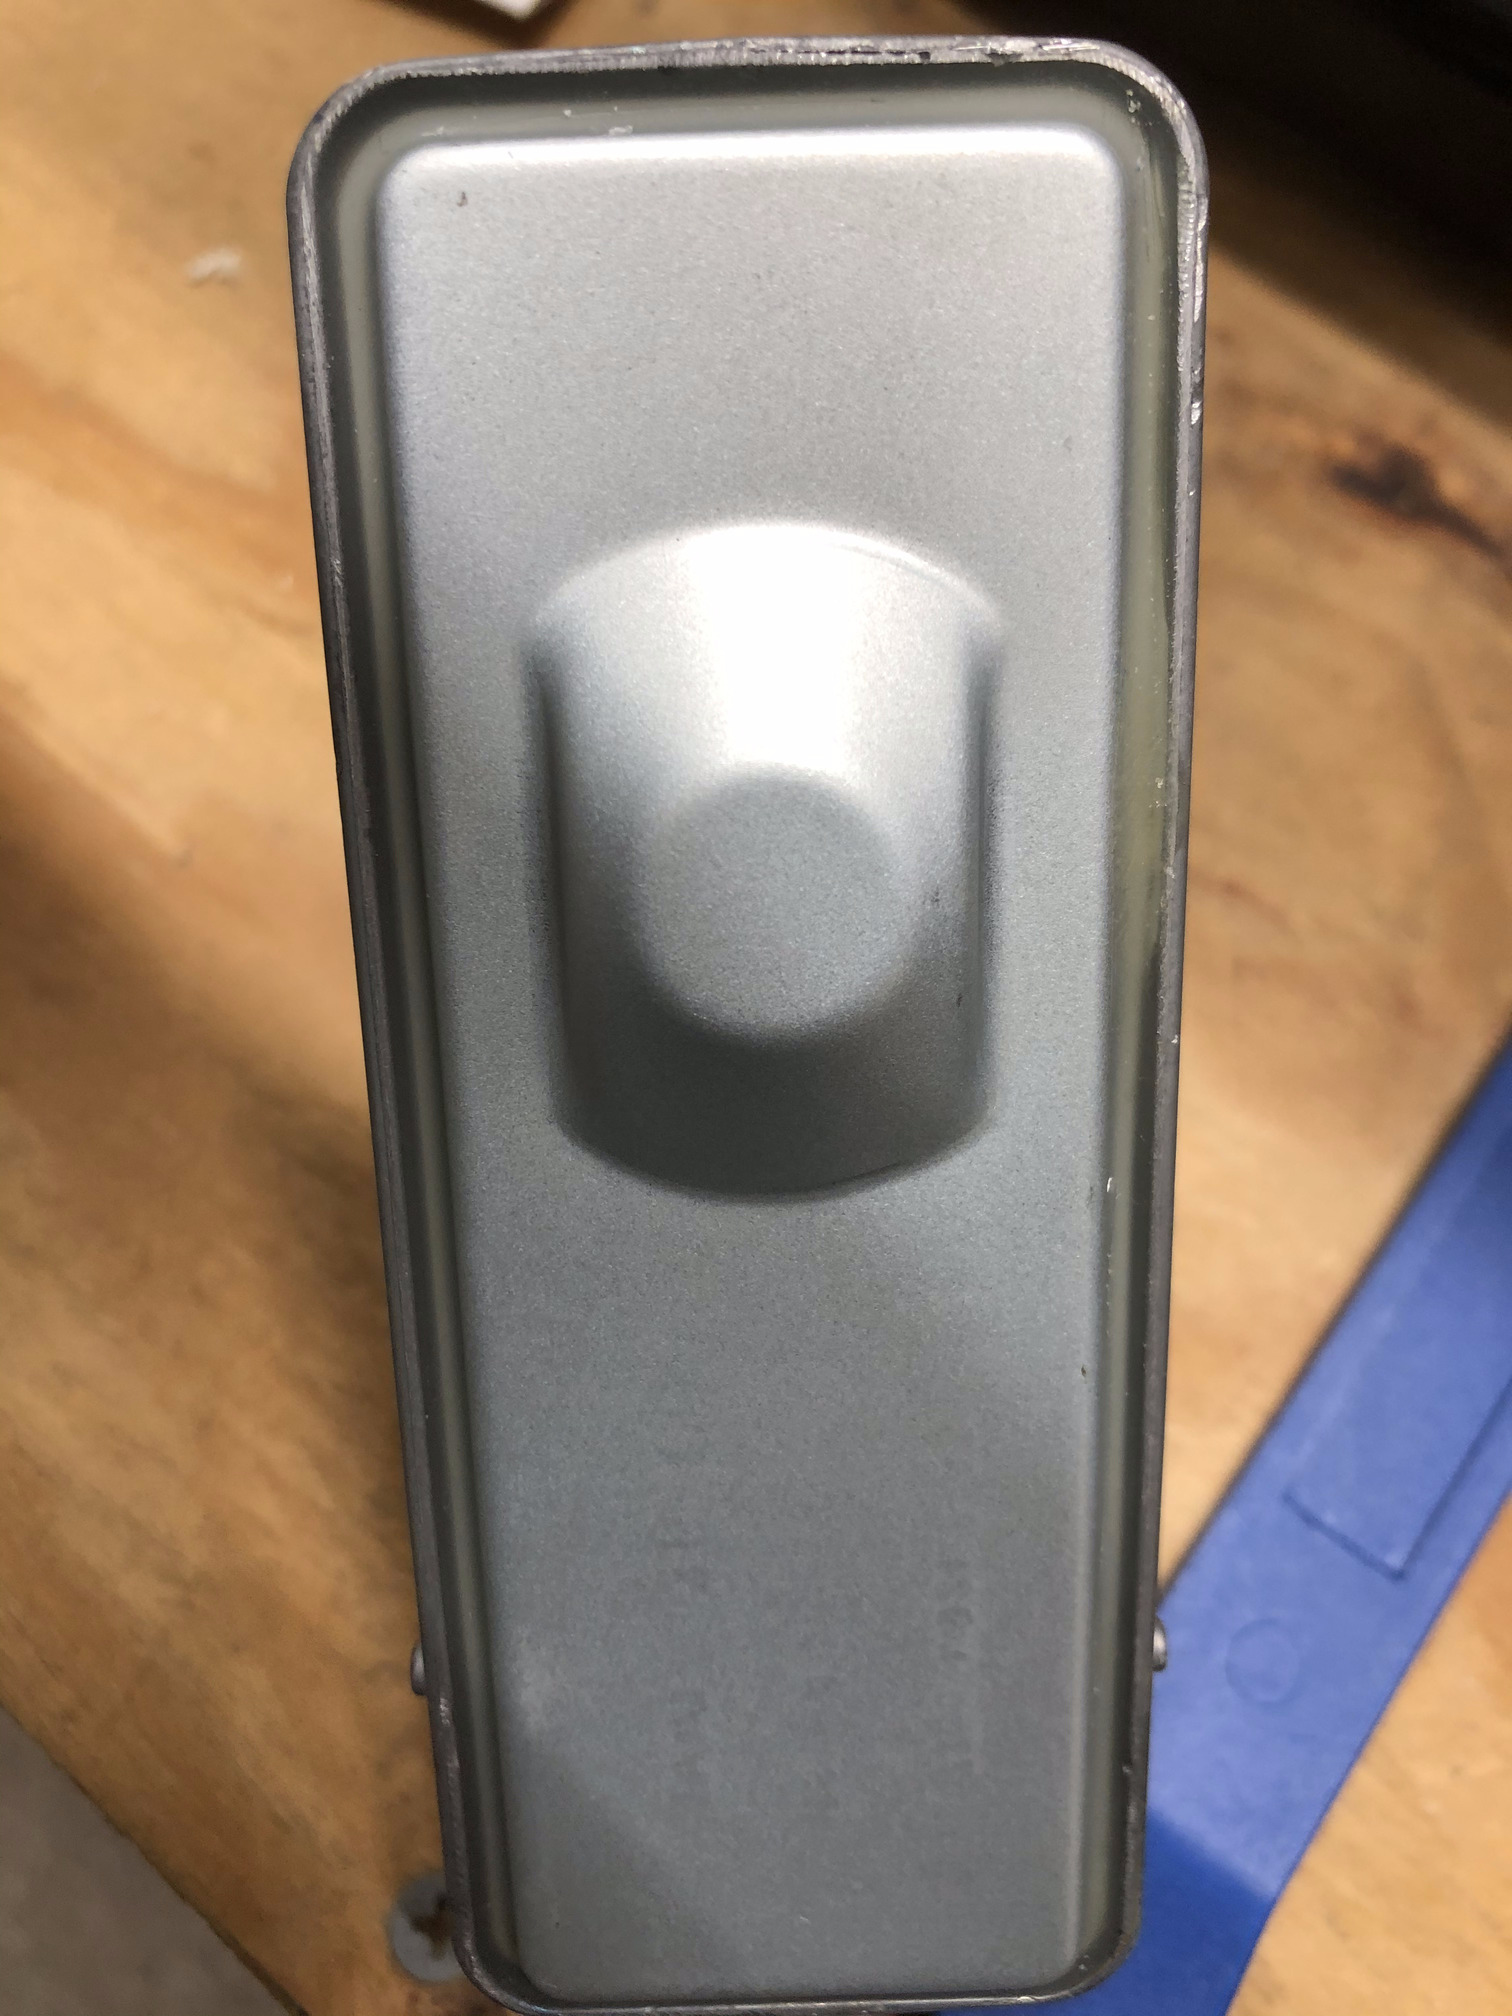 Figure 4a: LNBF metallic core back plate
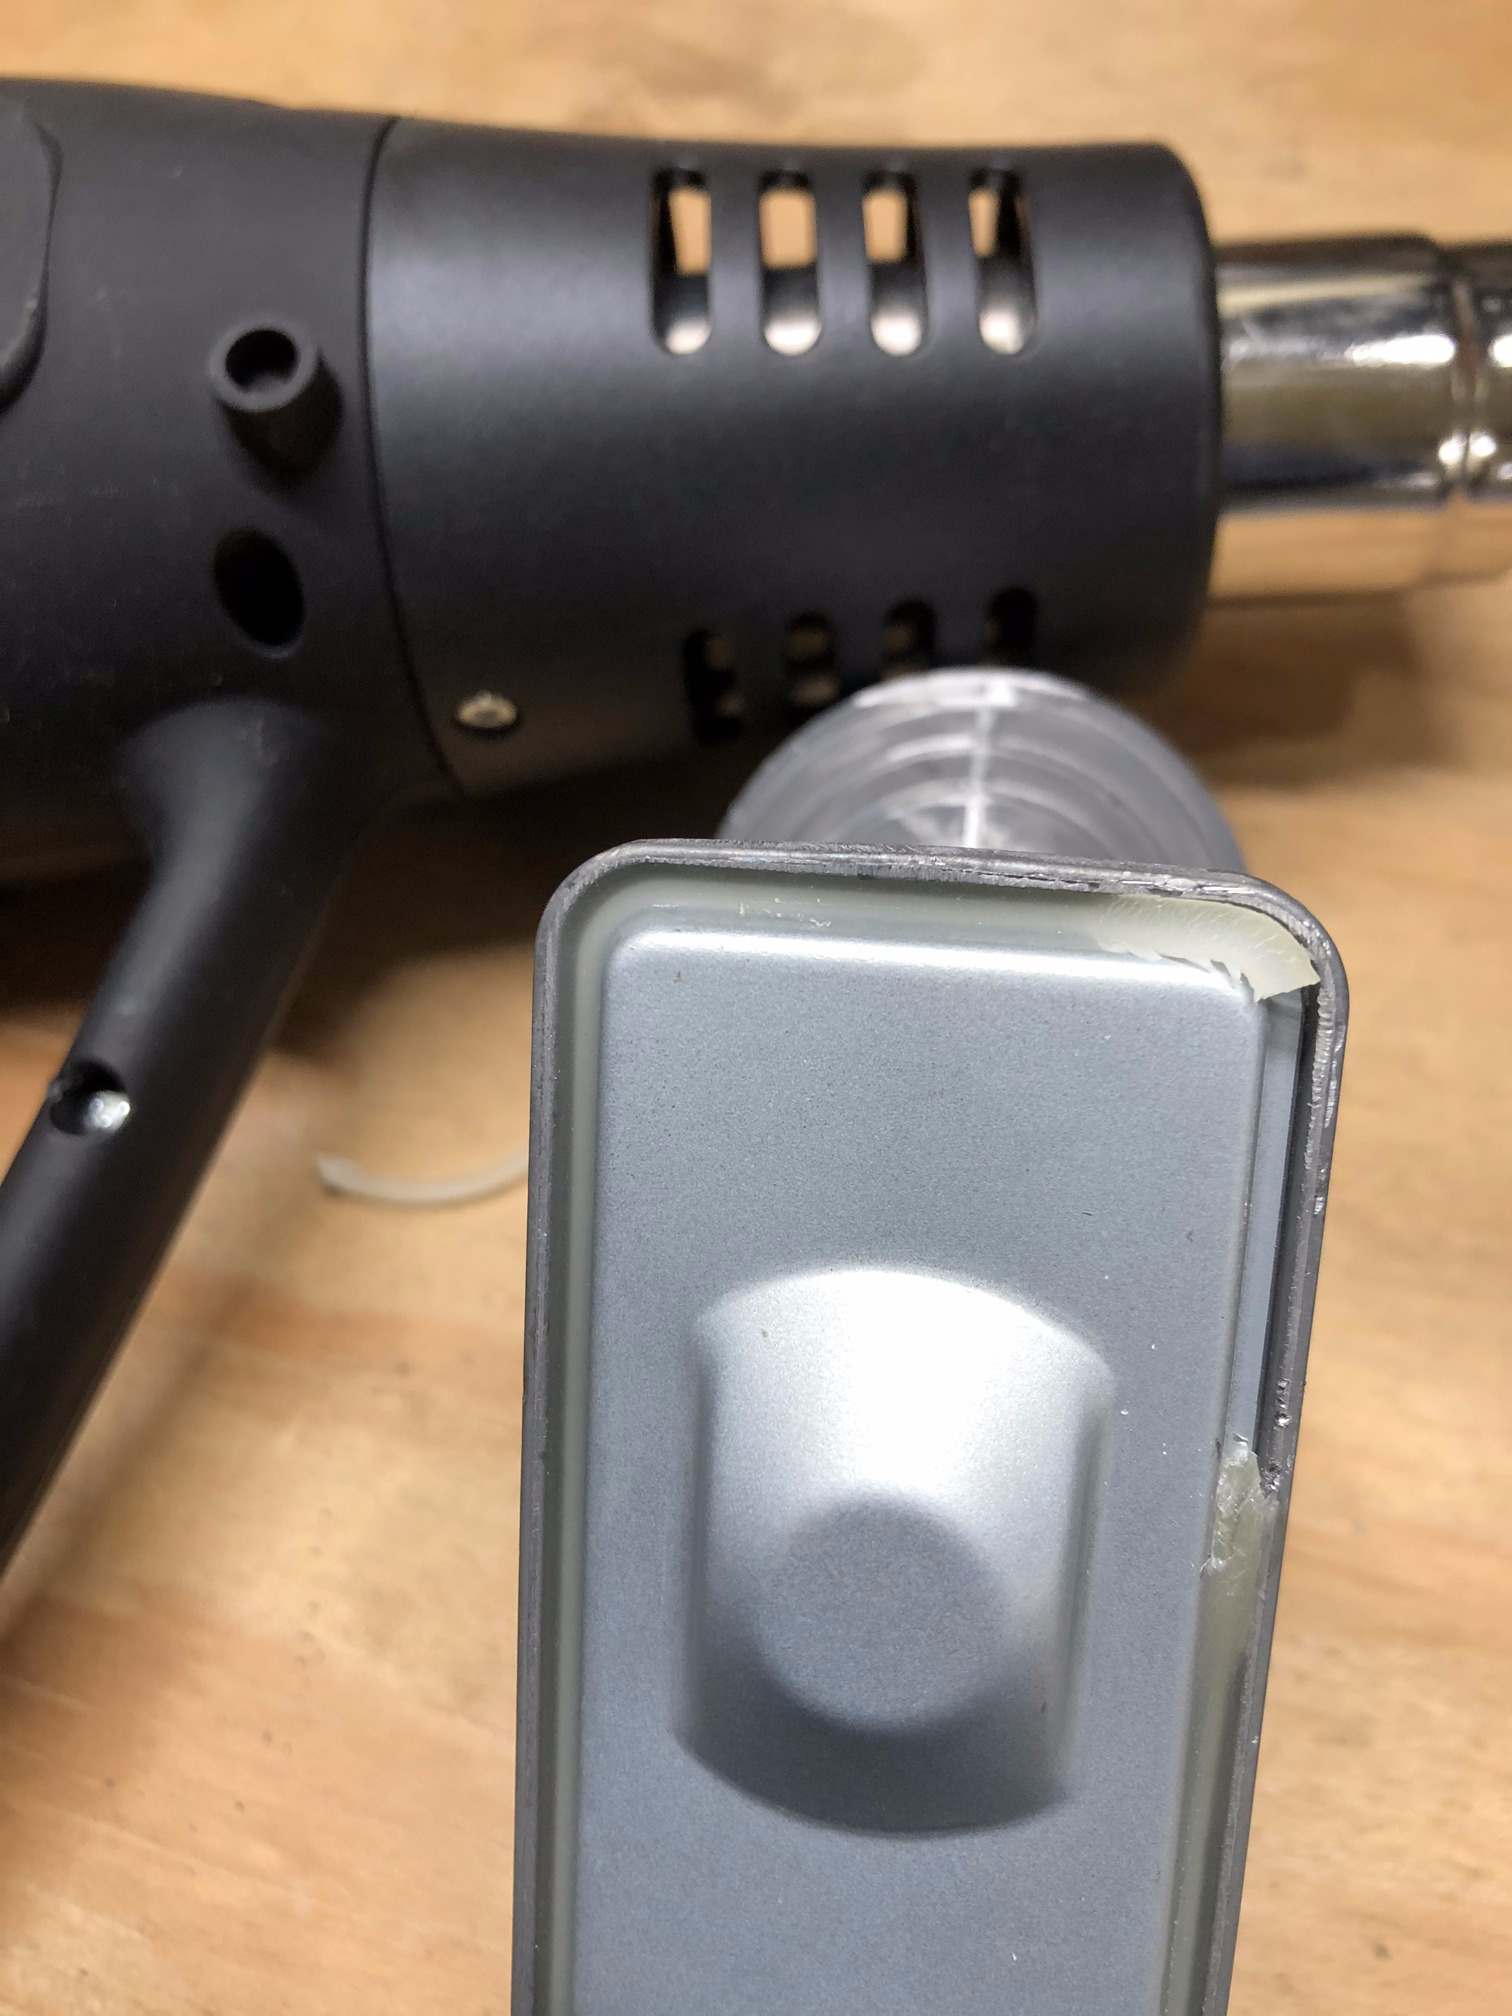 Figure 4b: Using a heat gun and blade remove the seal
Step 4: Removing the back plate exposes the circuit board that the LNBF houses (Figure 5), and that can be removed from the metallic core using a Torx screw driver (Figure 6). Using a wire cutter or pliers, cut the coaxial cable connector wiring as seen in Figure 7.
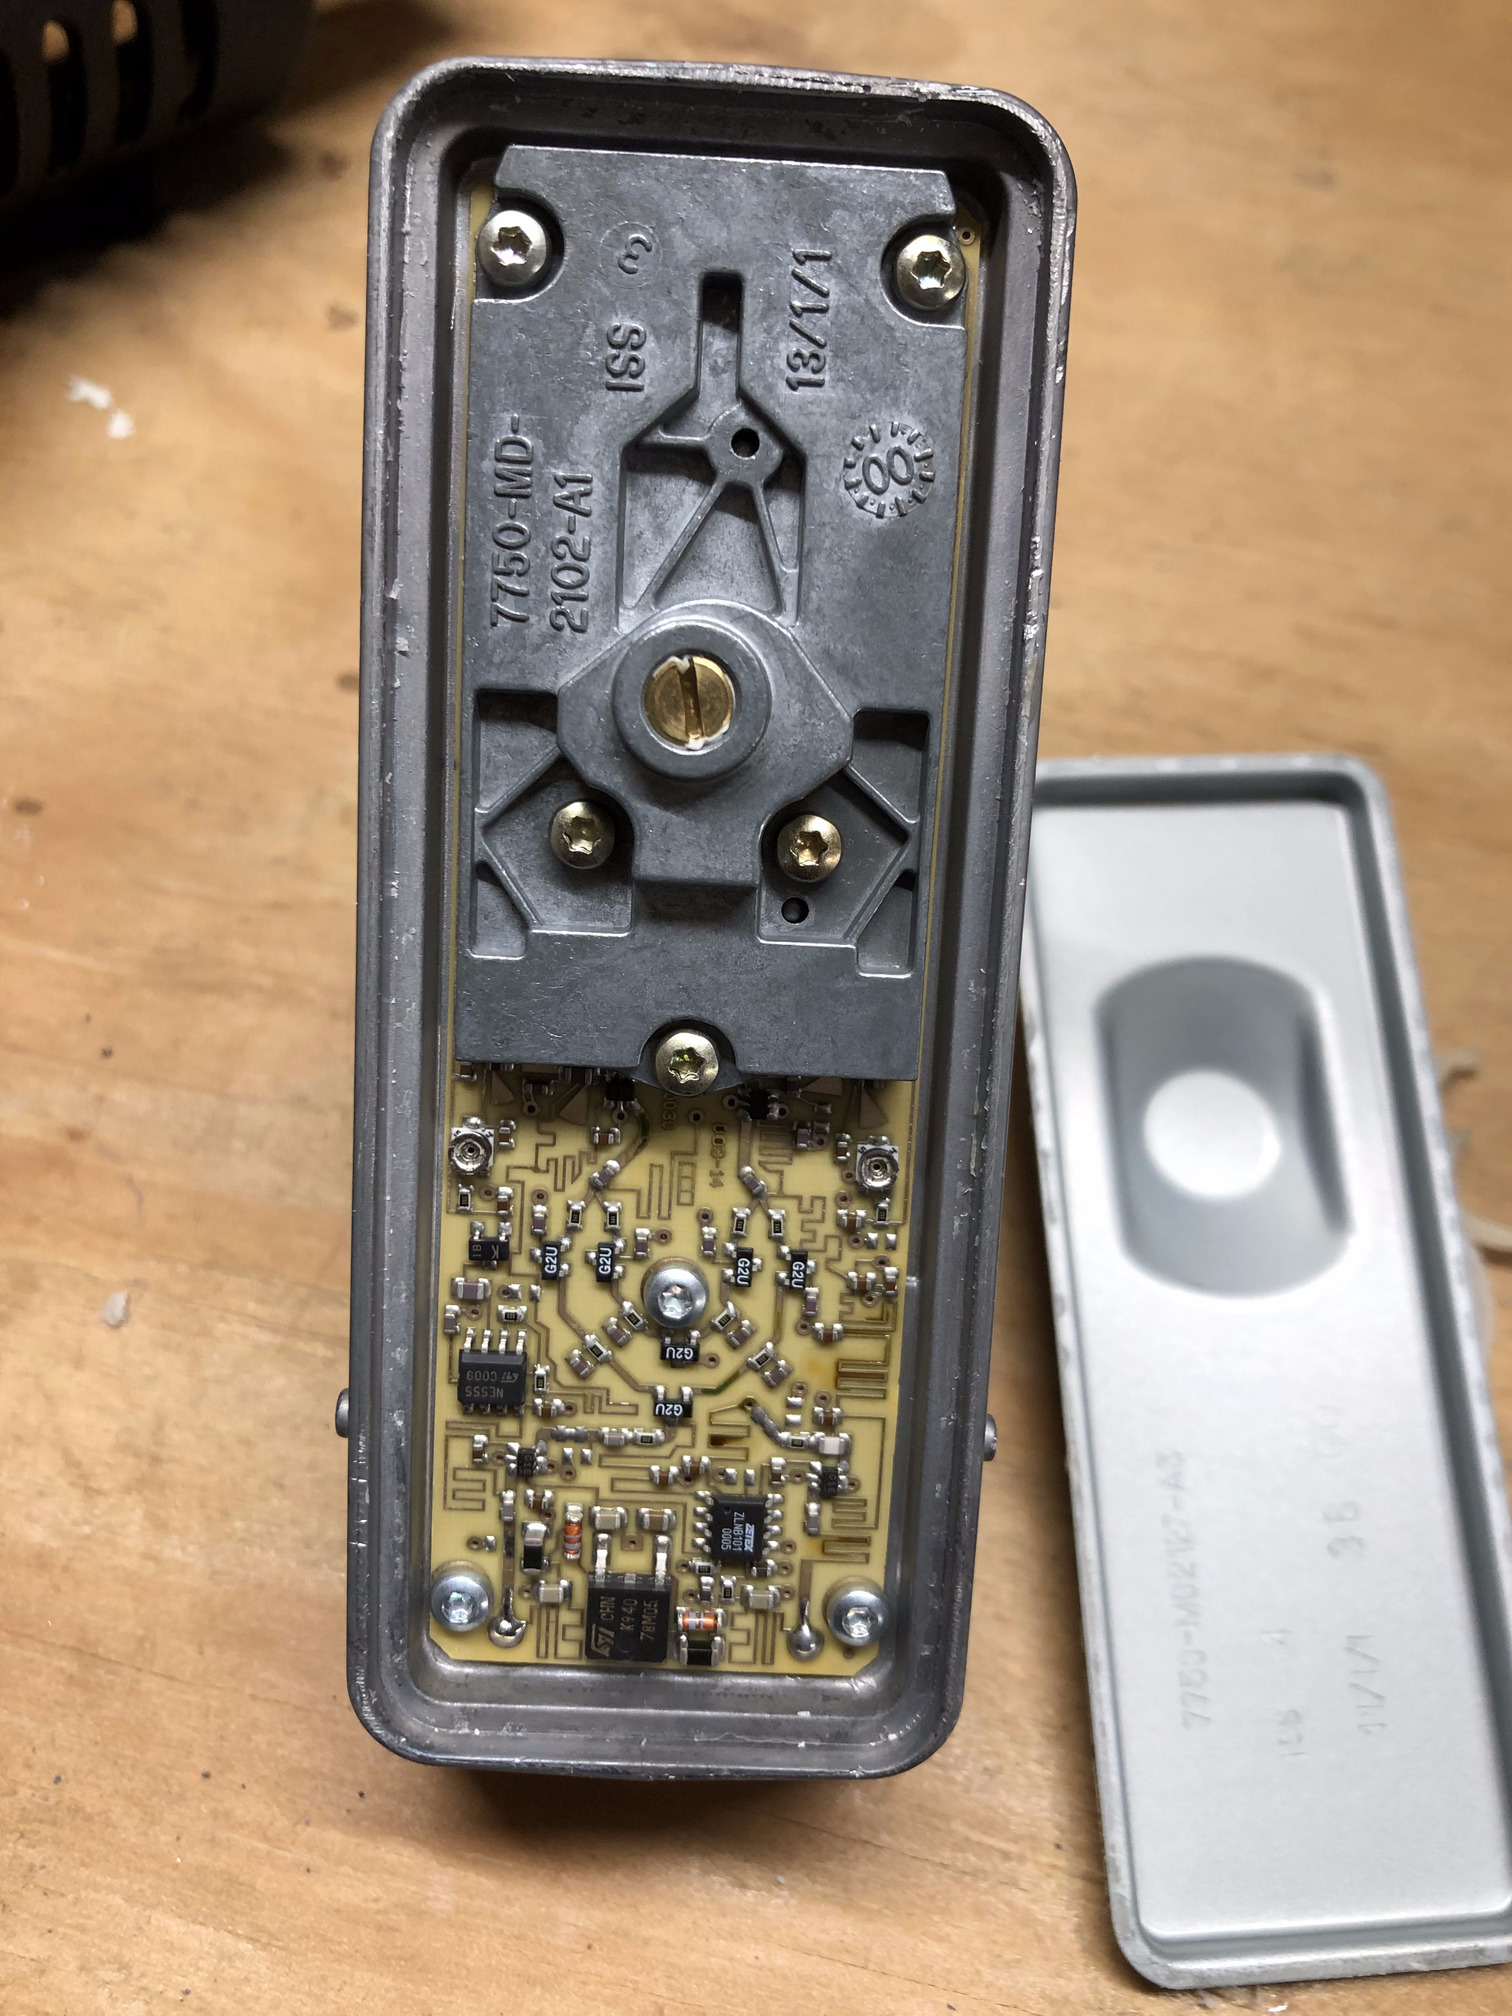 Figure 5: LNBF circuitry exposed once the back plate is removed
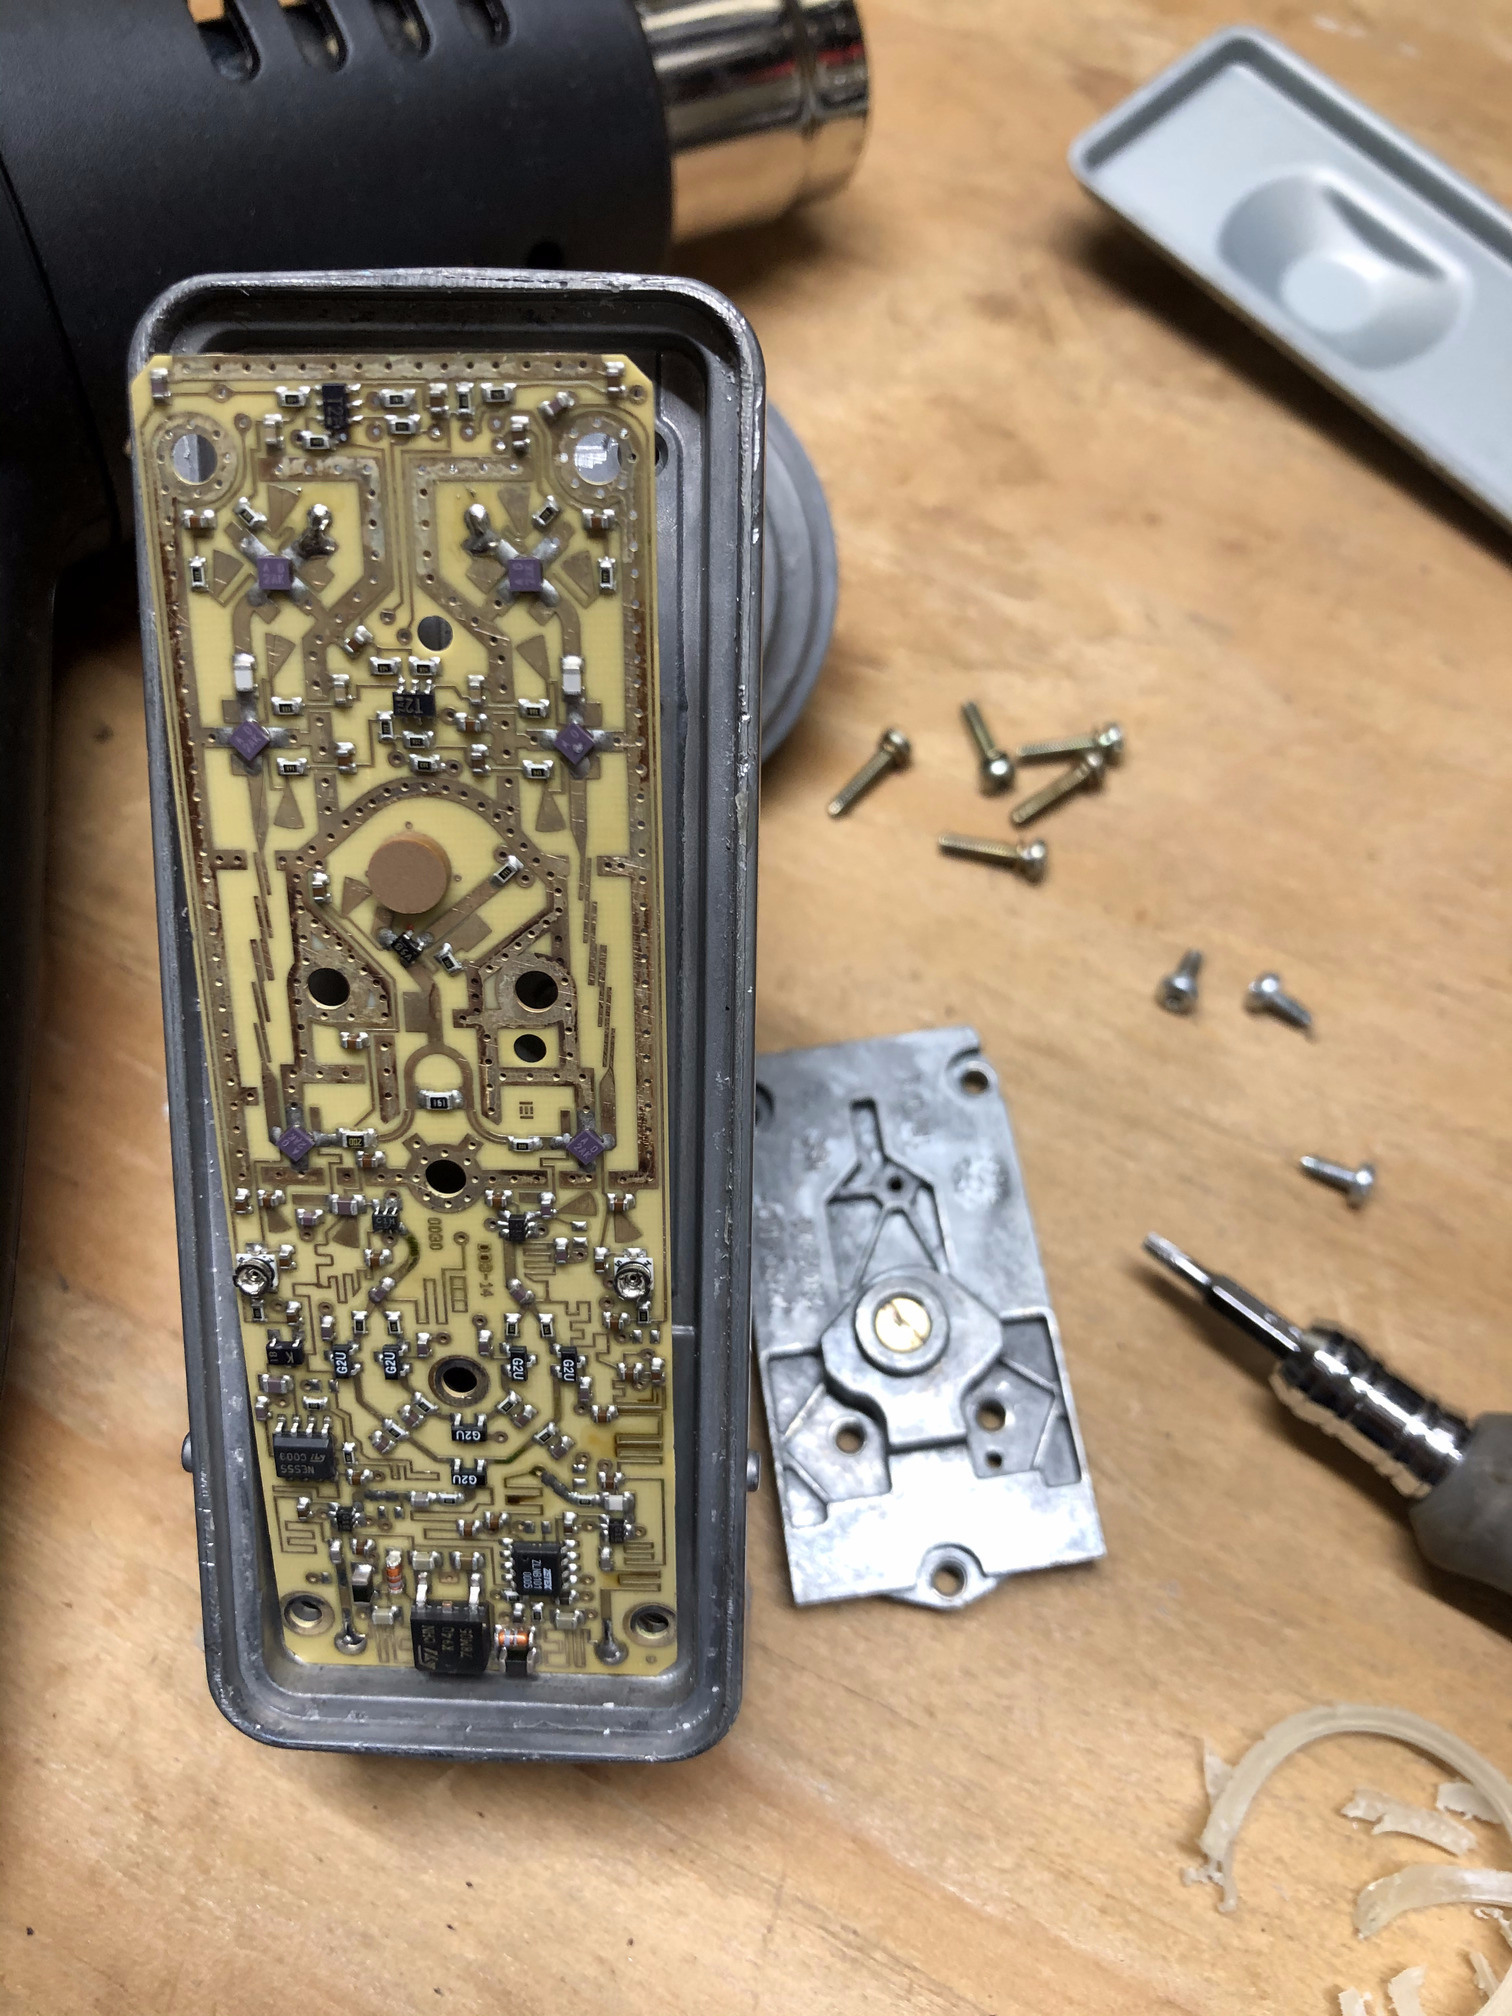 Figure 6: Using a Torx screw driver unscrew the PCB out of the metallic coree
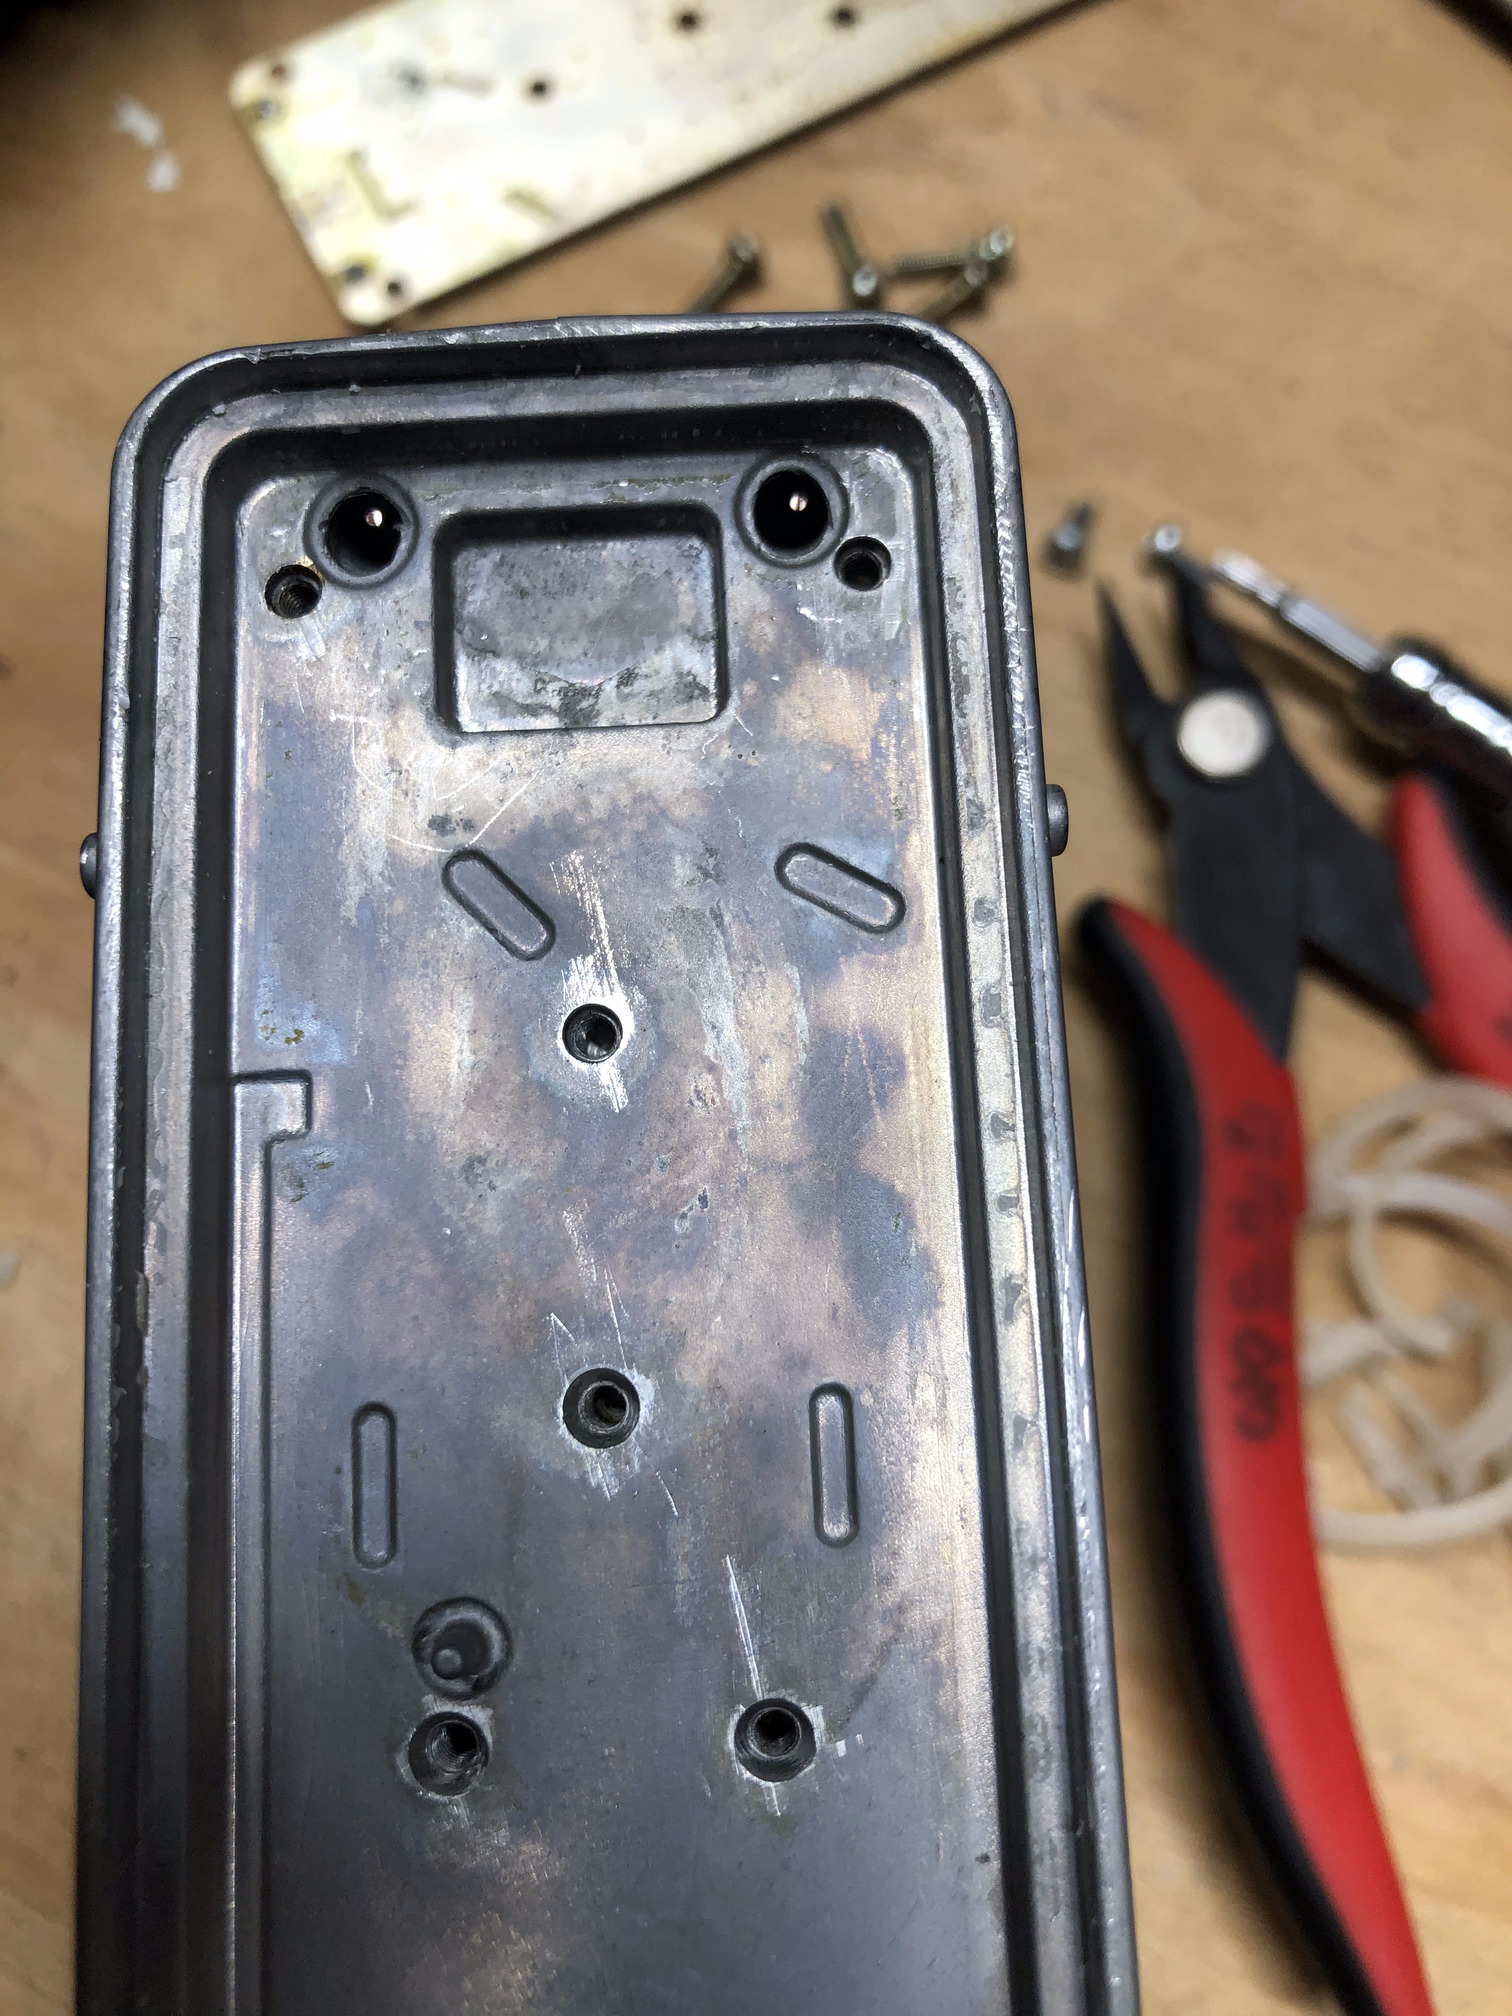 Figure 7: Using a wire cutter clip the PCB wires that attach to the coaxial cable connectors
Step 5: Next, remove the coaxial cable connectors from the metallic core (Figure 8). Using a hacksaw, these connectors can be quickly chopped off (Figure 9a). With a screw driver, the remaining plastic portions of the connector can then be pushed out (Figure 9b).
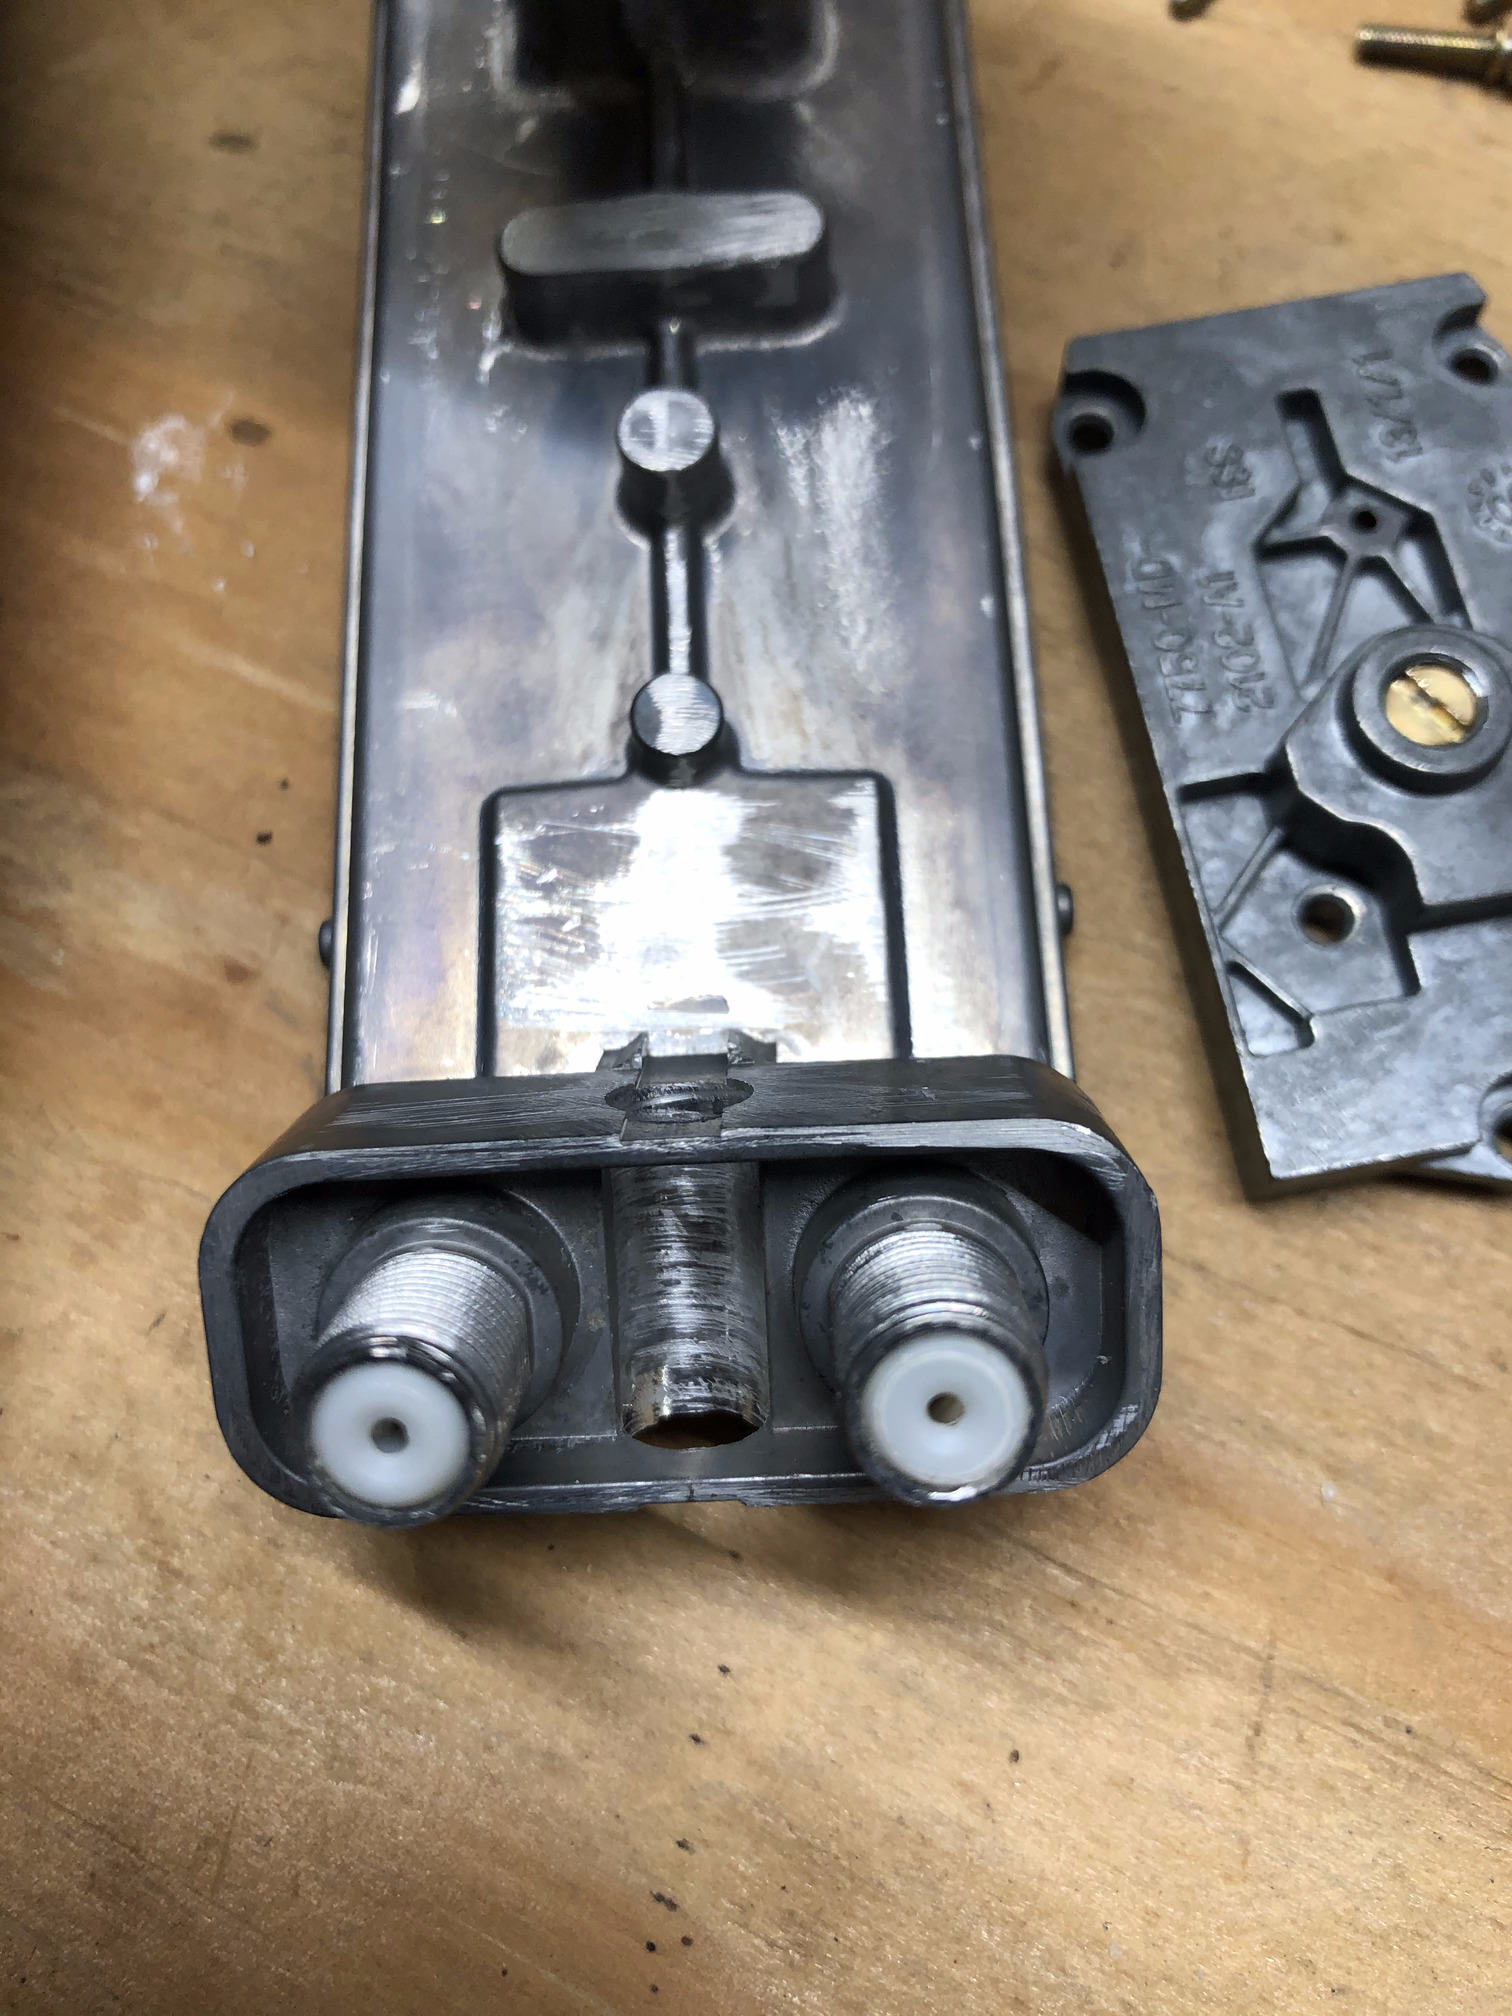 Figure 8: These coaxial cable connectors need to be removed
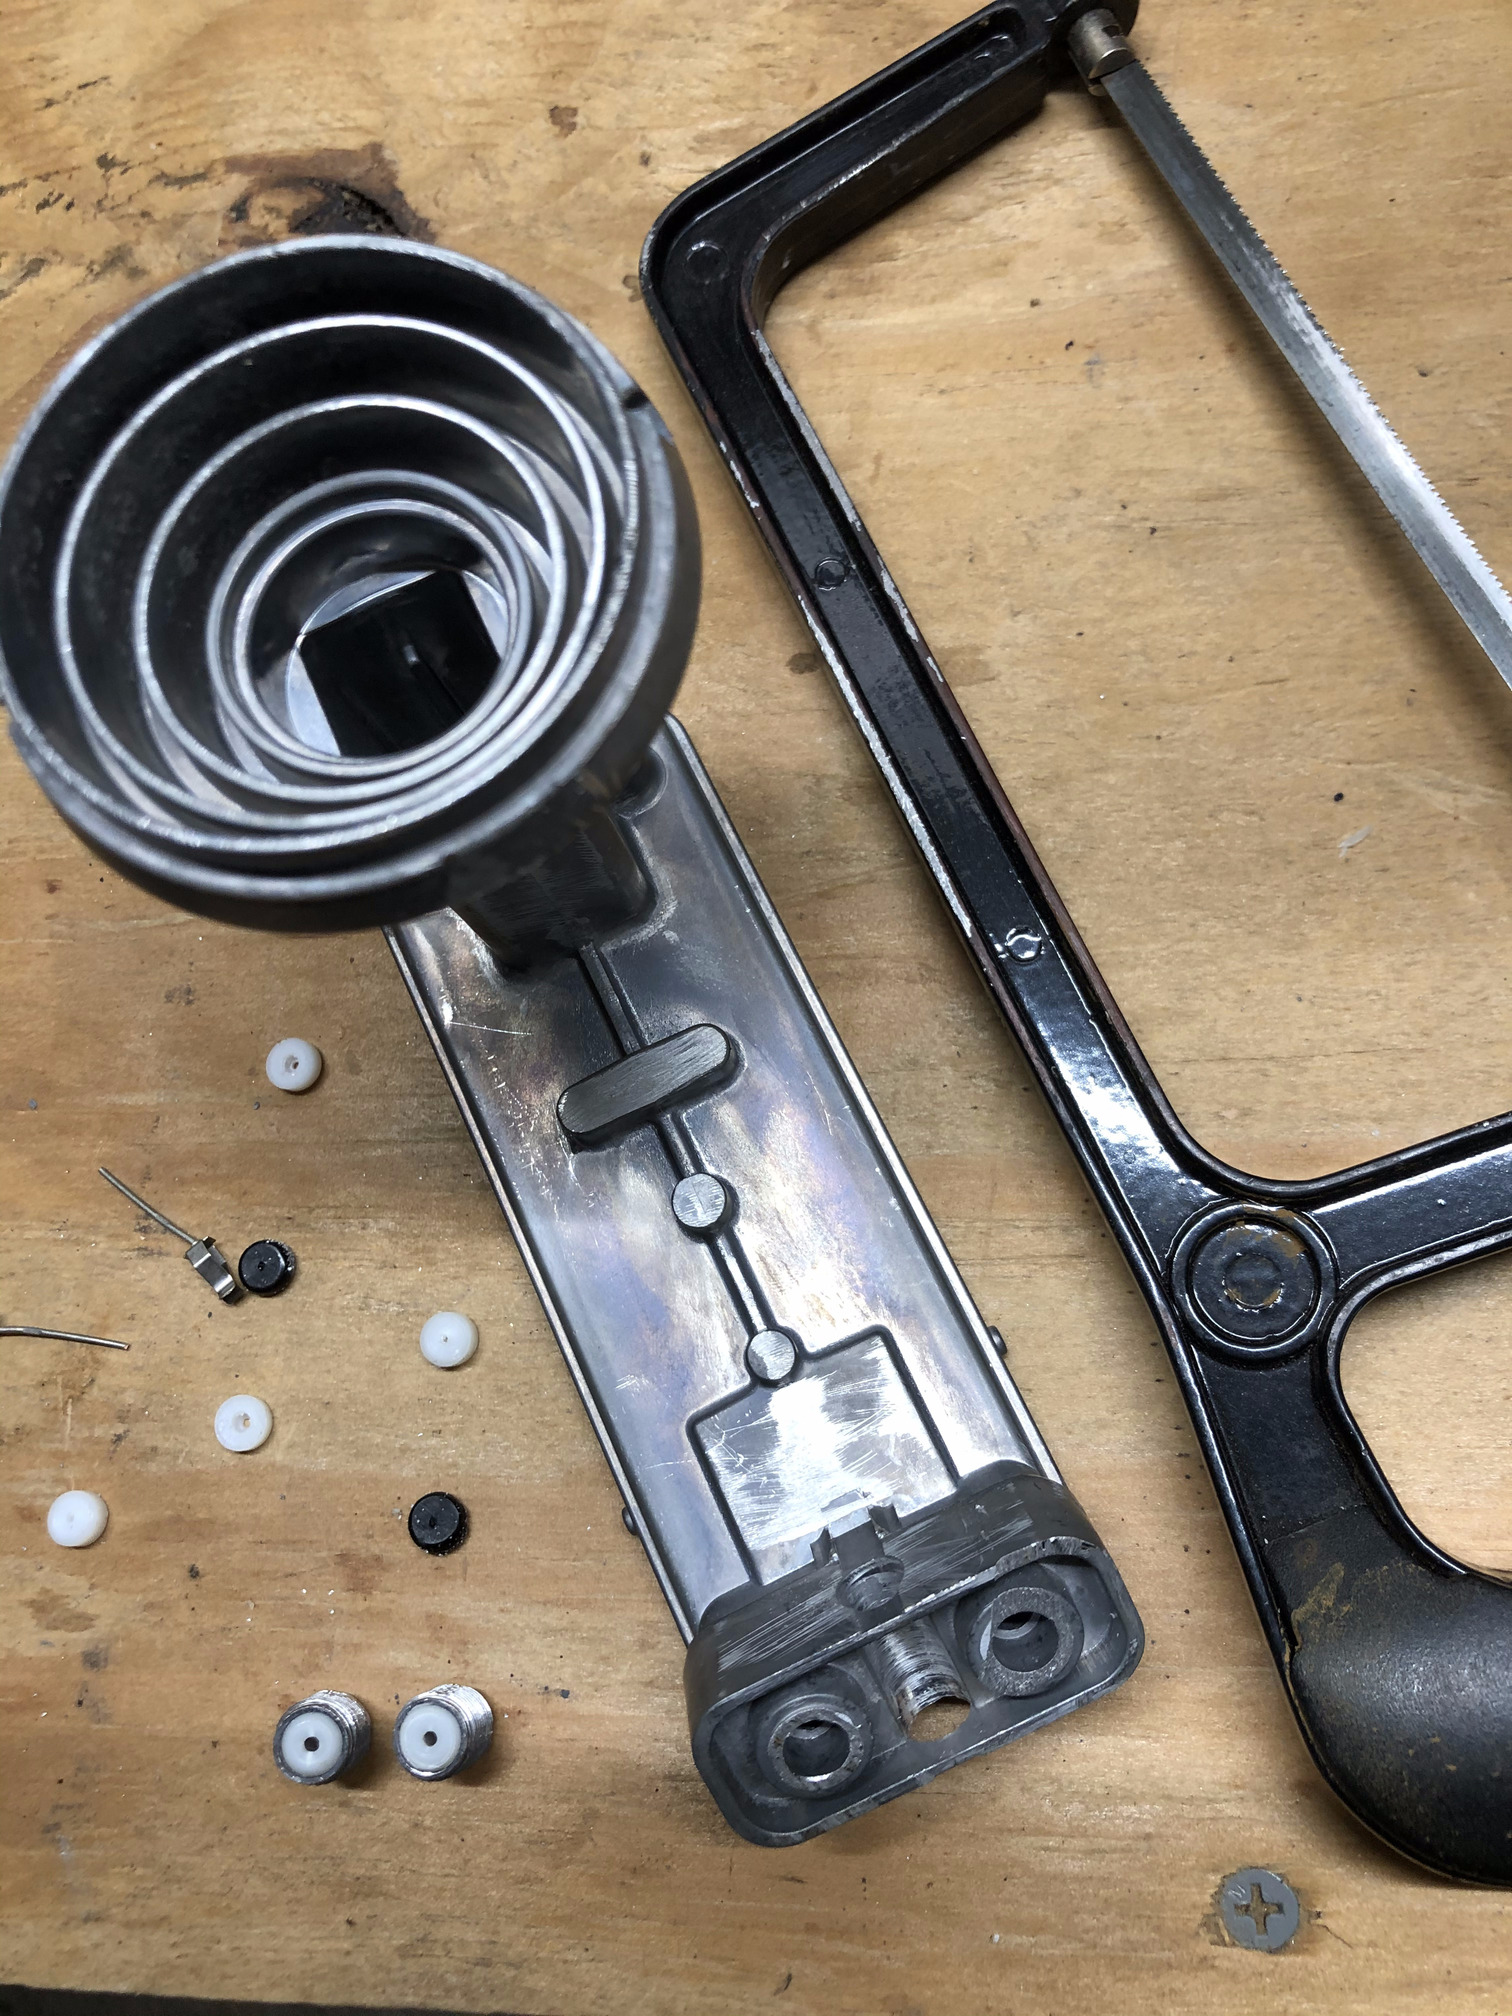 Figure 9a: Coaxial cable connectors removed
 Figure 9b: Coaxial cable connectors removed
Recall our goal is to fit the LNBF back into the dish as shown in Figure 10 and pass a wire through the dish arm as shown in Figure 11. To achieve this, using a hacksaw was the easiest way to cut up the LNBF metallic core as discussed in the next section.
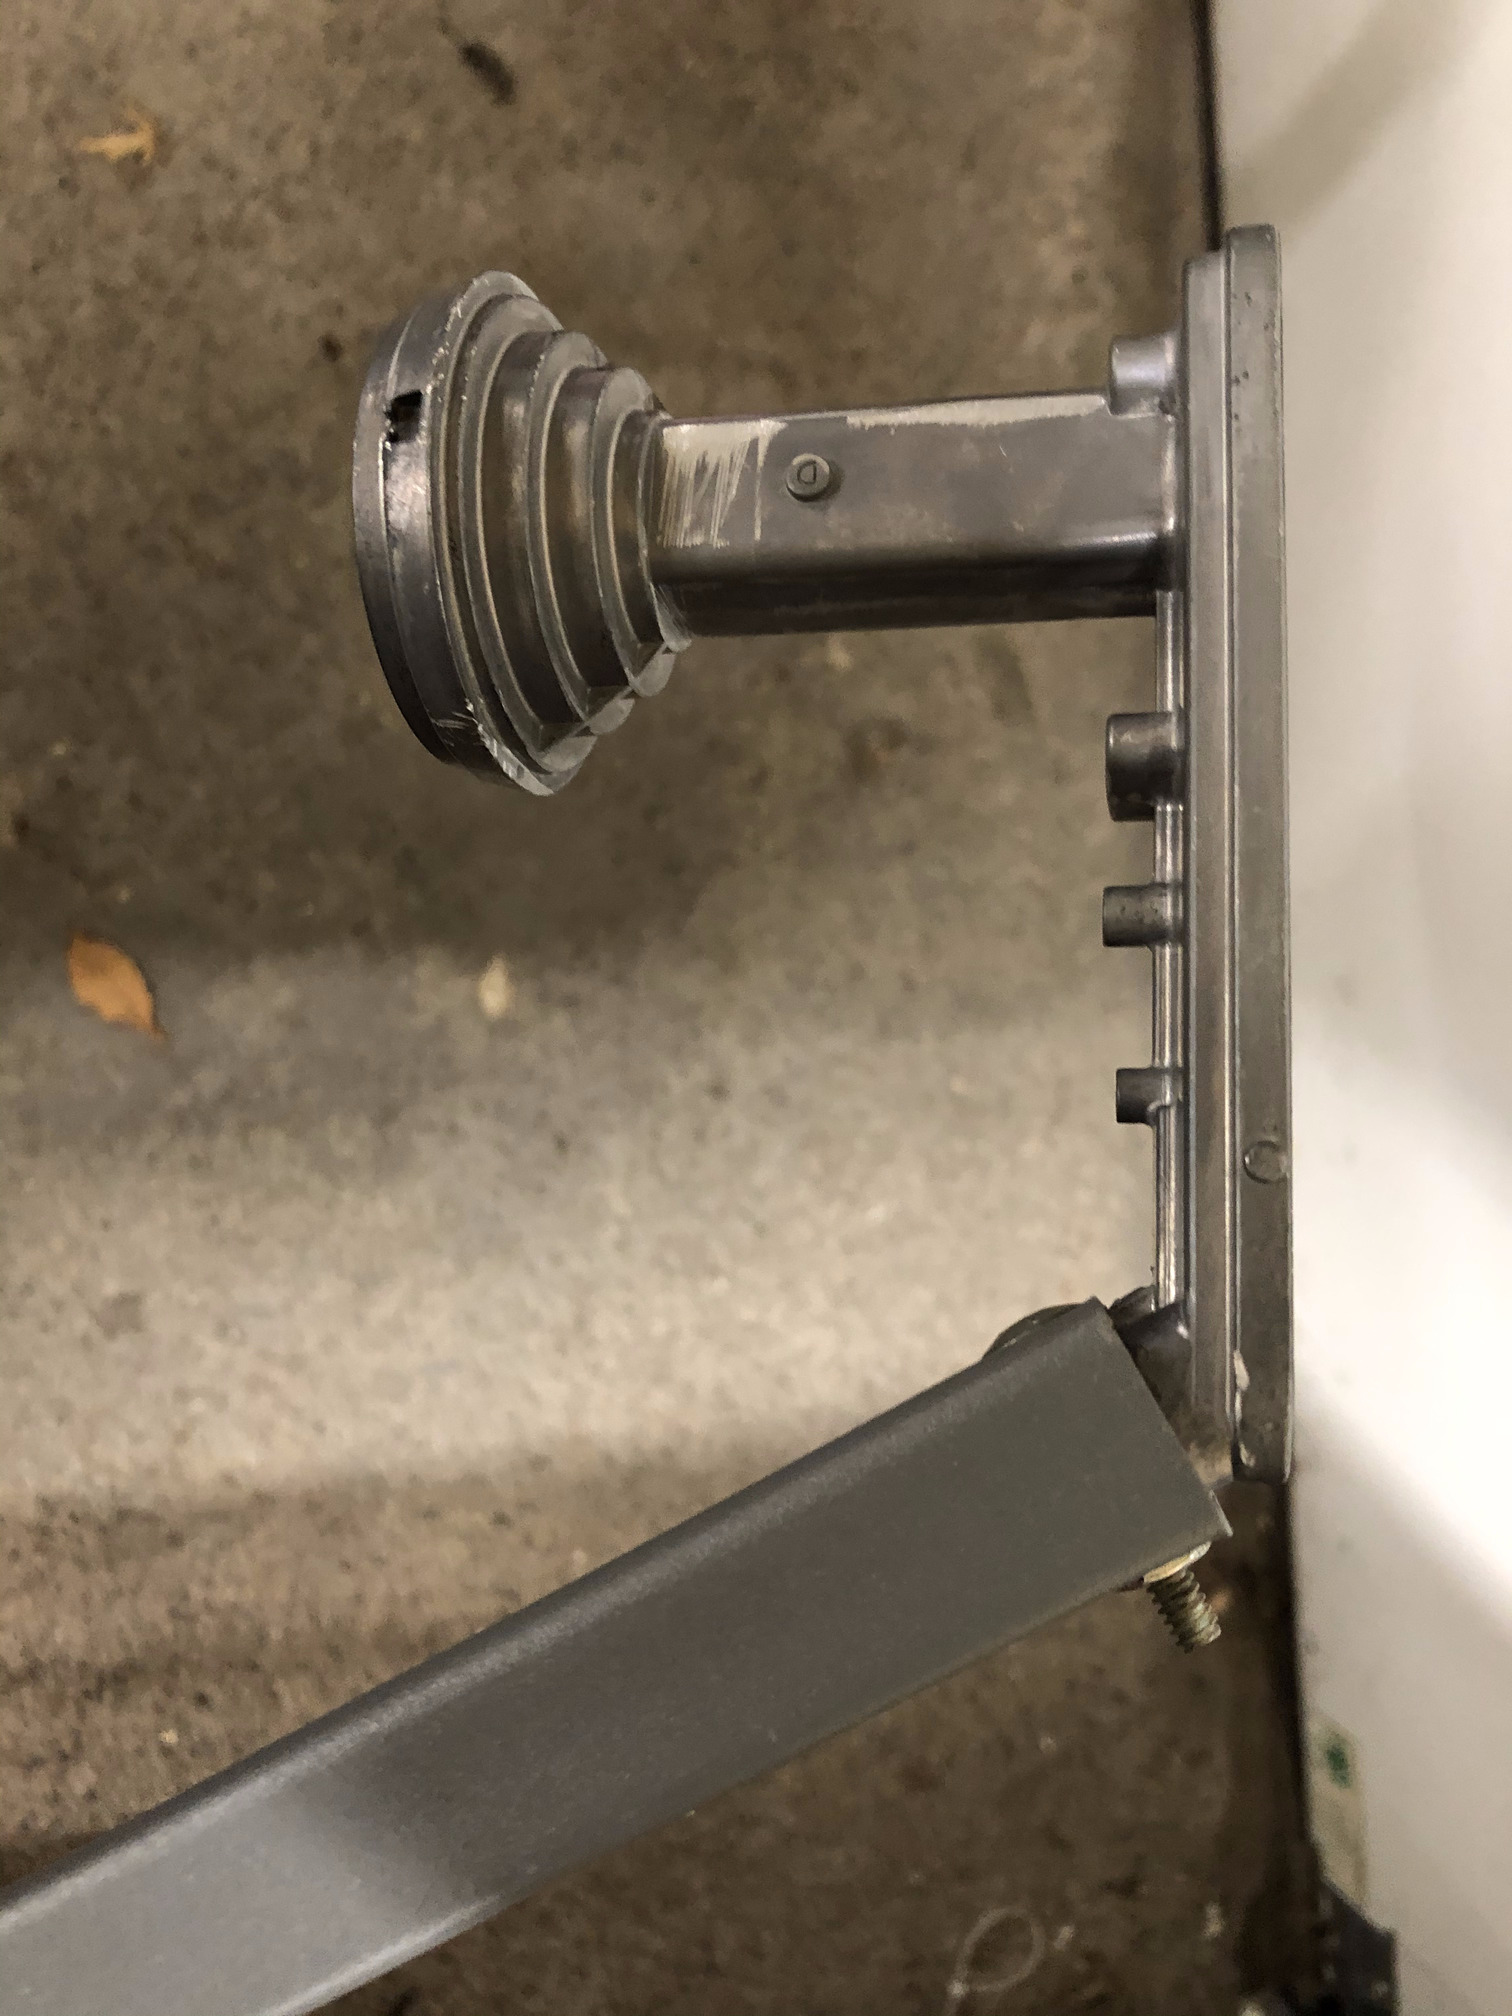 Figure 10. Expected fitting of the LNBF
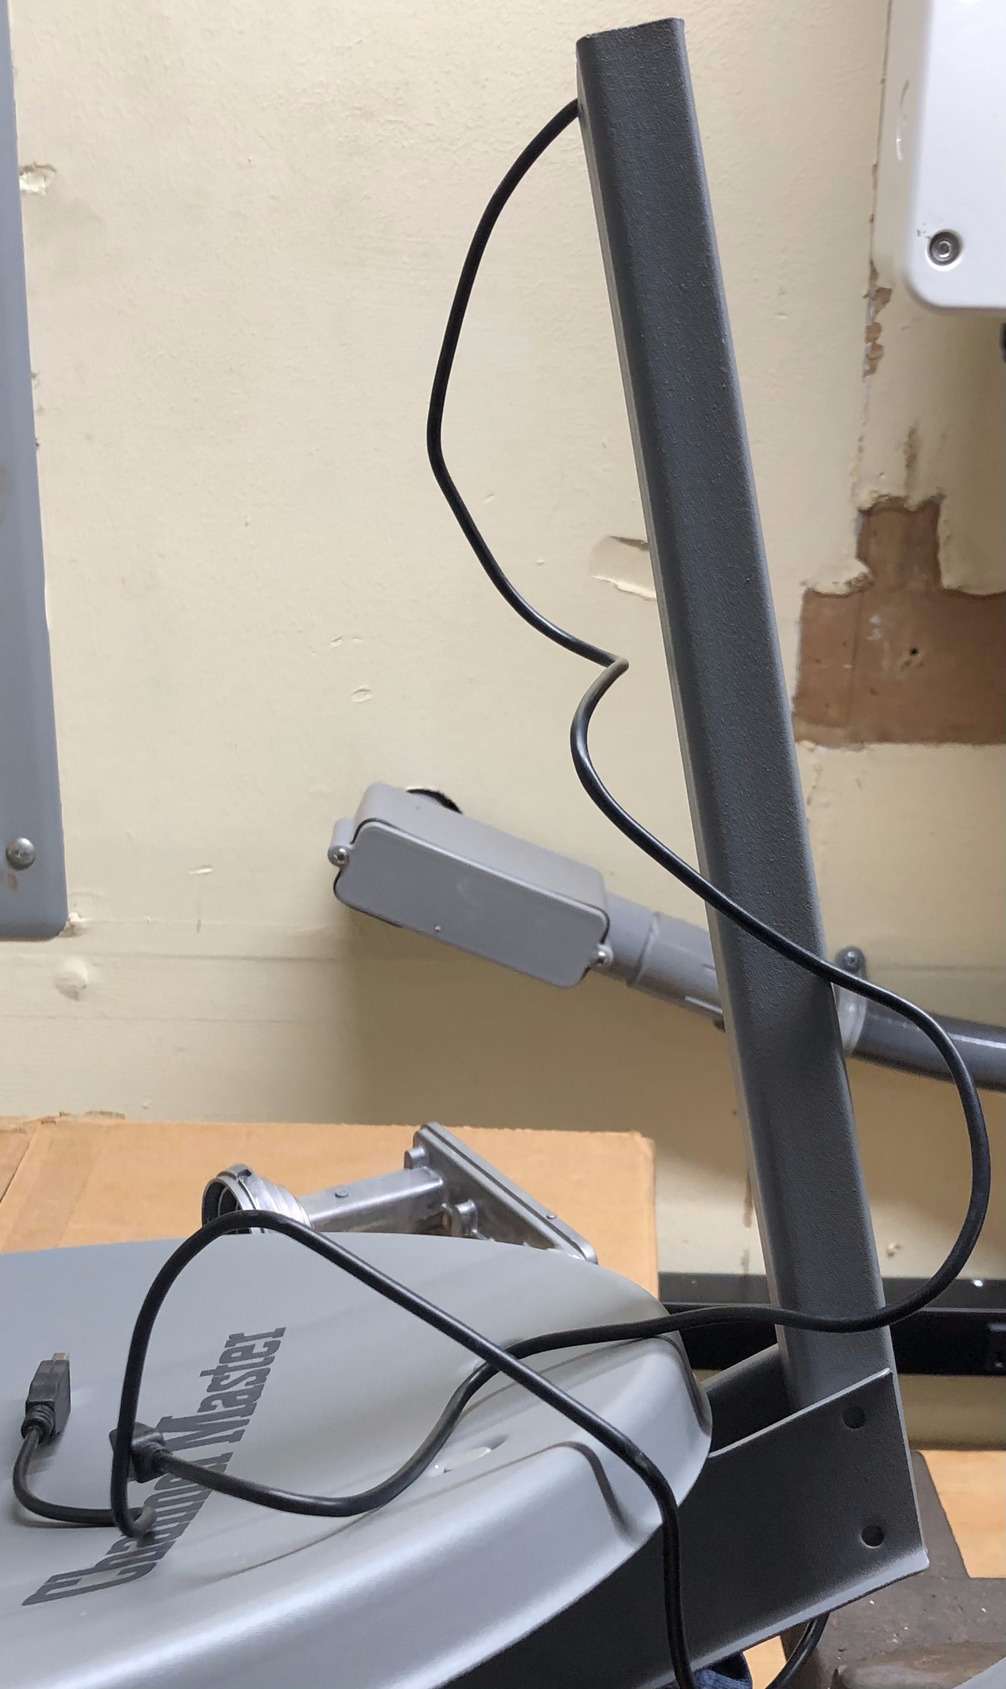 Figure 11. Expected way of passing a wire inside the satellite dish arm
Modify the LNBF
Step 6: The male and female SMA connectors have to be passed into the two different ends of the LNBF metallic core as shown in Figures 12 and 13. The fastest way to do this is to cut out sections of the core with a hacksaw.
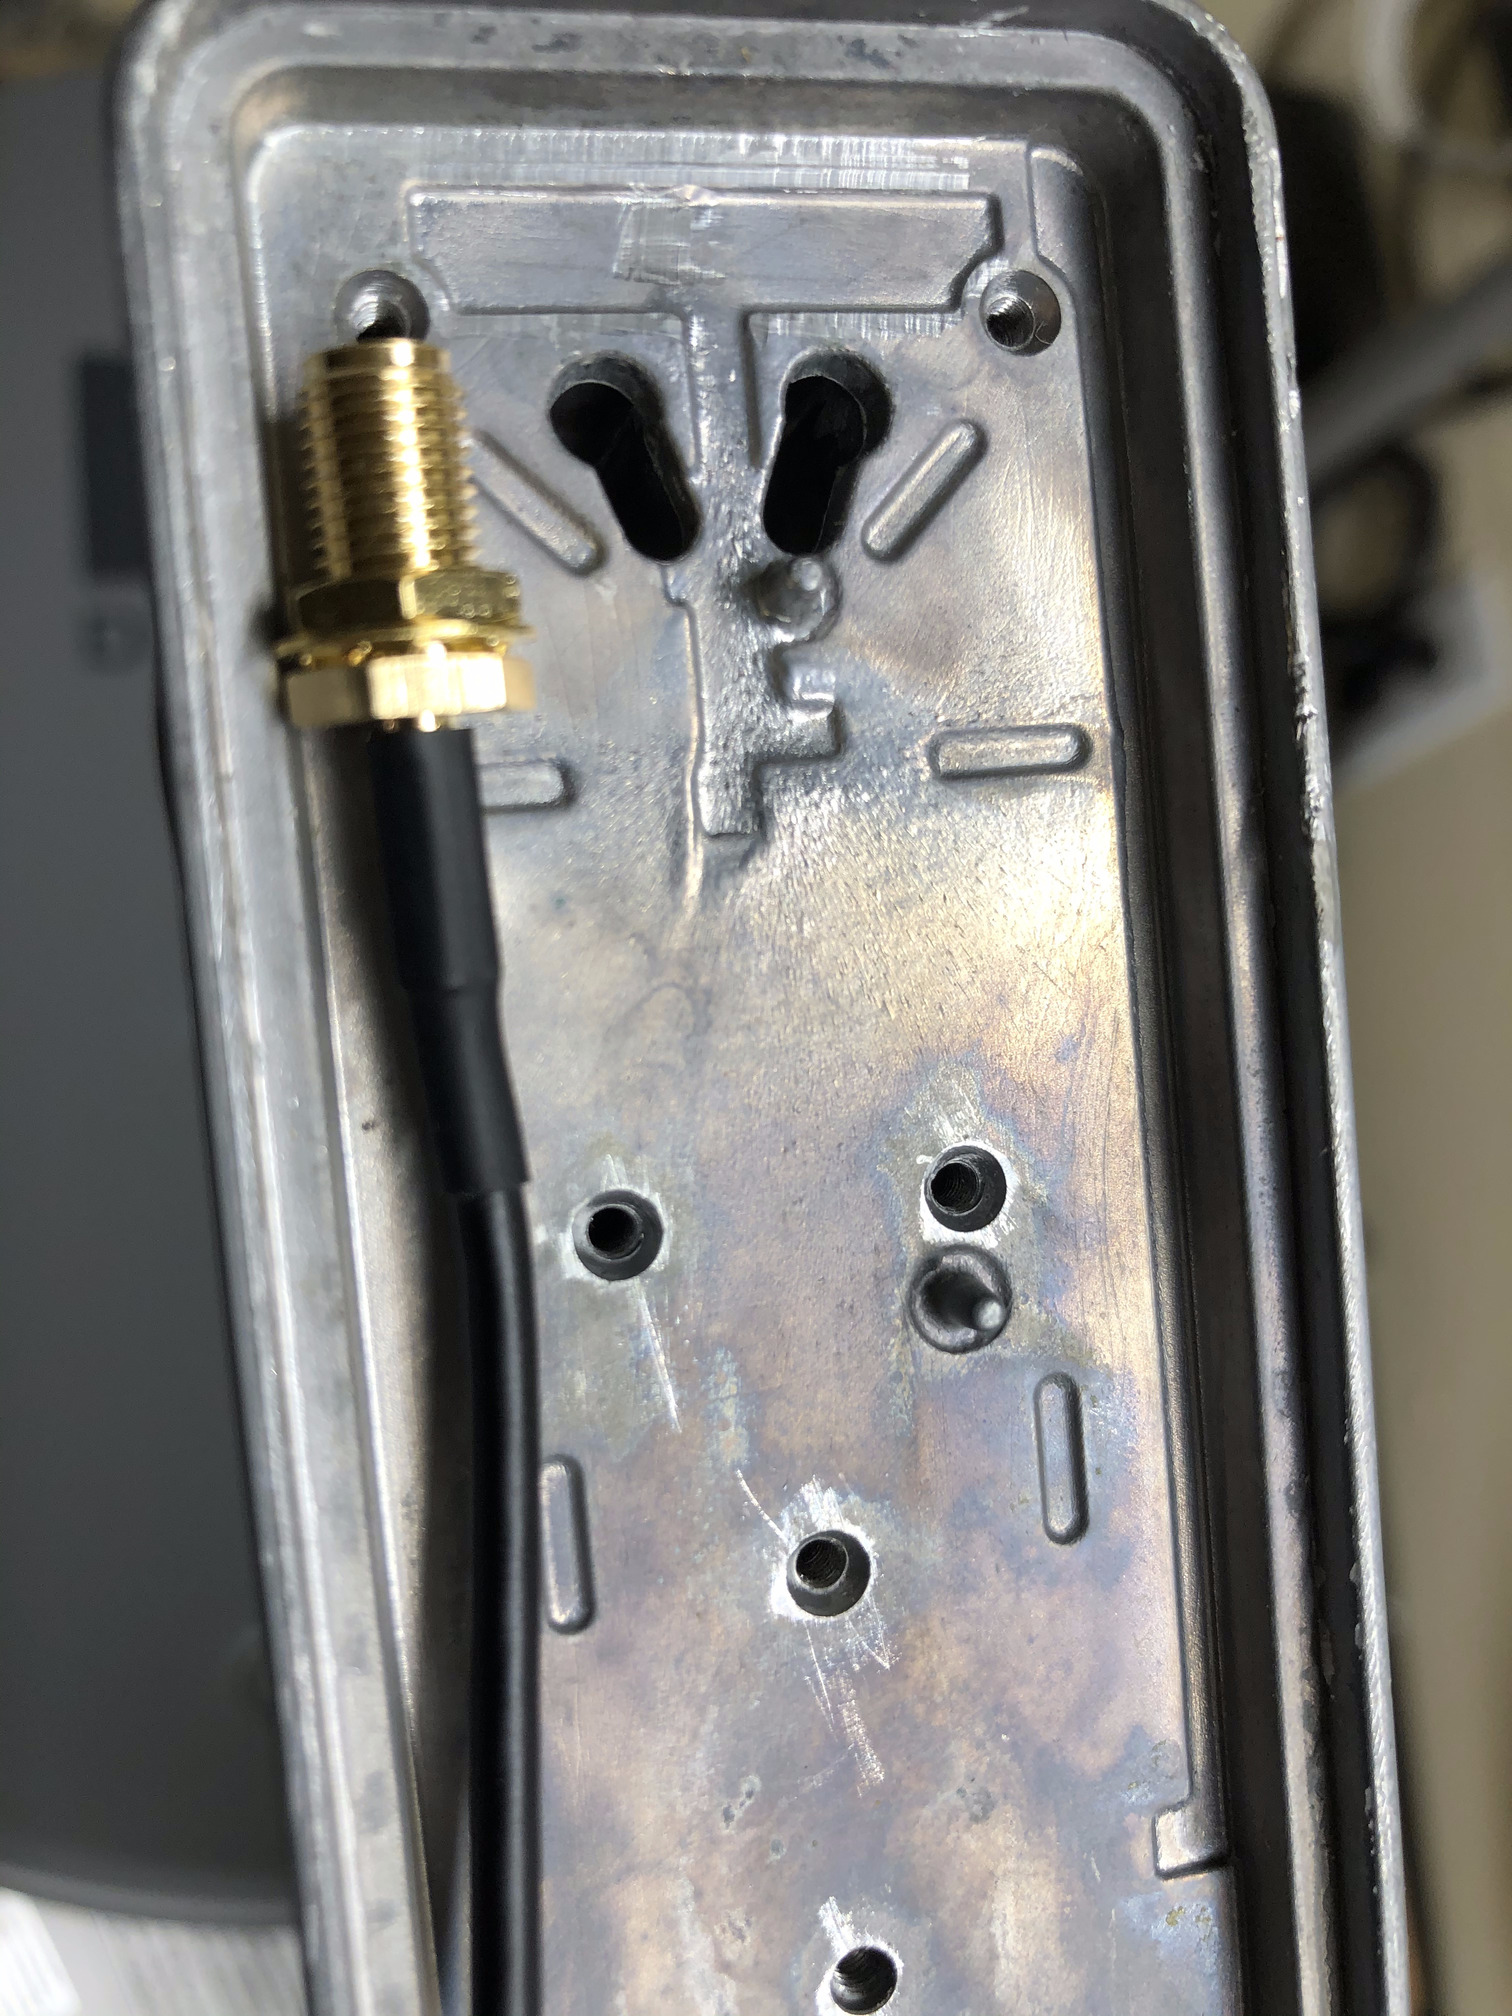 .
Figure 12. Male connector of the SMA cable
.
Figure 12. Male connector of the SMA cable
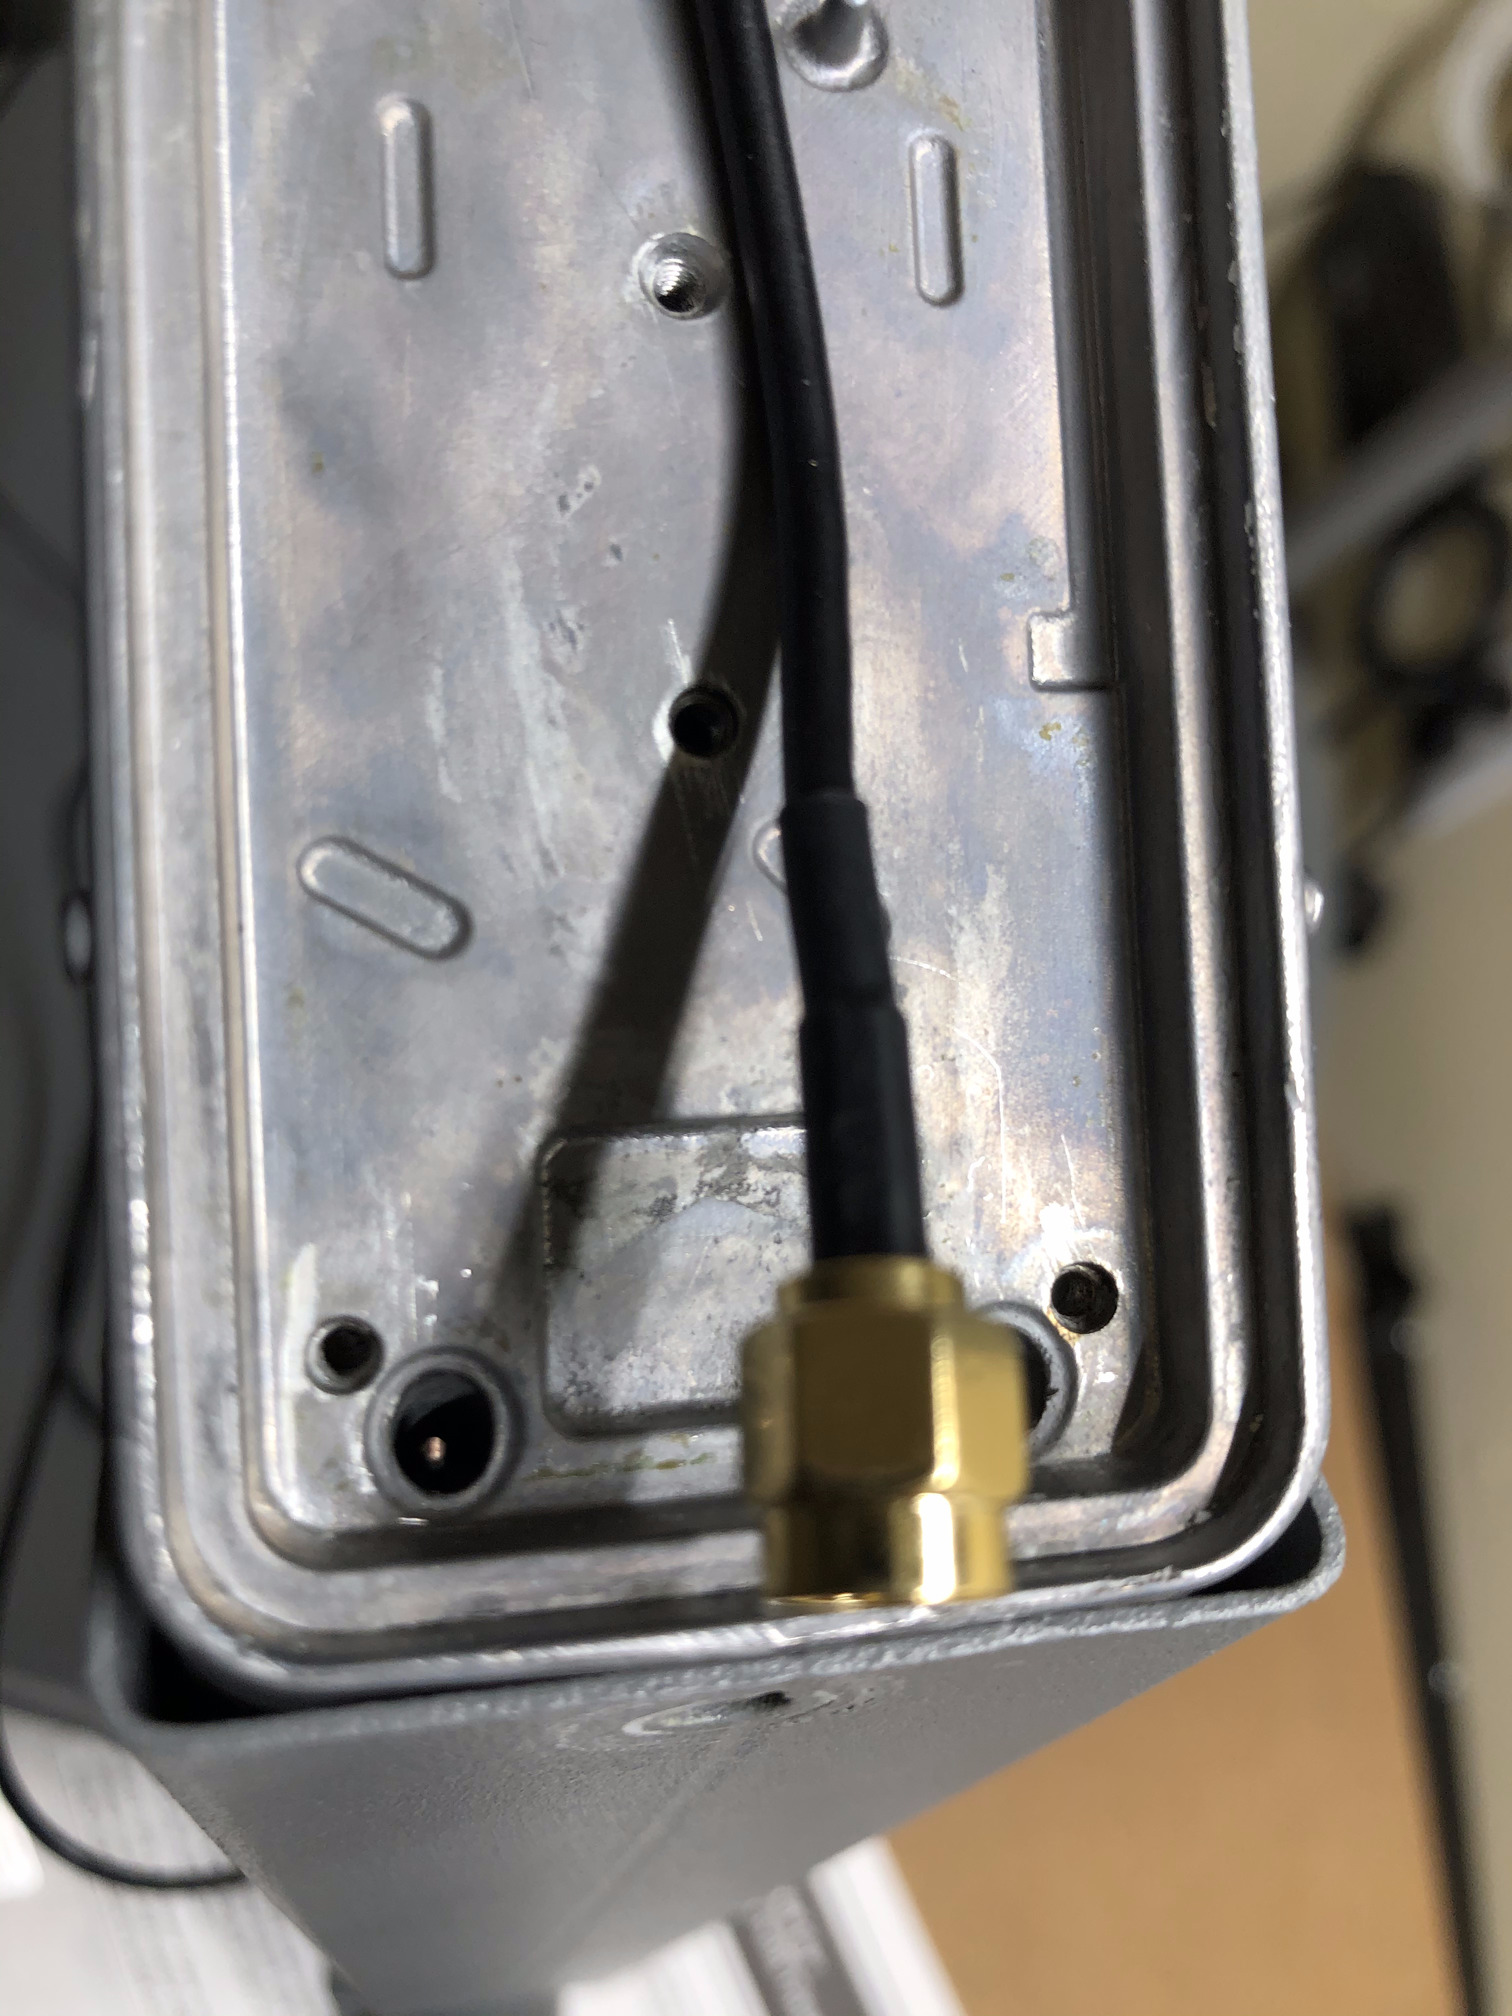 .
Figure 13. Female connector of the SMA cable
.
Figure 13. Female connector of the SMA cable
Step 7: Cut out sections of the LNBF as shown in the below images using a hacksaw. A bench vice may need to be used for better grip and support while cutting.
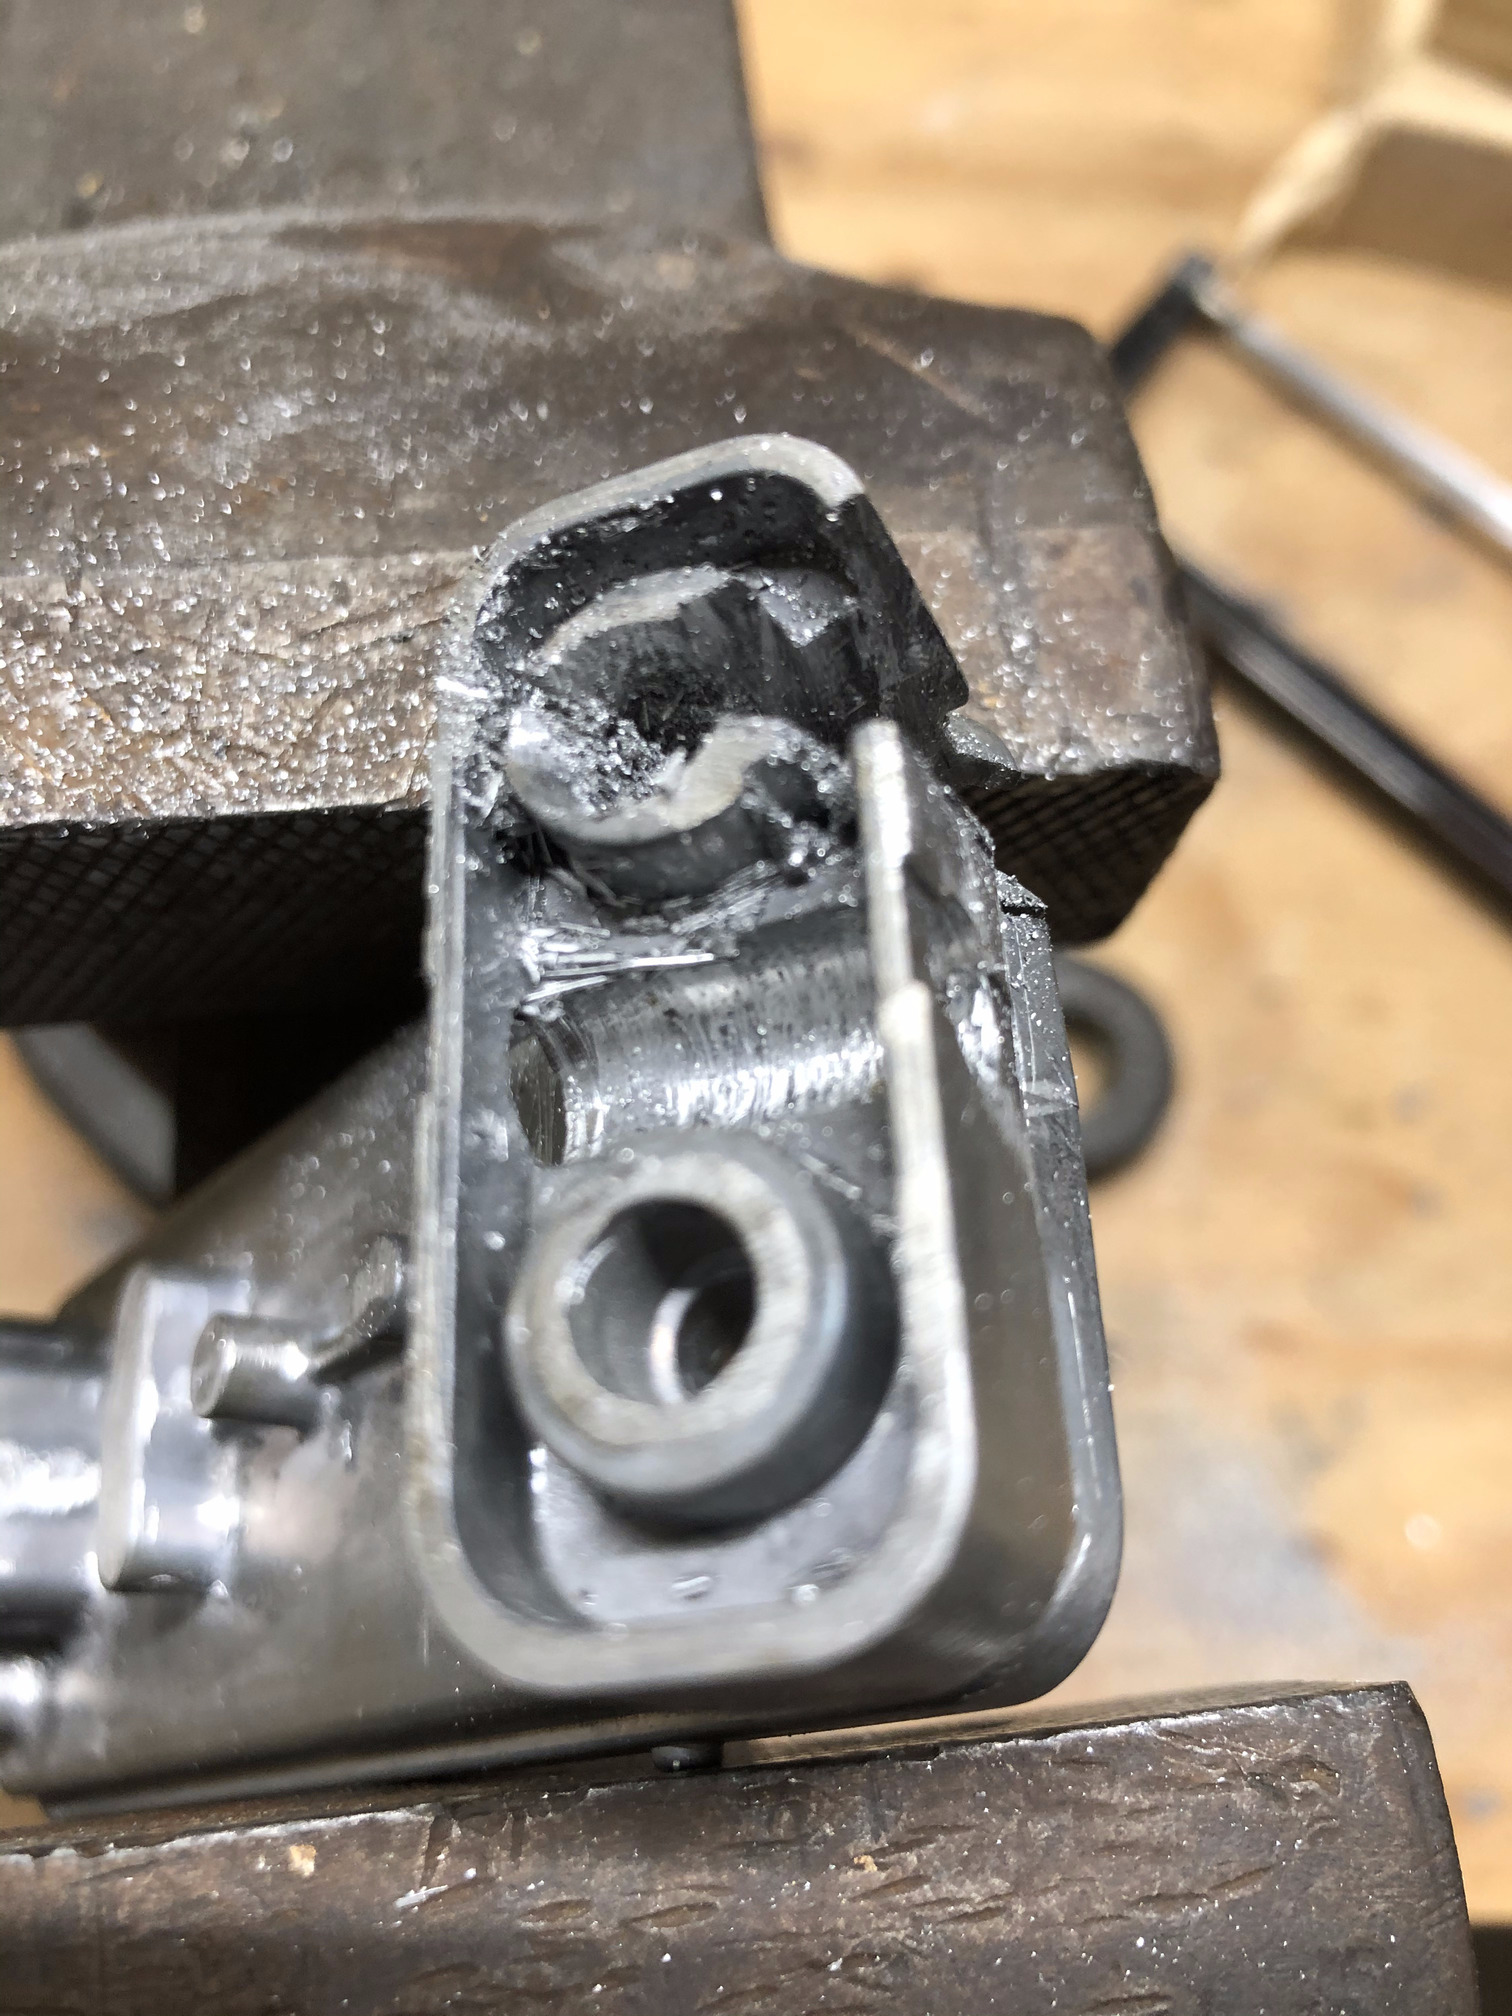 Figure 14a. Top view of the cut at the coaxial cable connector portion of the core
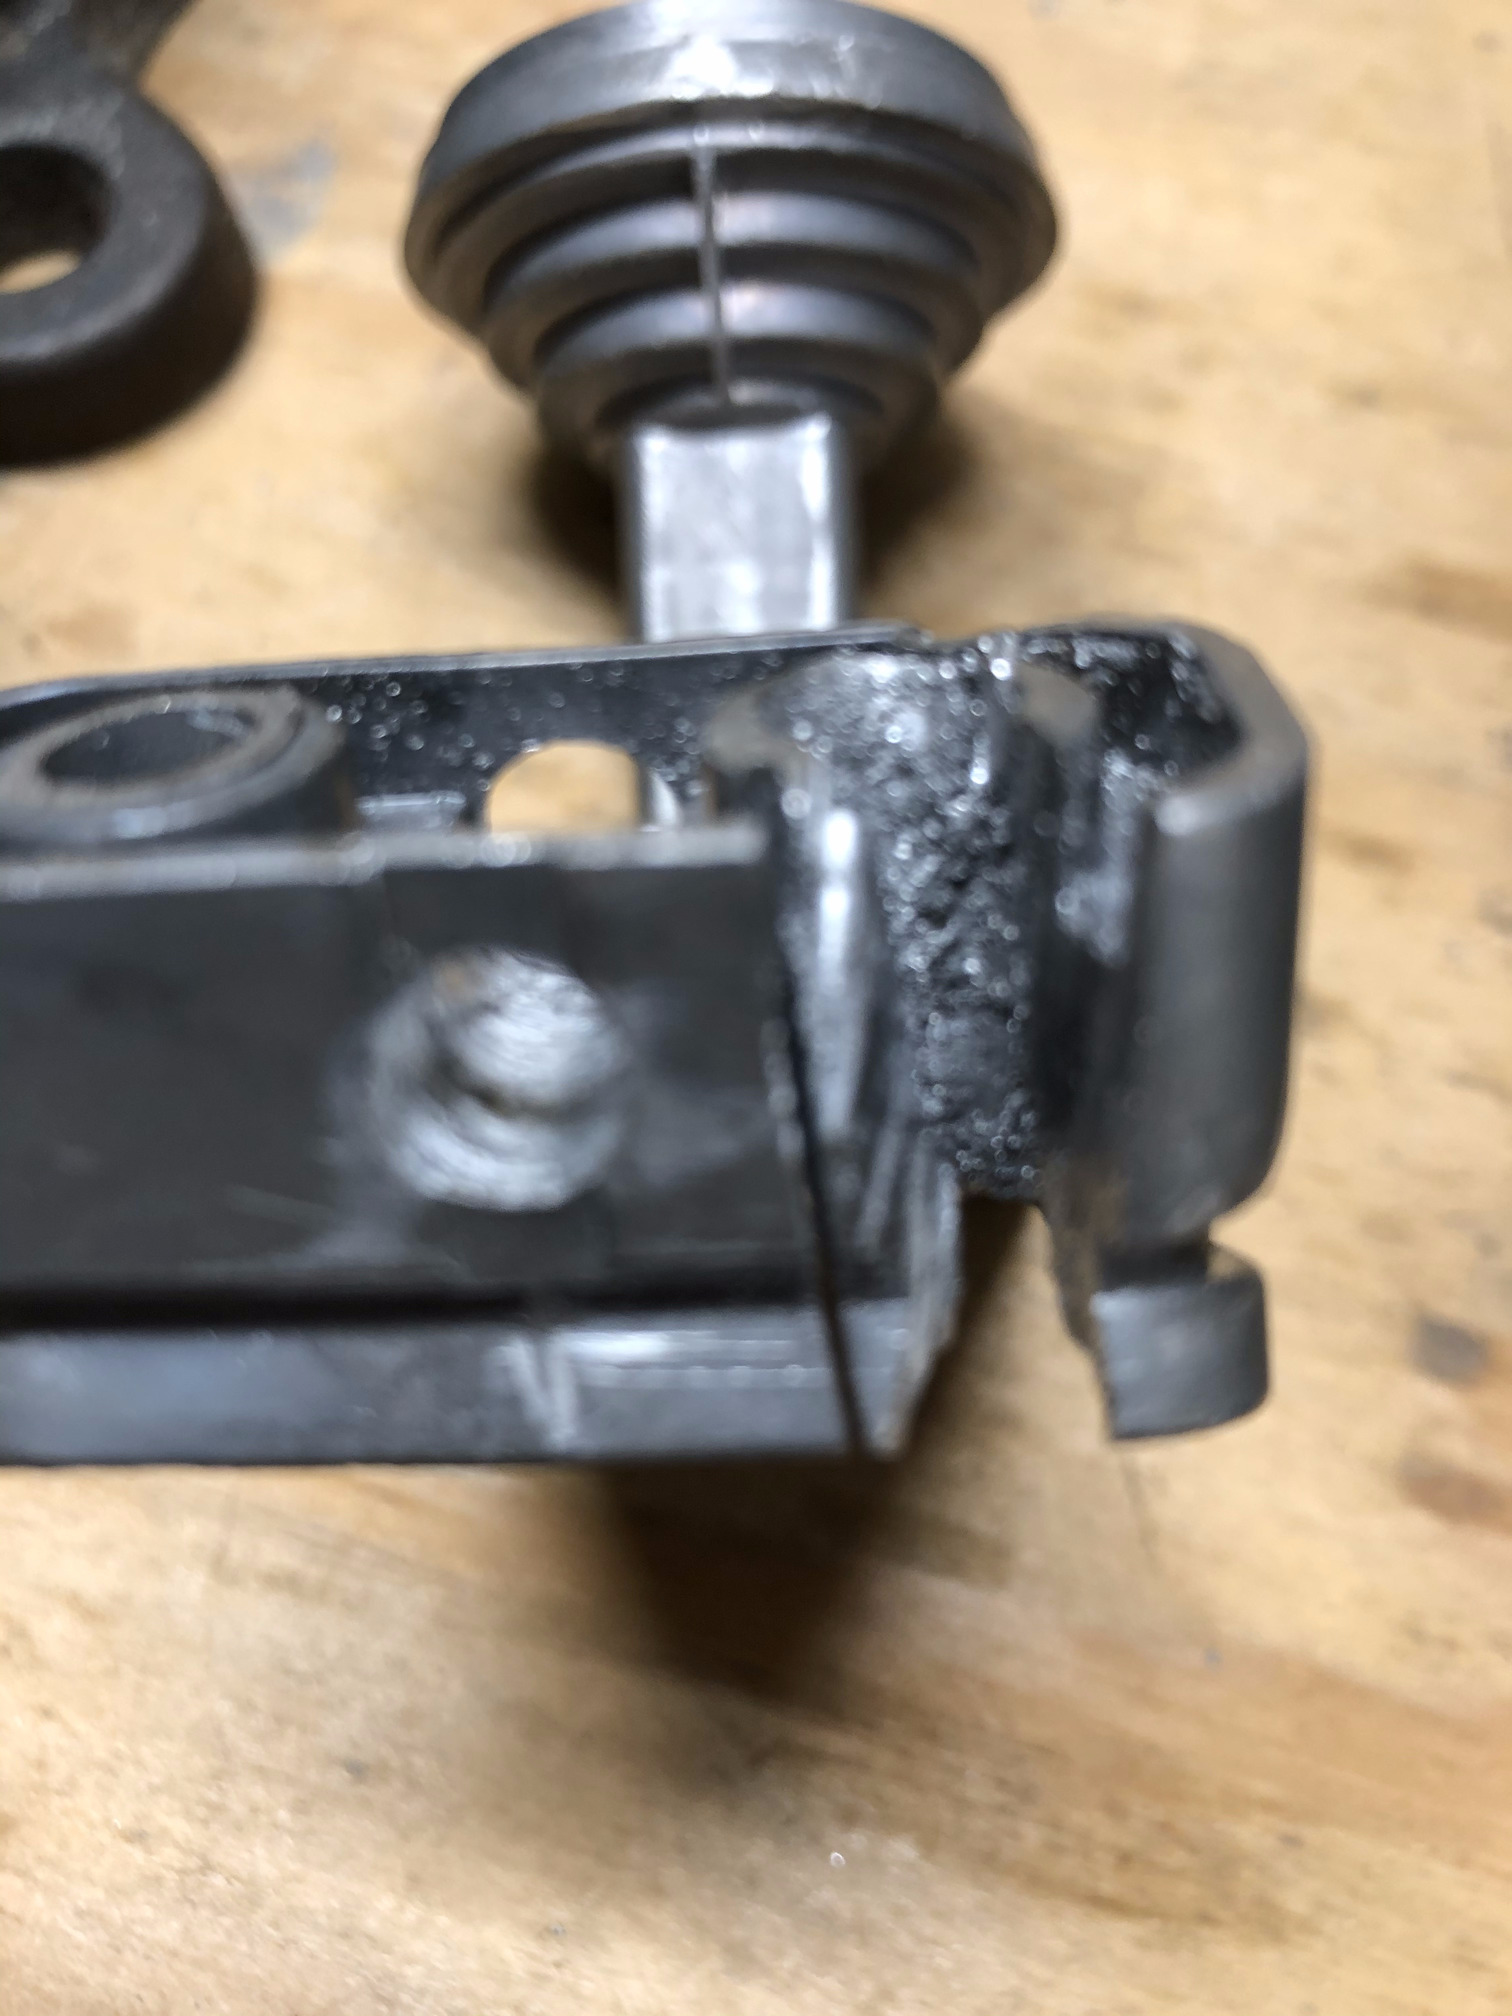 Figure 14b. Side view of the cut at the coaxial cable connector portion of the core
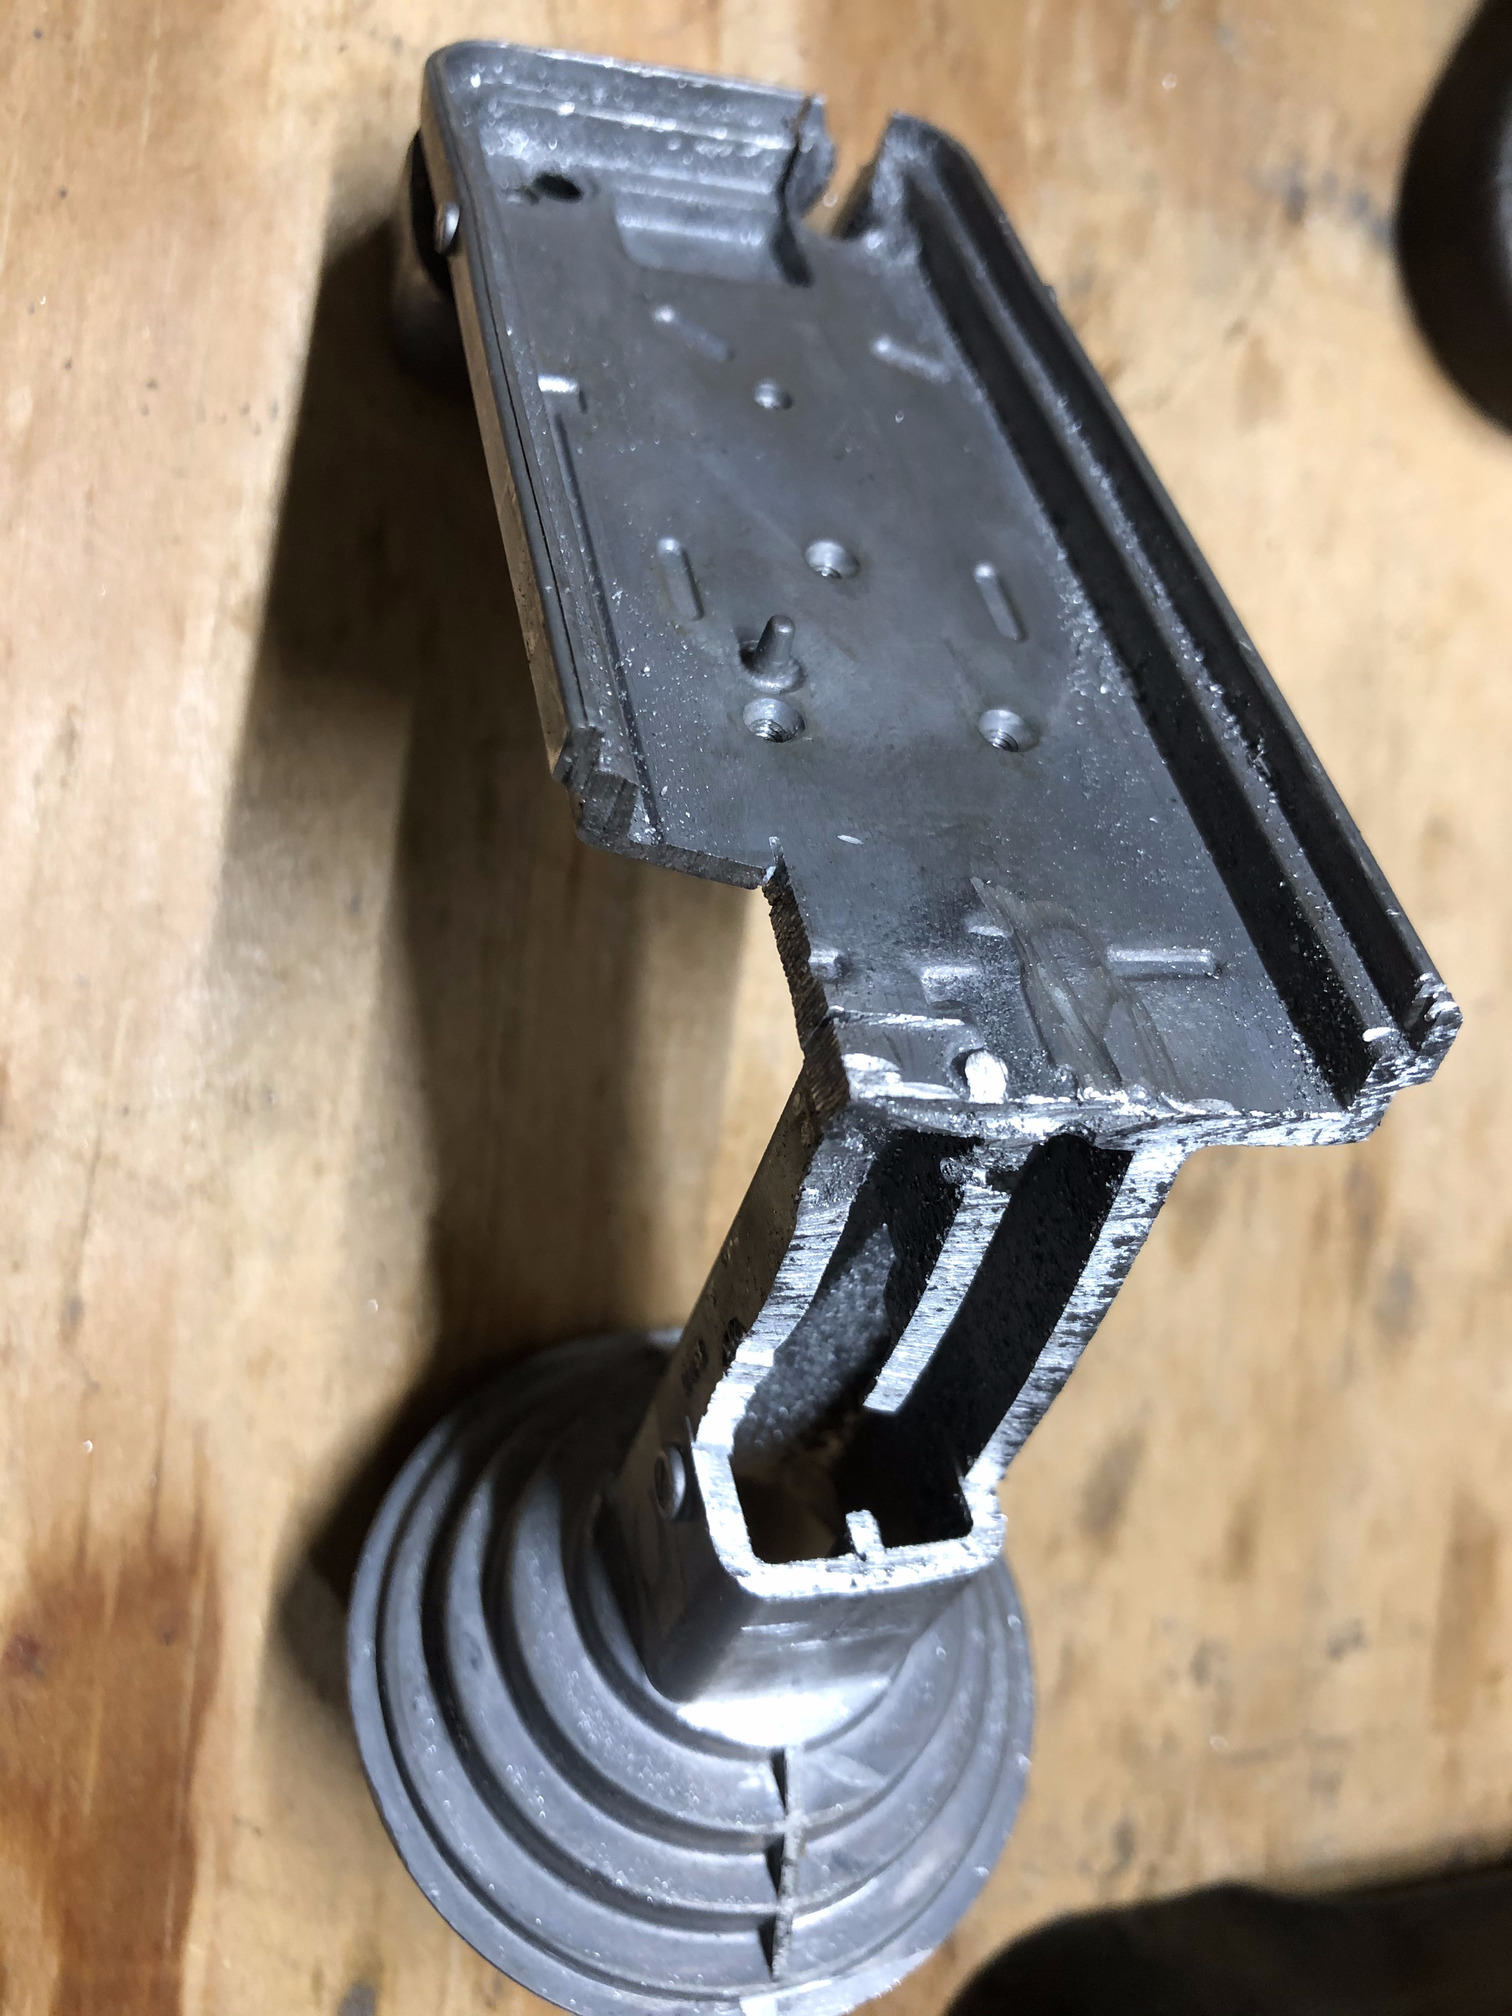 Figure 14c. Top view of the cut at the top of the core
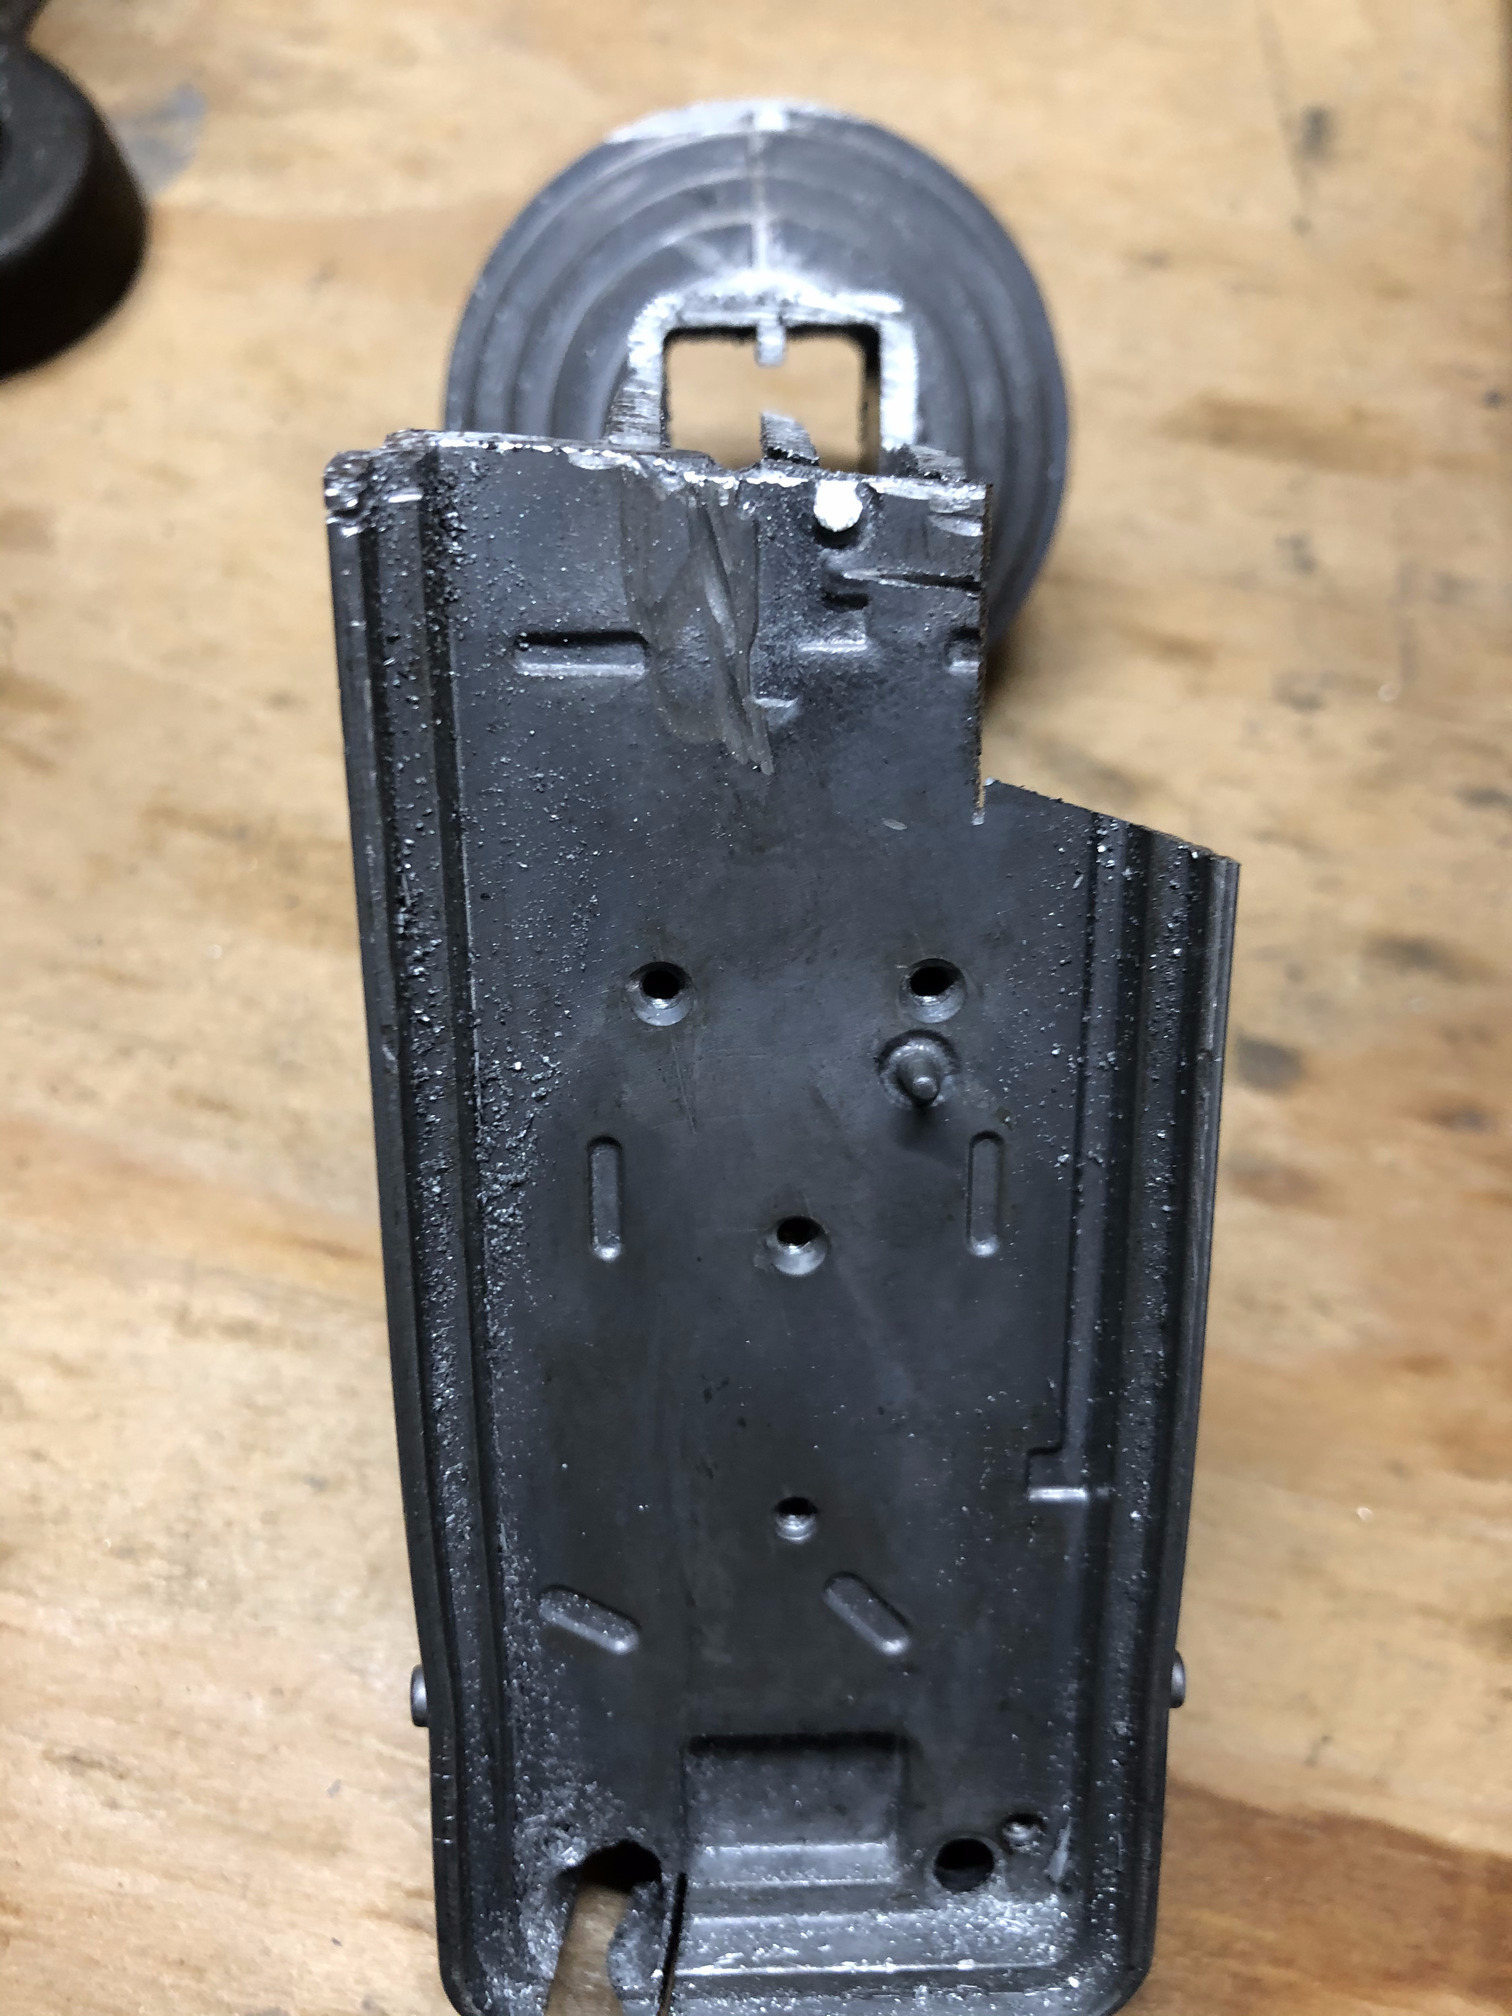 Figure 14d. Rear view of the cut at the top of the core
Step 8: Drill a hole in the white cap where the male SMA connector will fit.
 Figure 15. Drill a hole in the cap
Step 9: Pass the wire through the metallic core (Figure 16a) and verify that the whole assembly will work (Figure 16b).
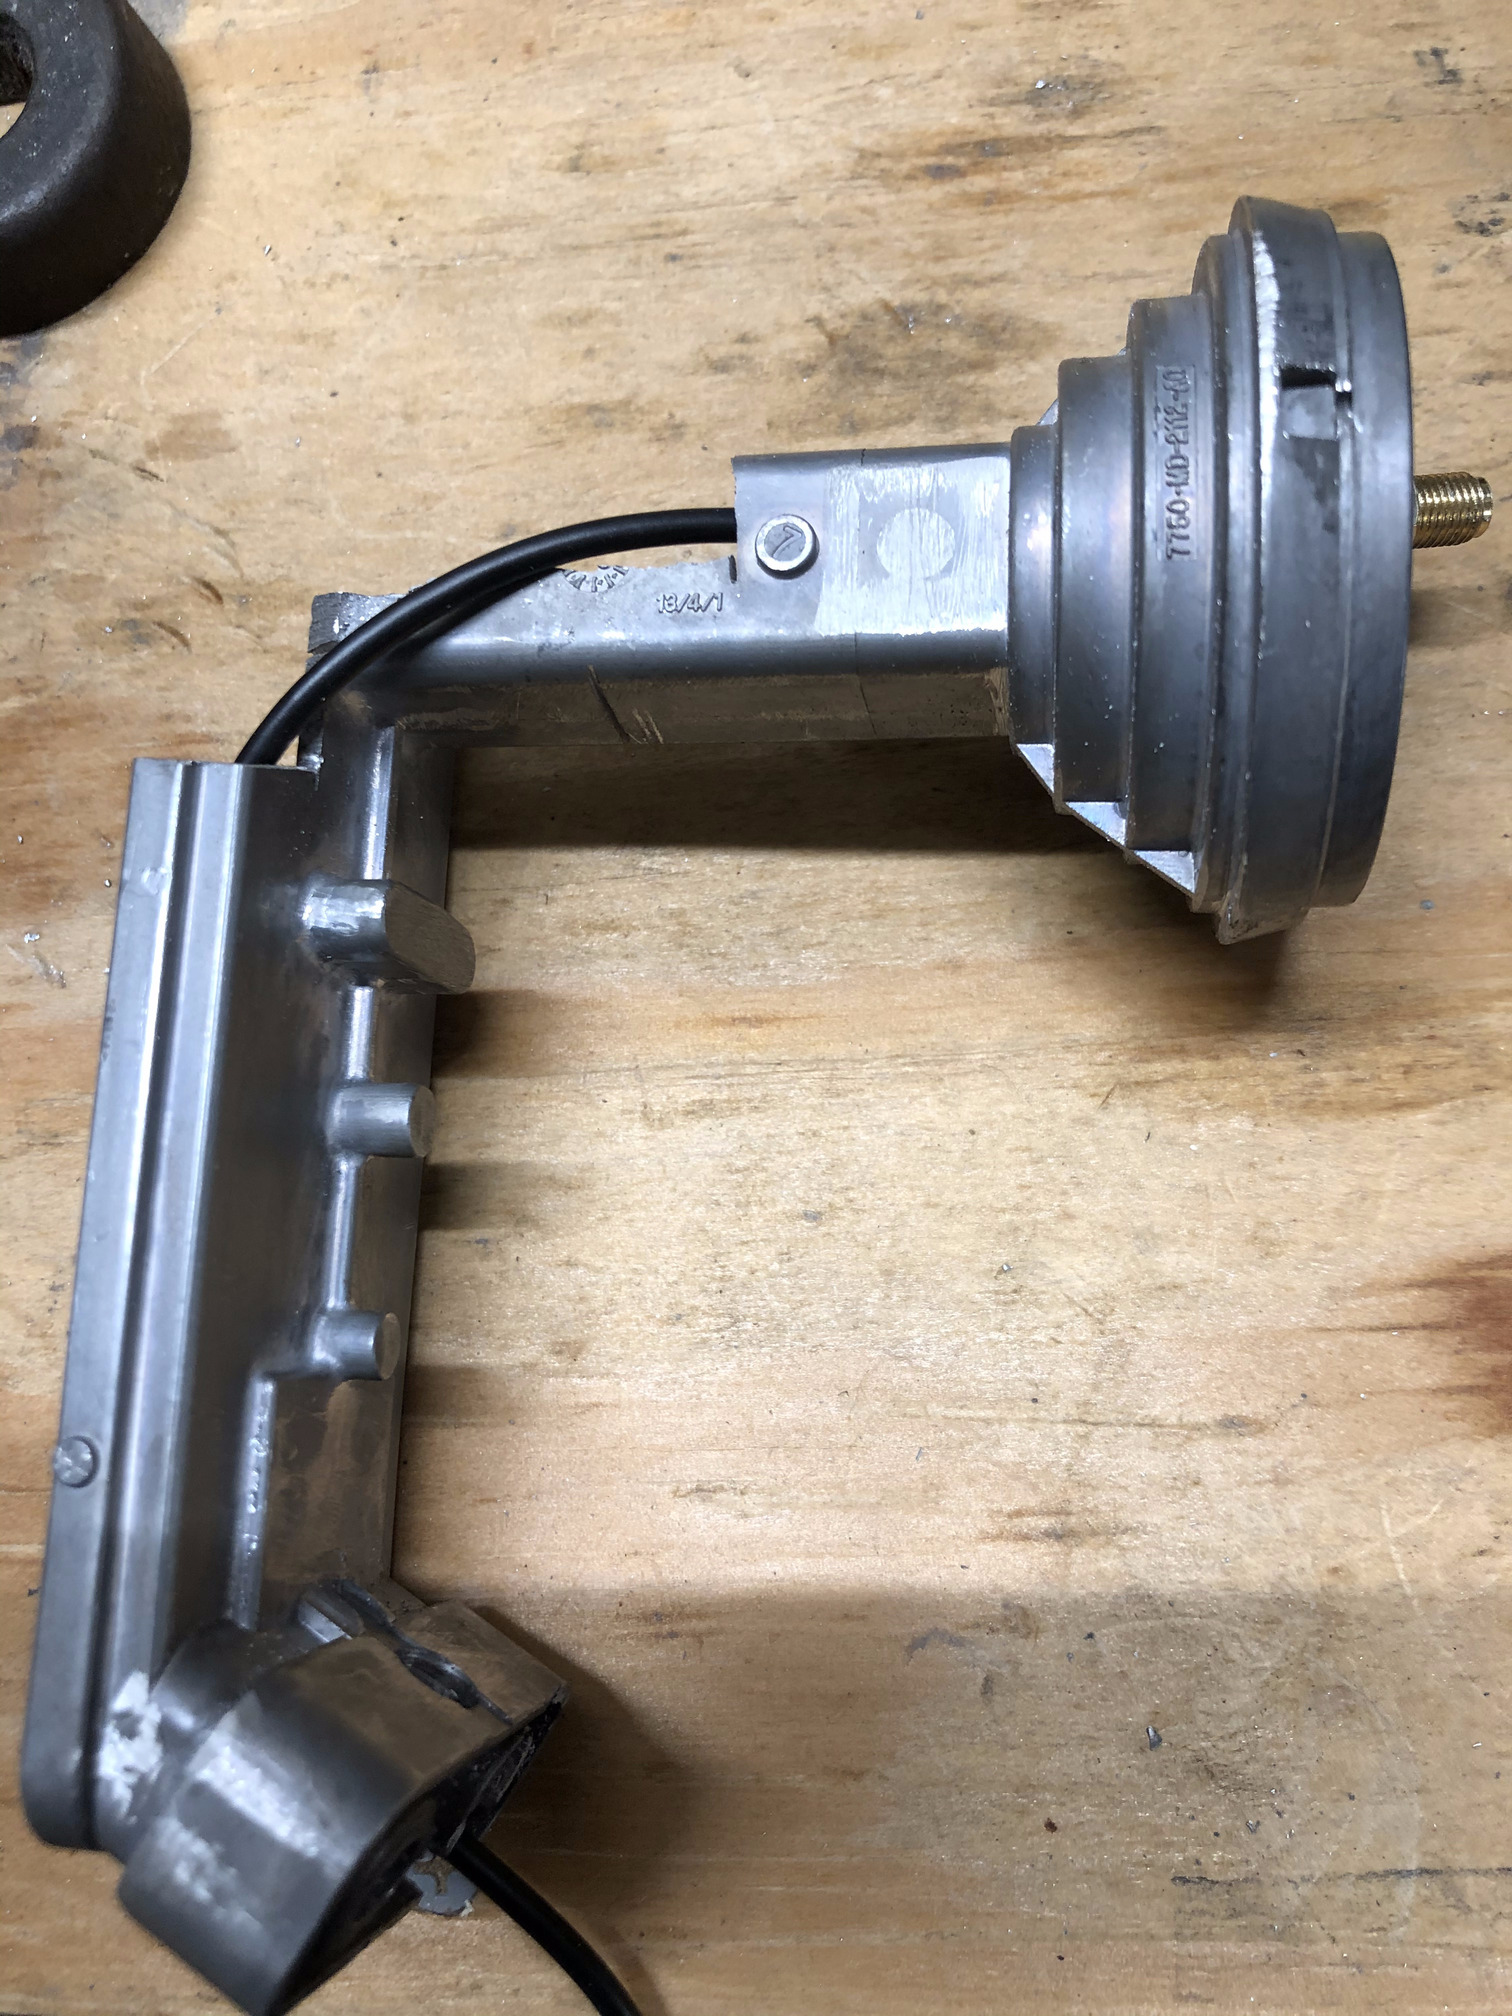 Figure 16a. Pass the wire through the metallic core
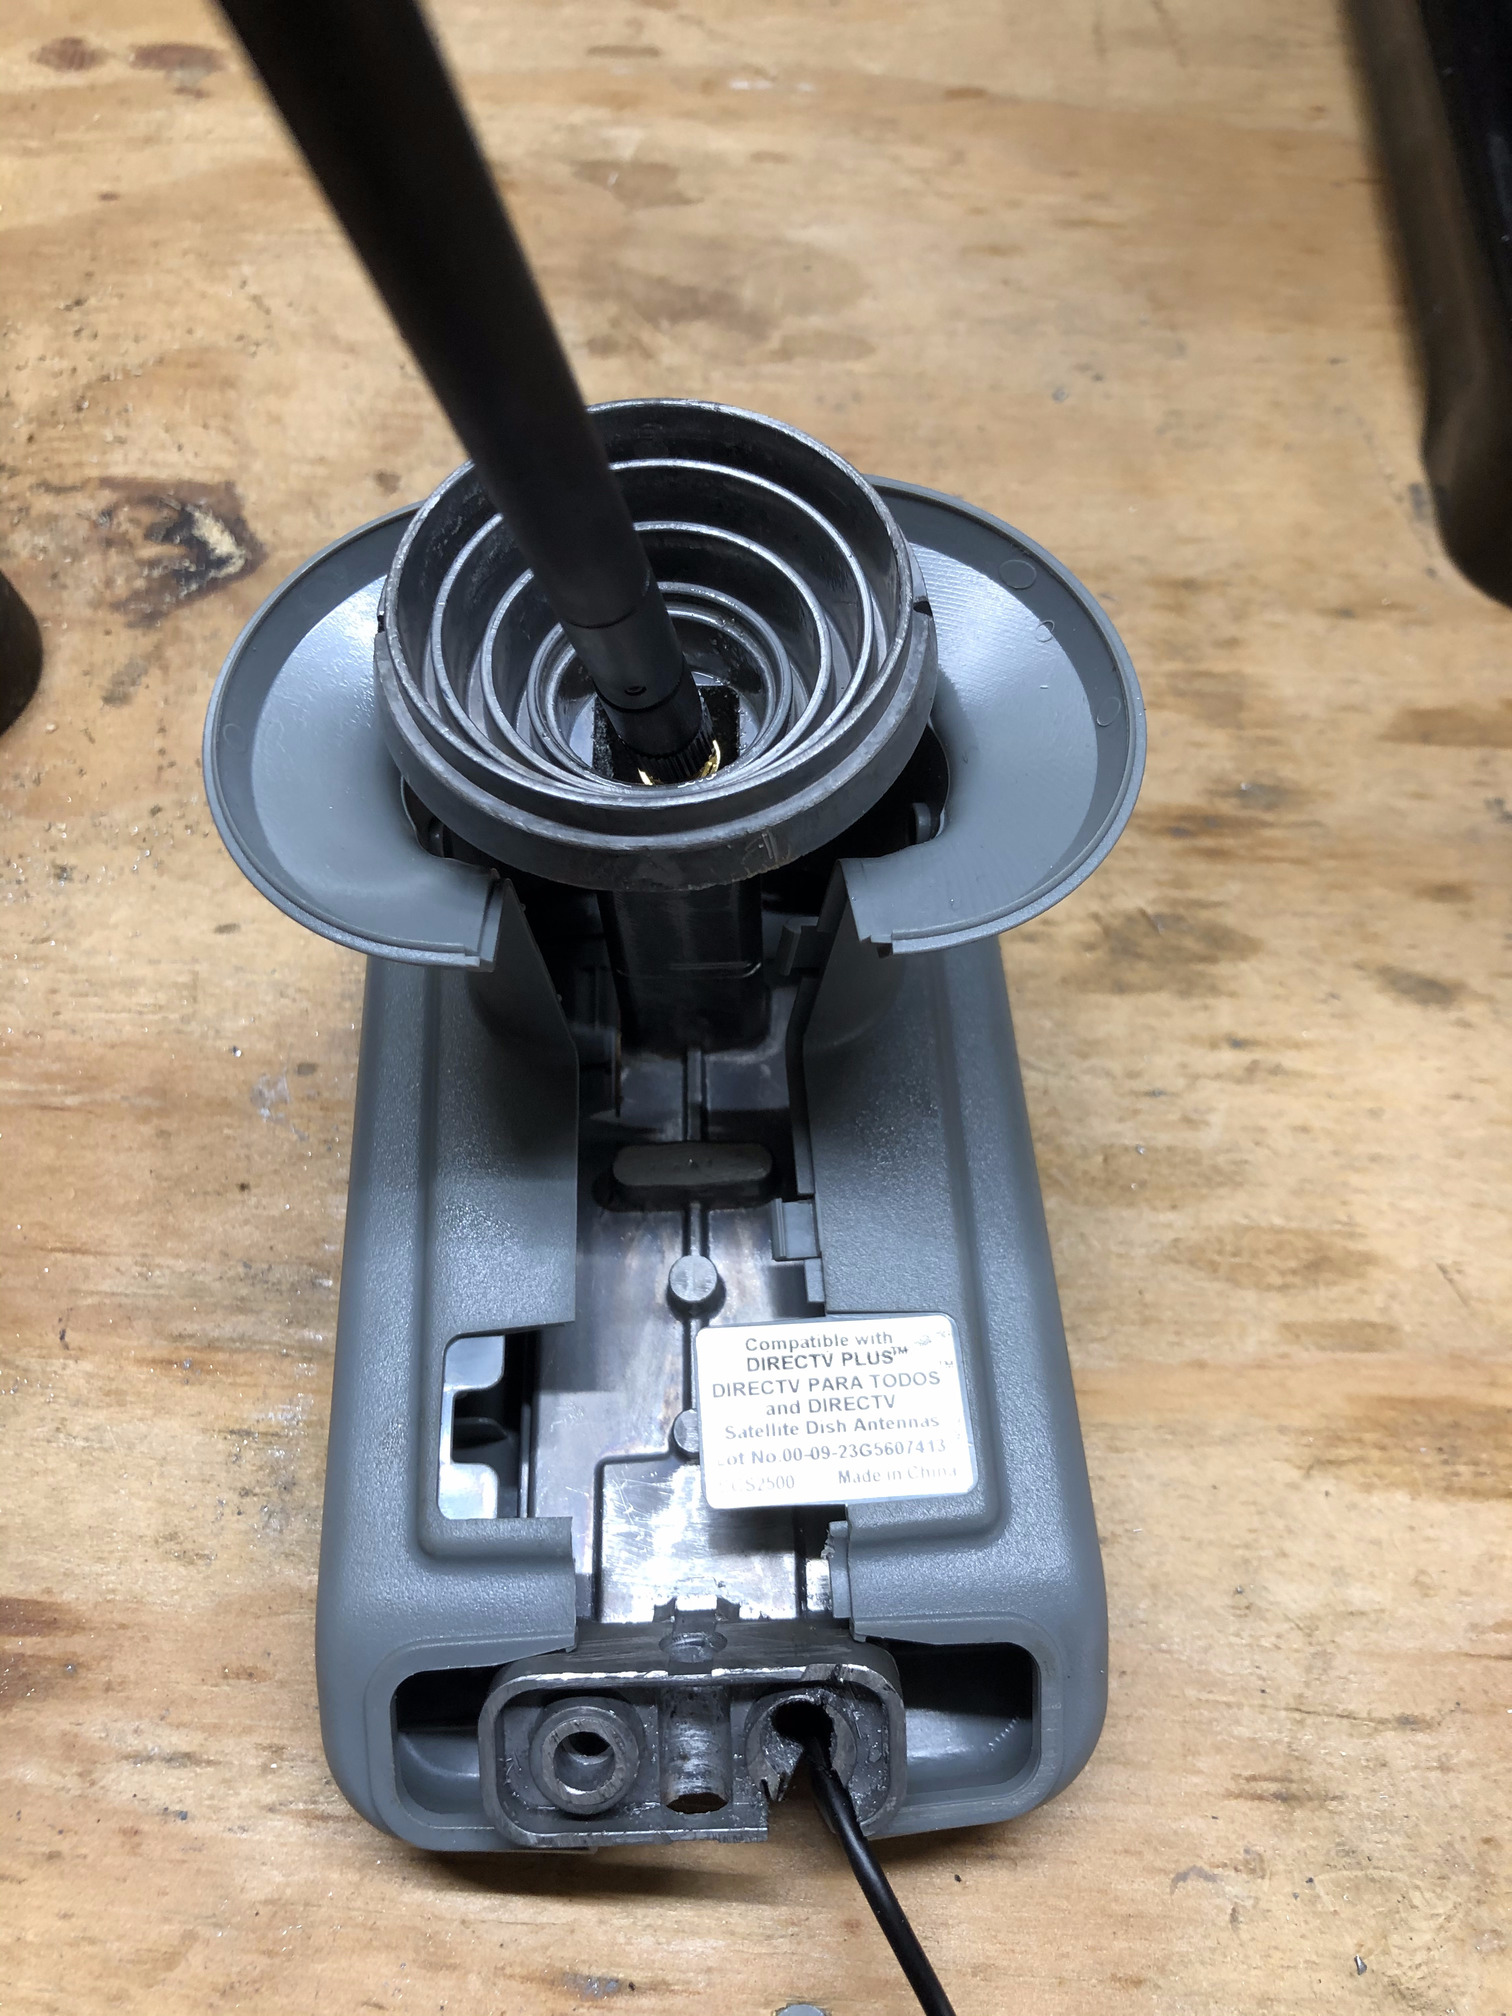 Figure 16b. Verify that the assembly will work as intended
Step 10: Remove the gold/brass SMA connector nut (Figure 17) and firmly attach the male SMA connector to the white cap as shown in Figures 18a and 18b.
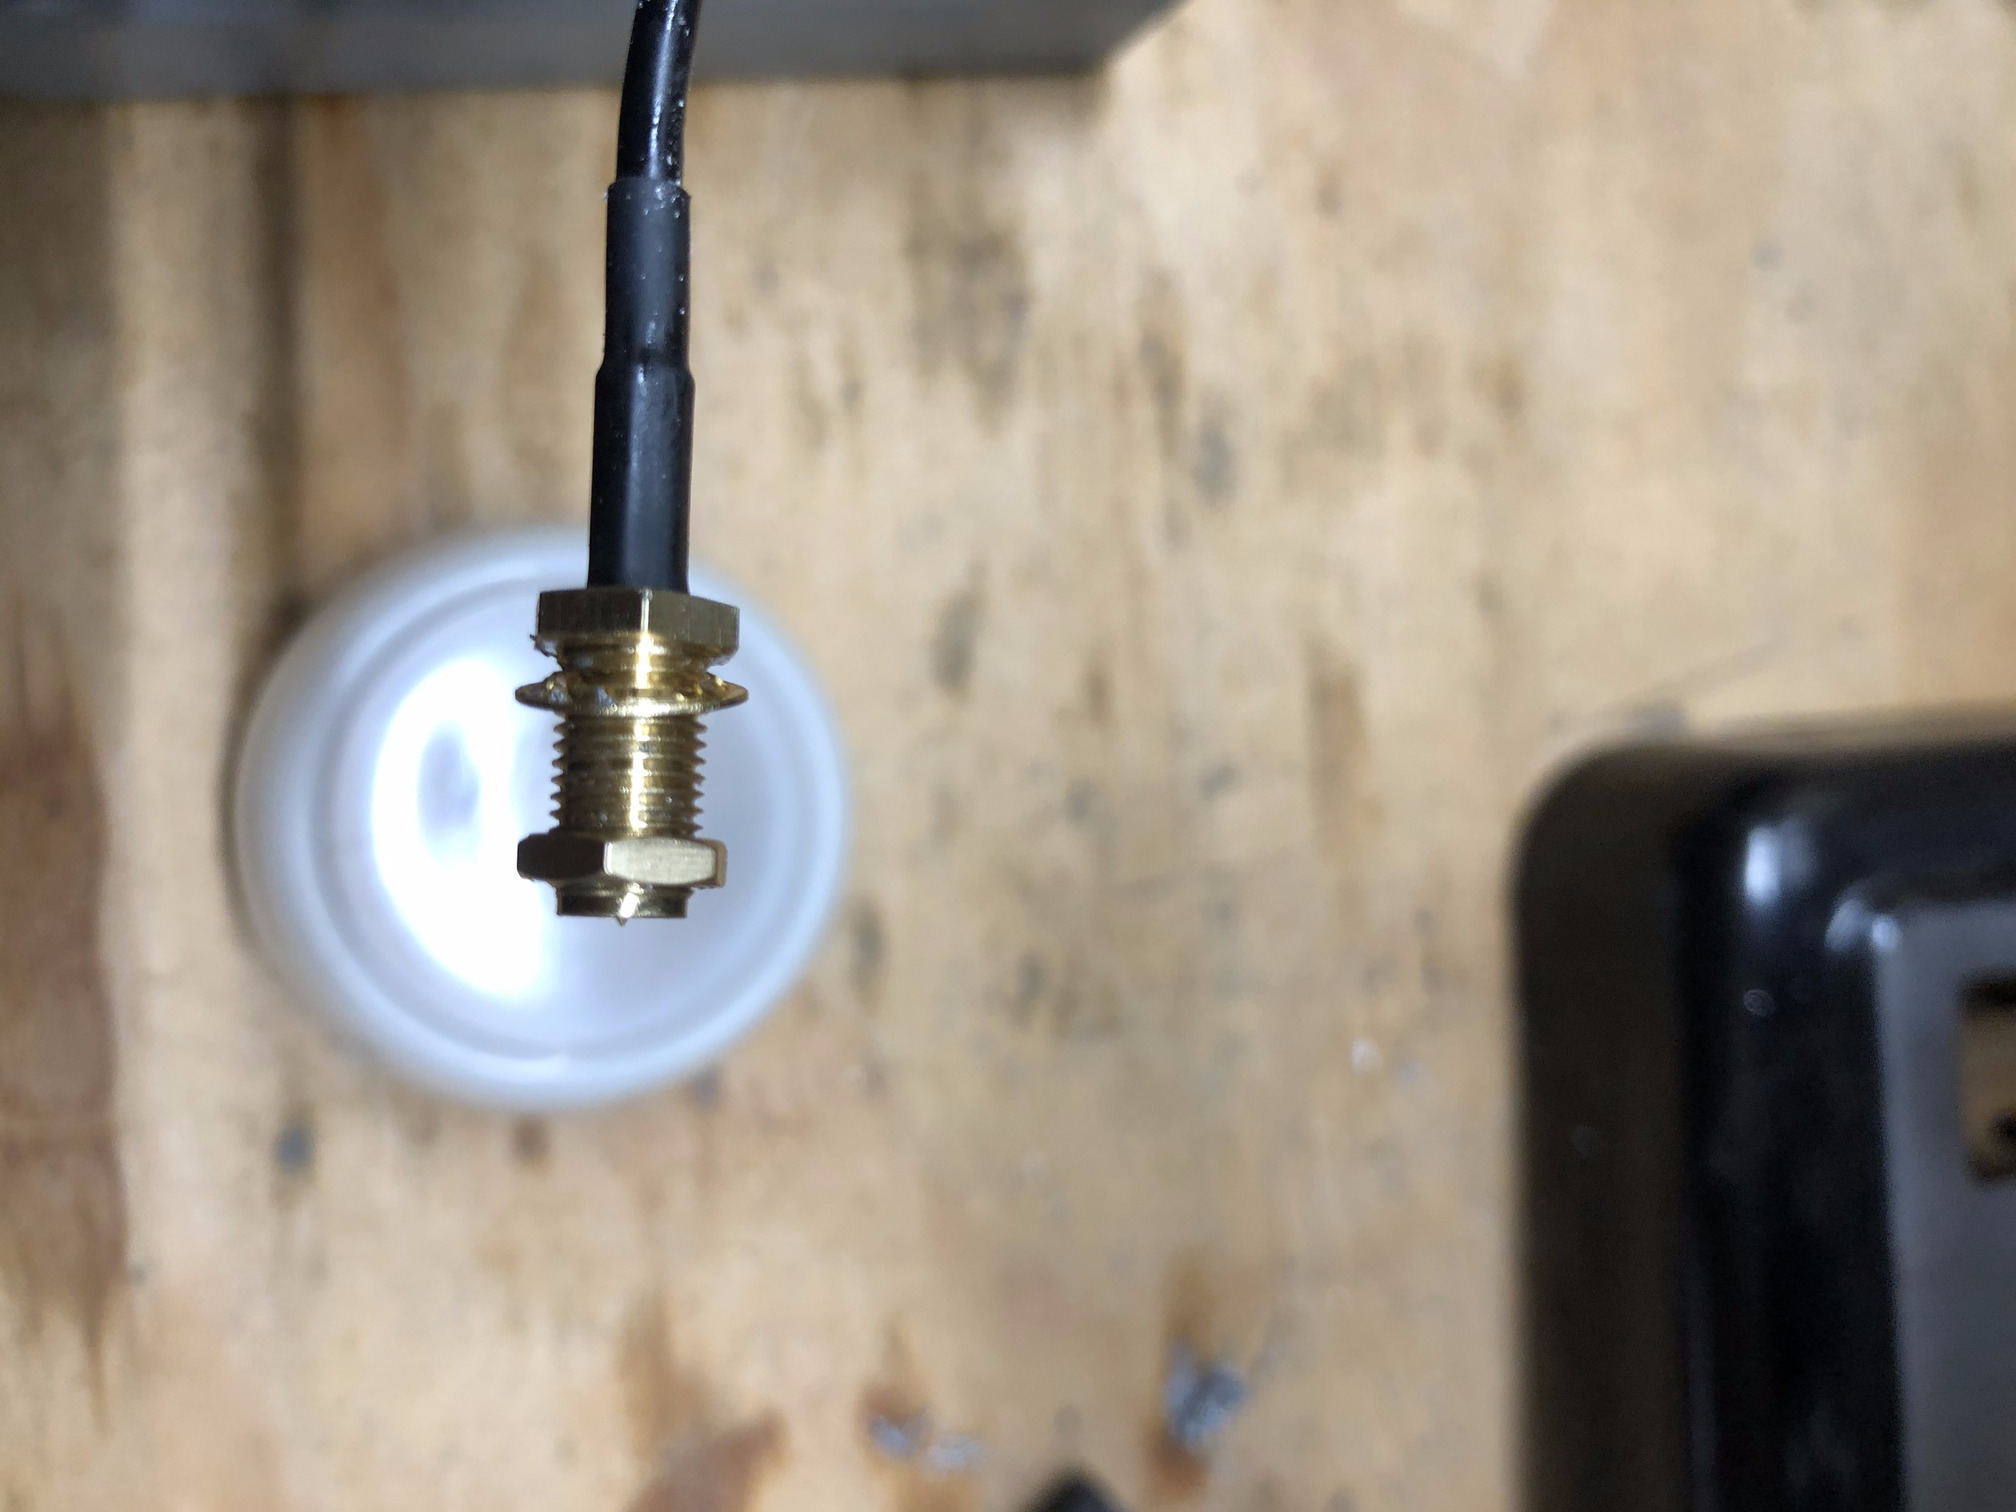 Figure 17. Remove the nut and washer from the male SMA connector
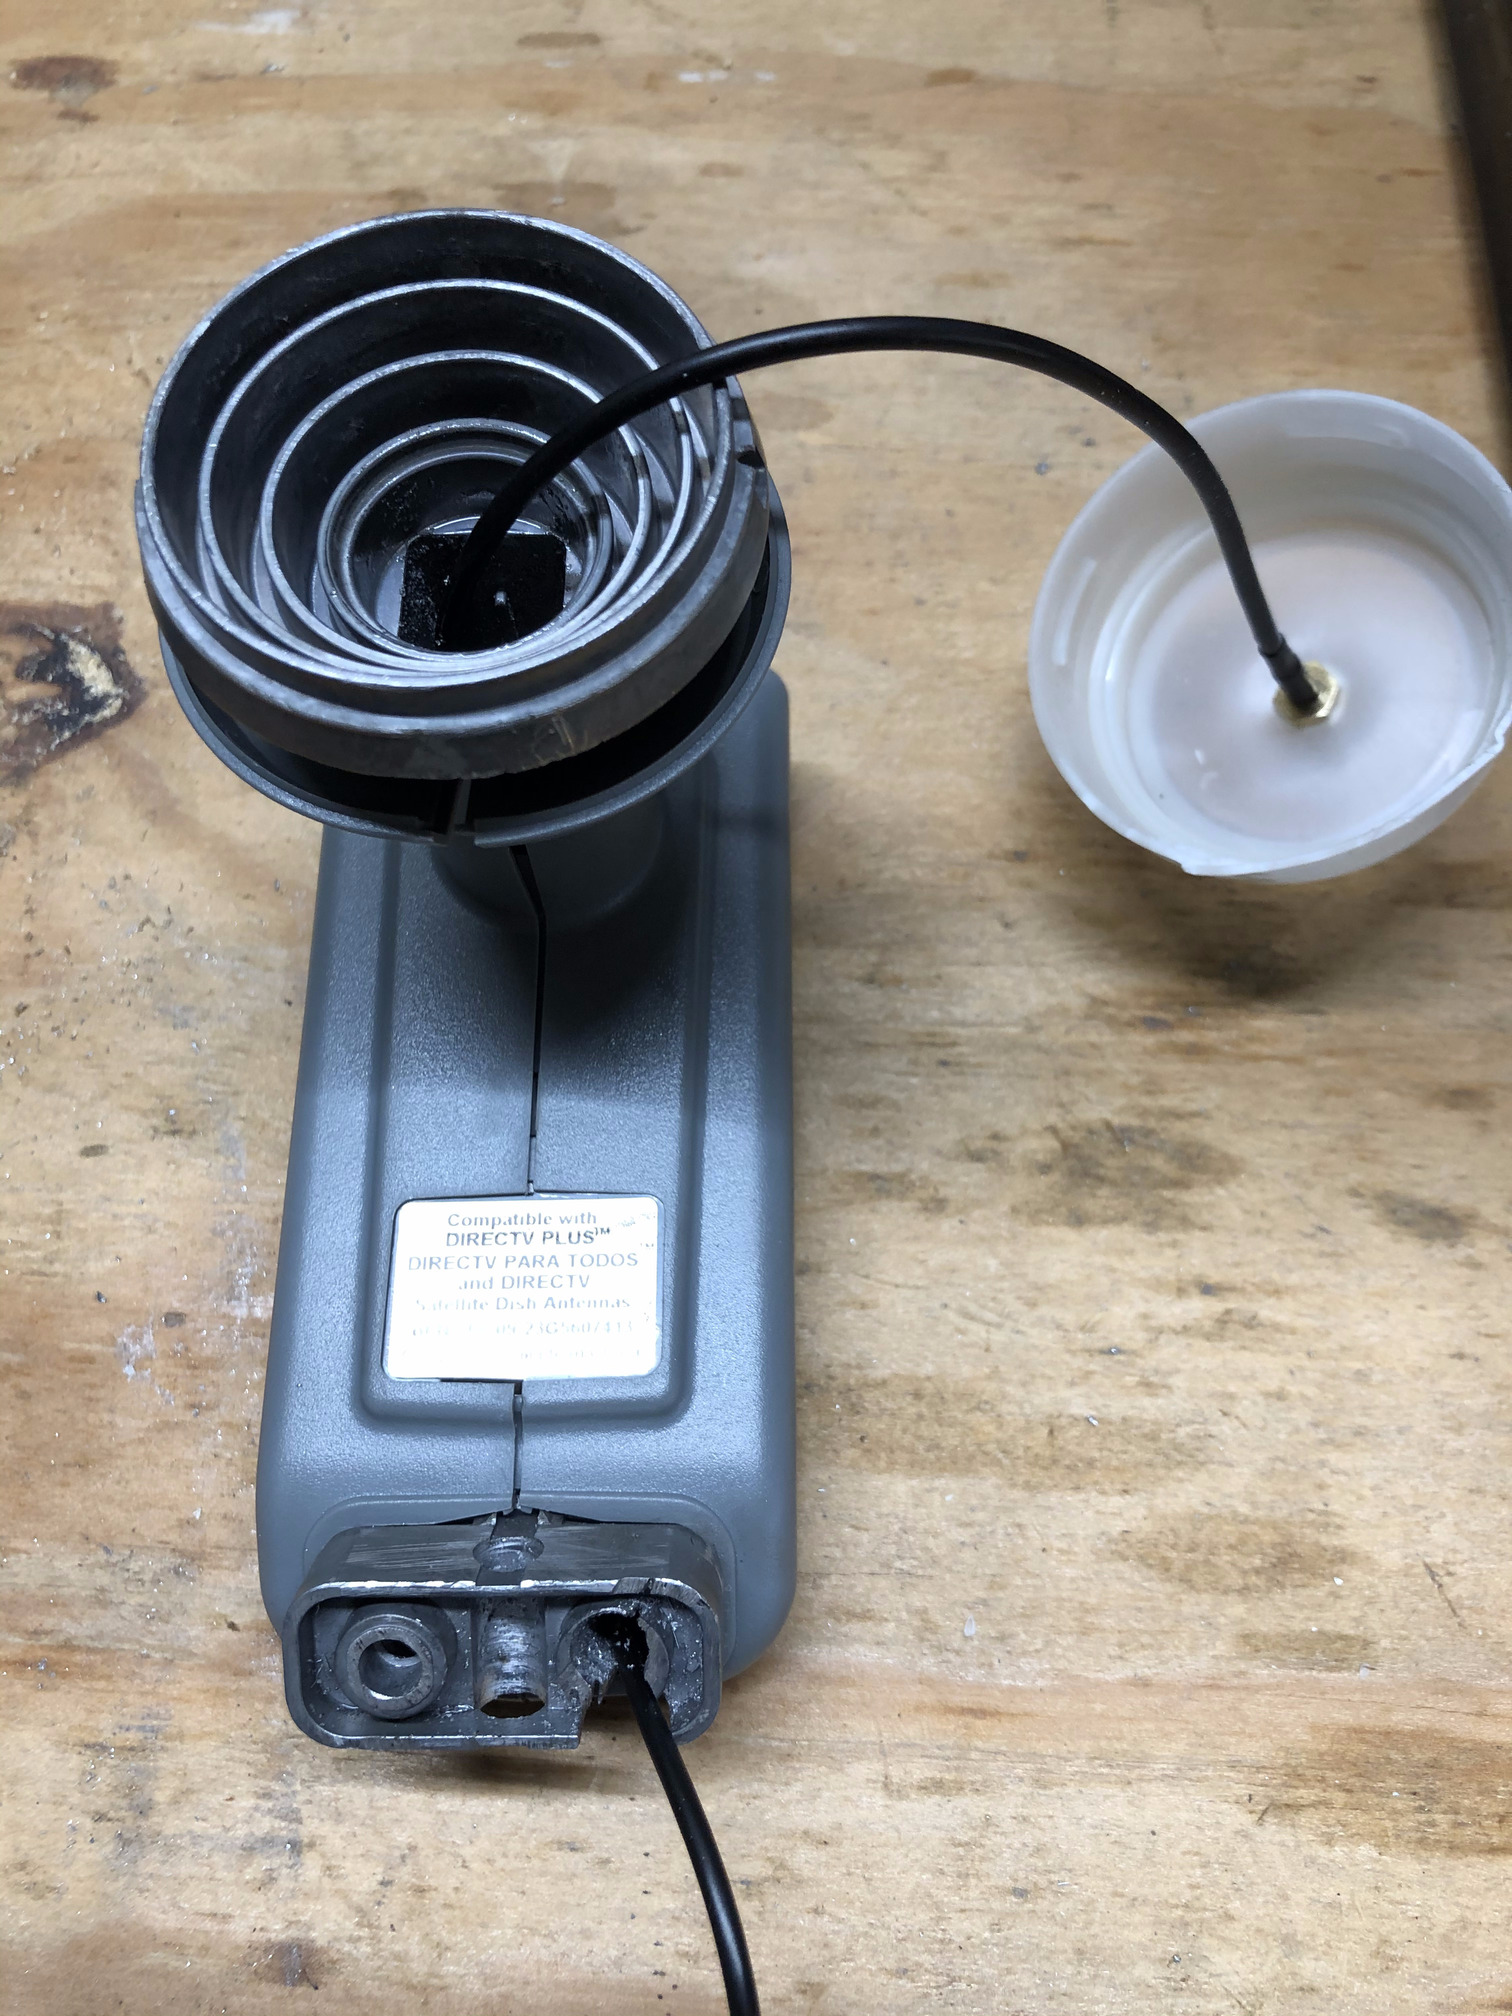 Figure 18a. Make sure the wire is in the core first
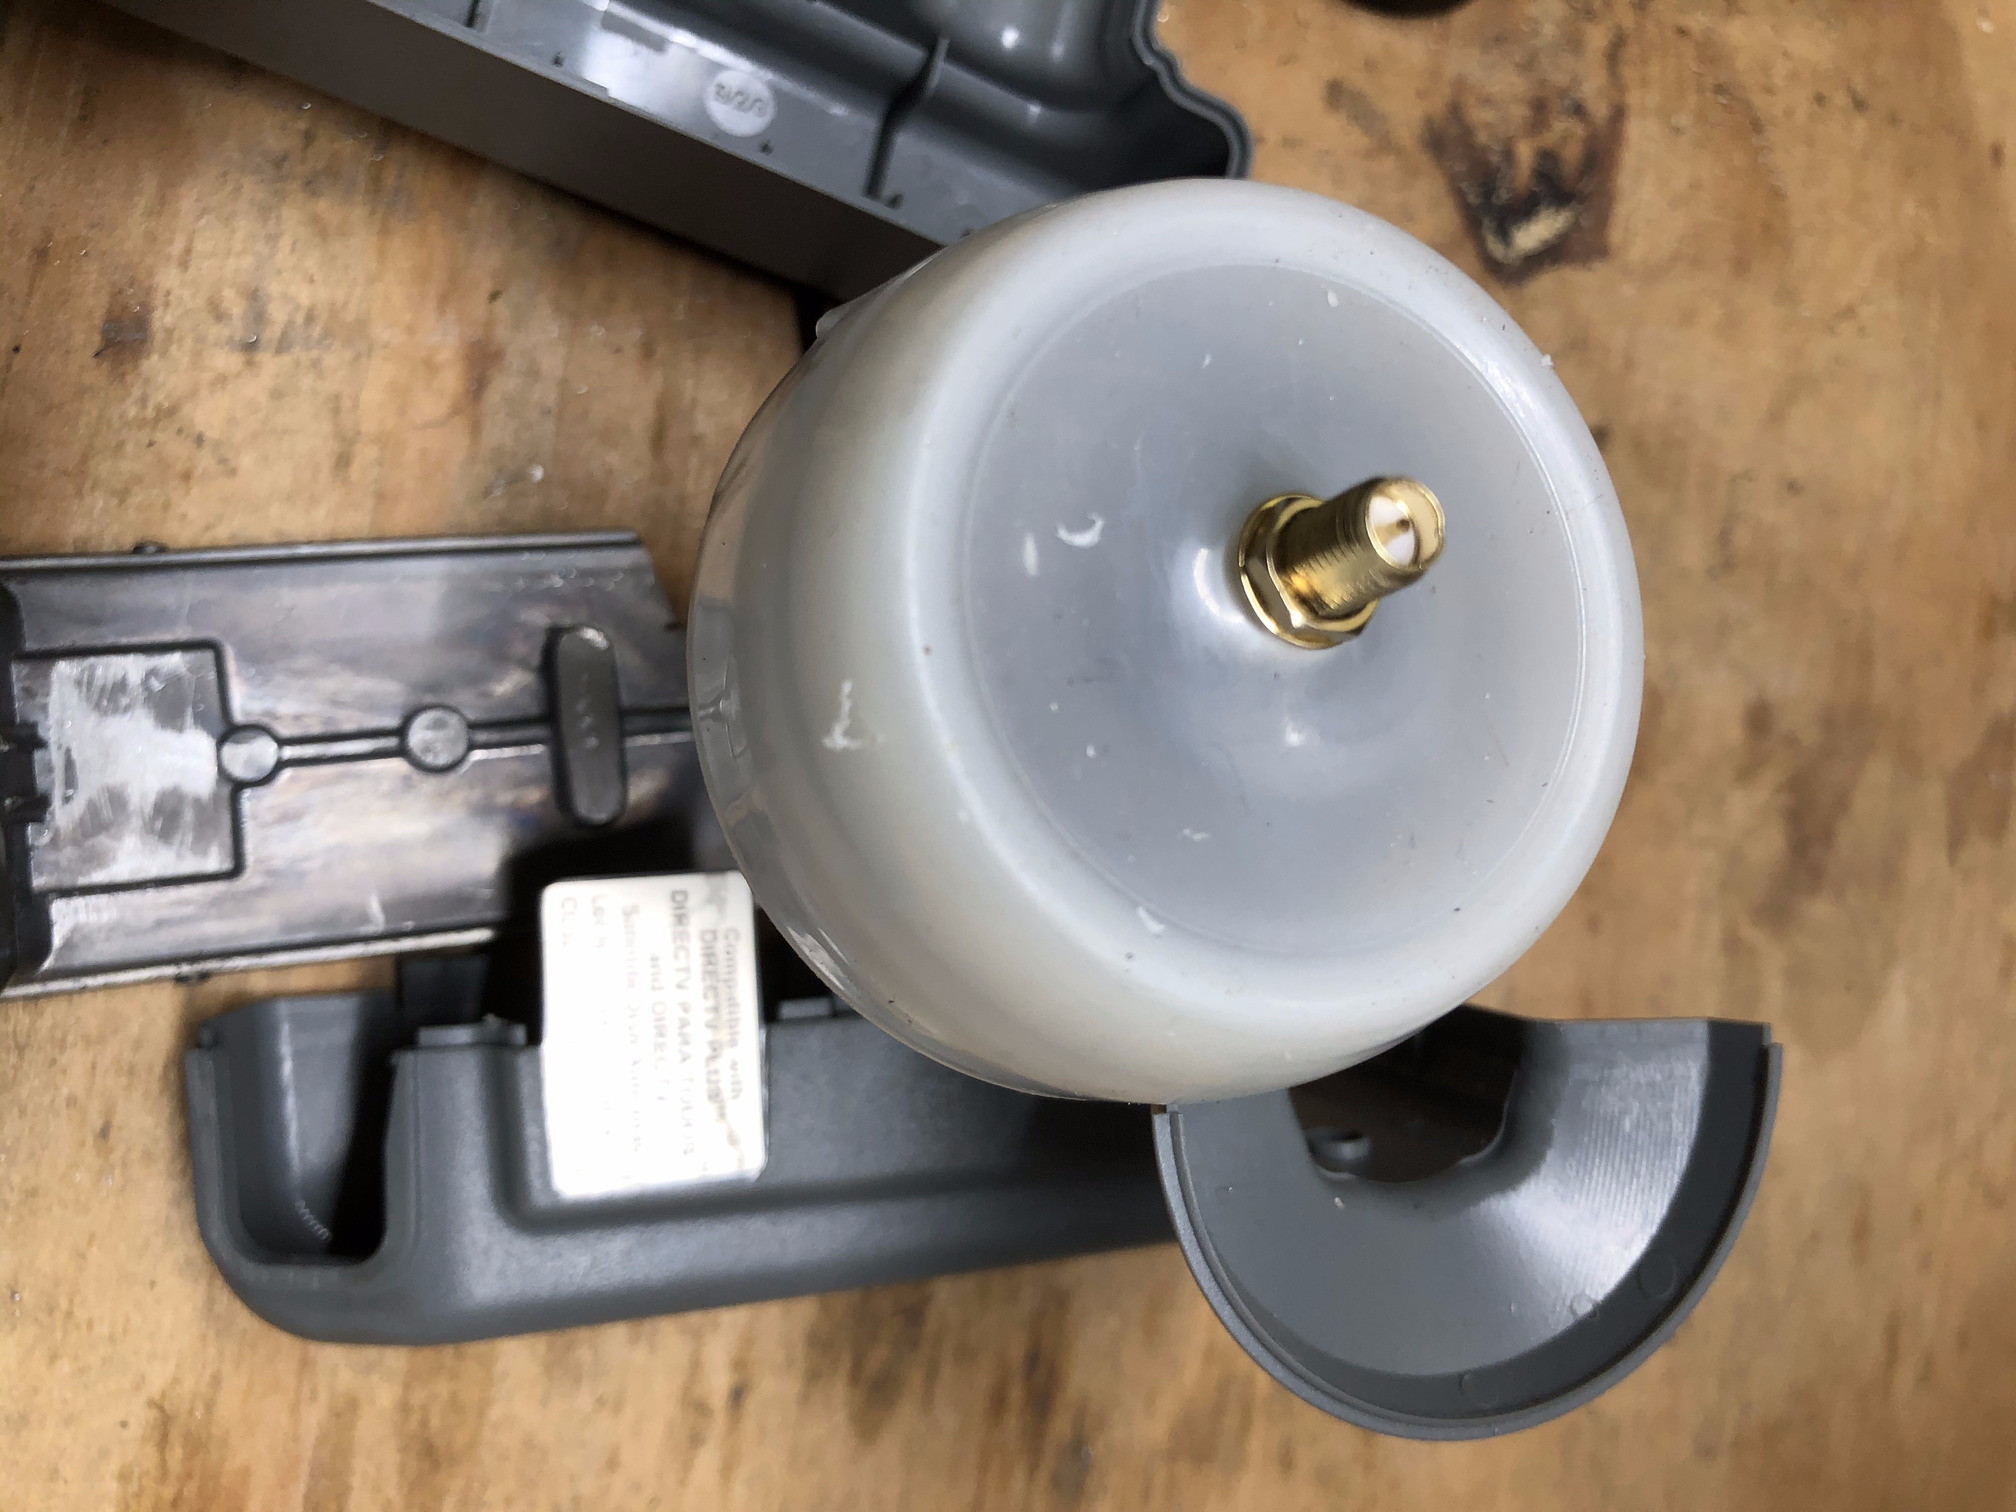 Figure 18b. Insert male SMA connector into the white cap and fasten with nut
Step 11: Reassemble the plastic housing around the metallic core and observe that a fully packaged LNBF, with the male SMA connector protruding out, is ready to accept an antenna in there (Figure 19). Then screw in the antenna as in Figure 20.
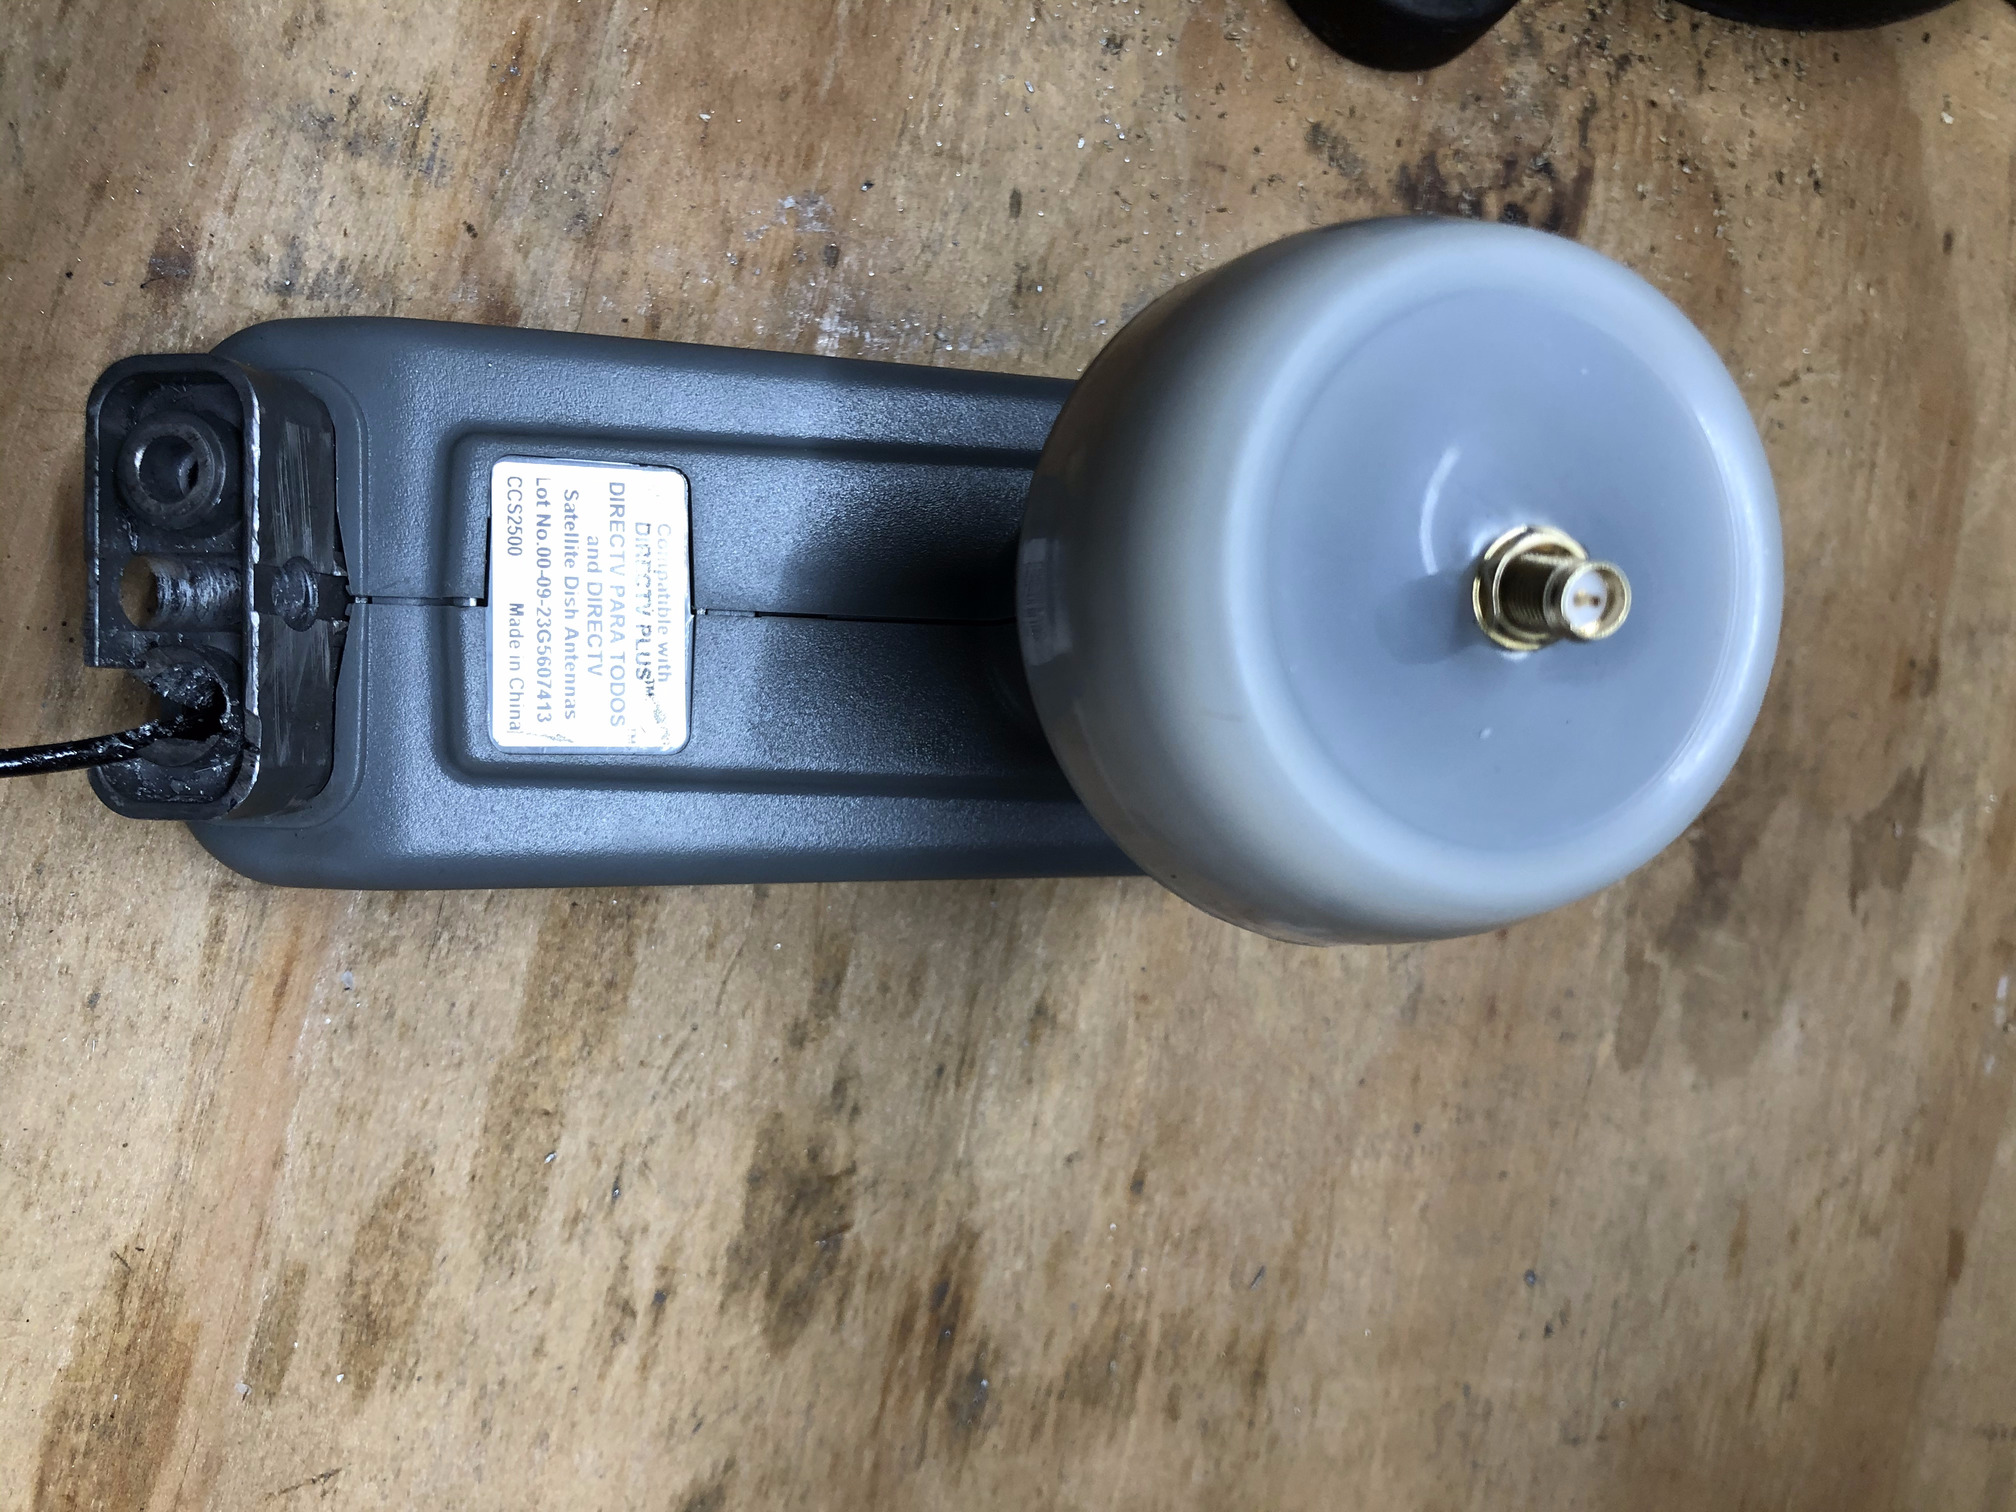 Figure 19. Complete re-assembly of the LNBF cover
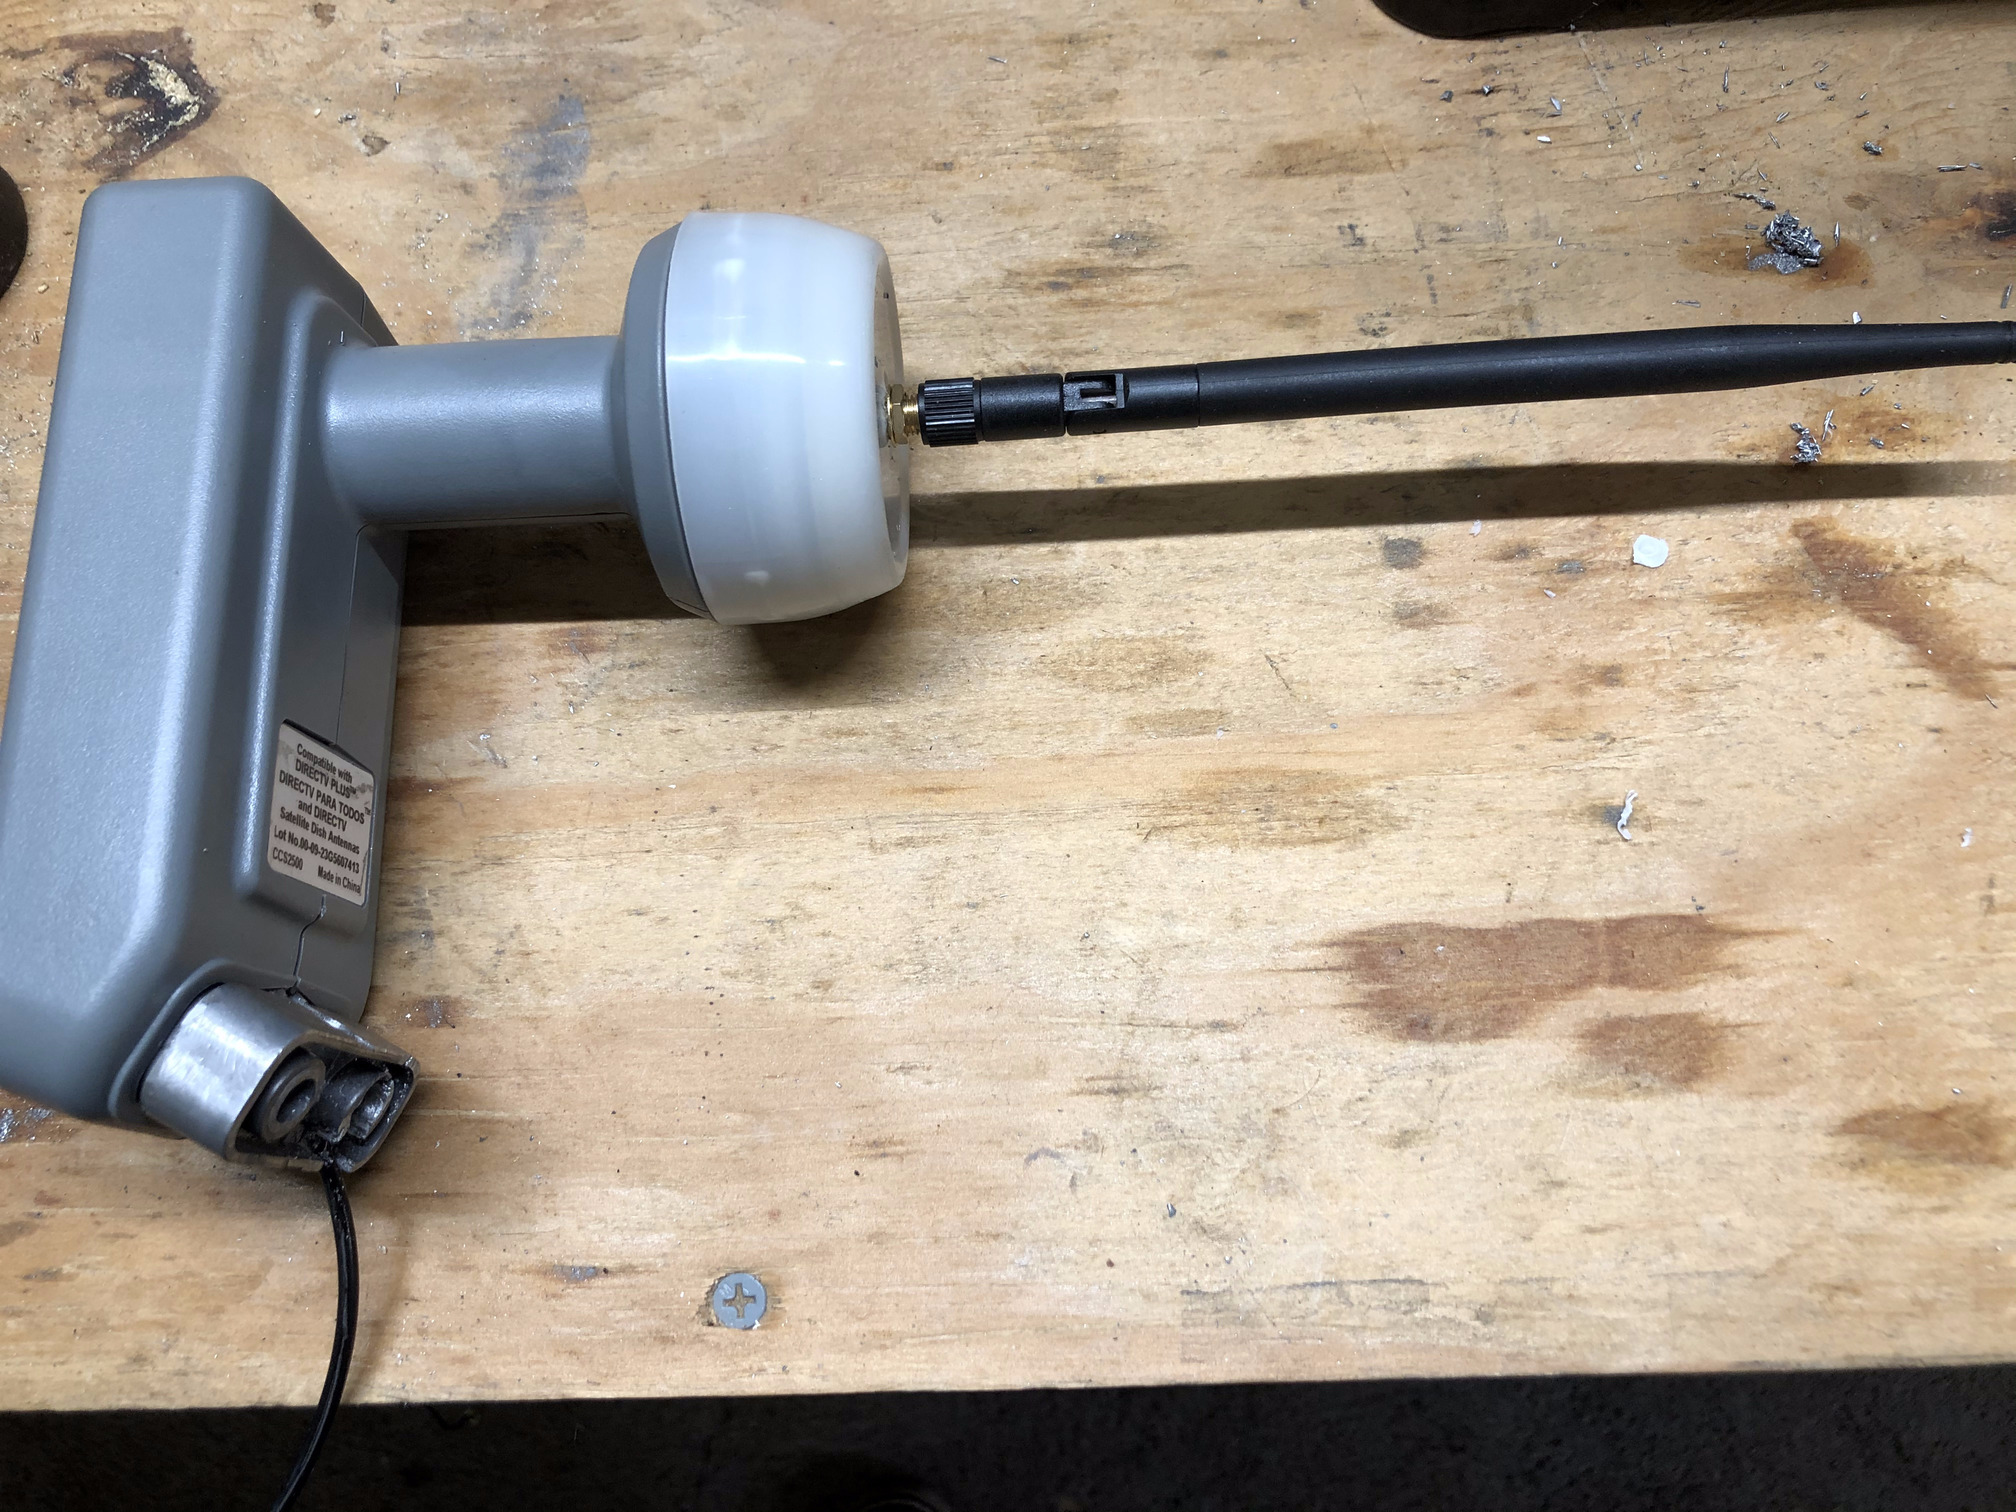 Figure 20. Screw in the antenna to the male SMA connector
Parabolic Antenna is Ready
Step 12: Pass the female end of the SMA connector through the satellite dish arm as shown in Figure 21 and screw the LNBF back on to the arm.
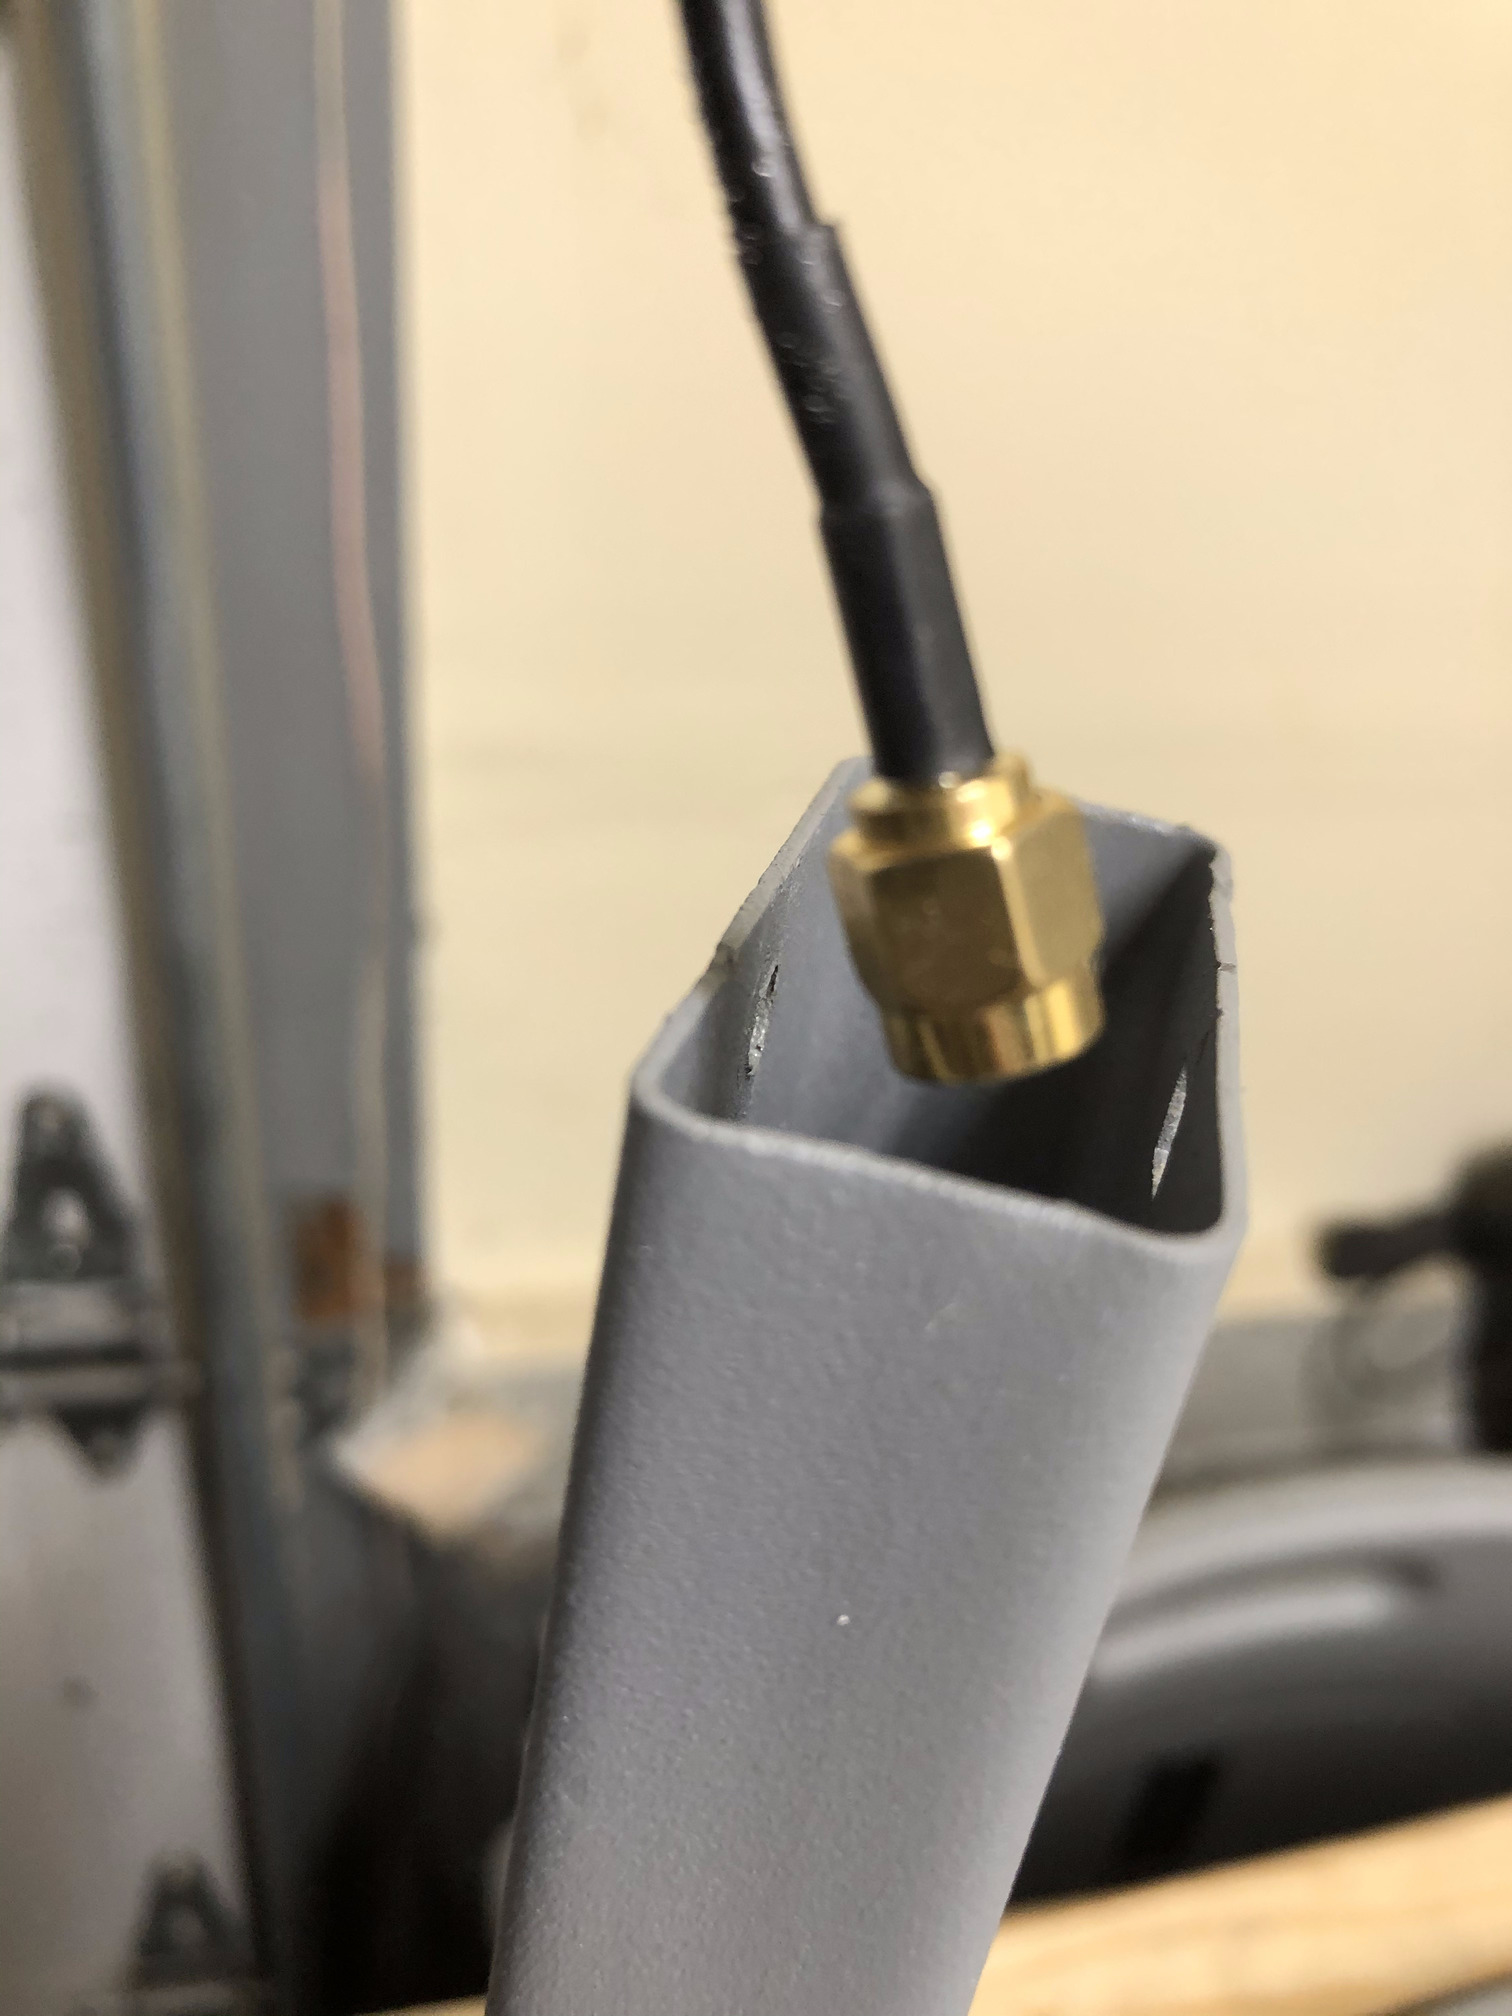 Figure 21: Pass the female end of the SMA connector cable through the satellite dish arm
Step 13: The antenna is now ready for use. Connect the USB WiFi dongle to the female SMA connector as shown in Figure 22.
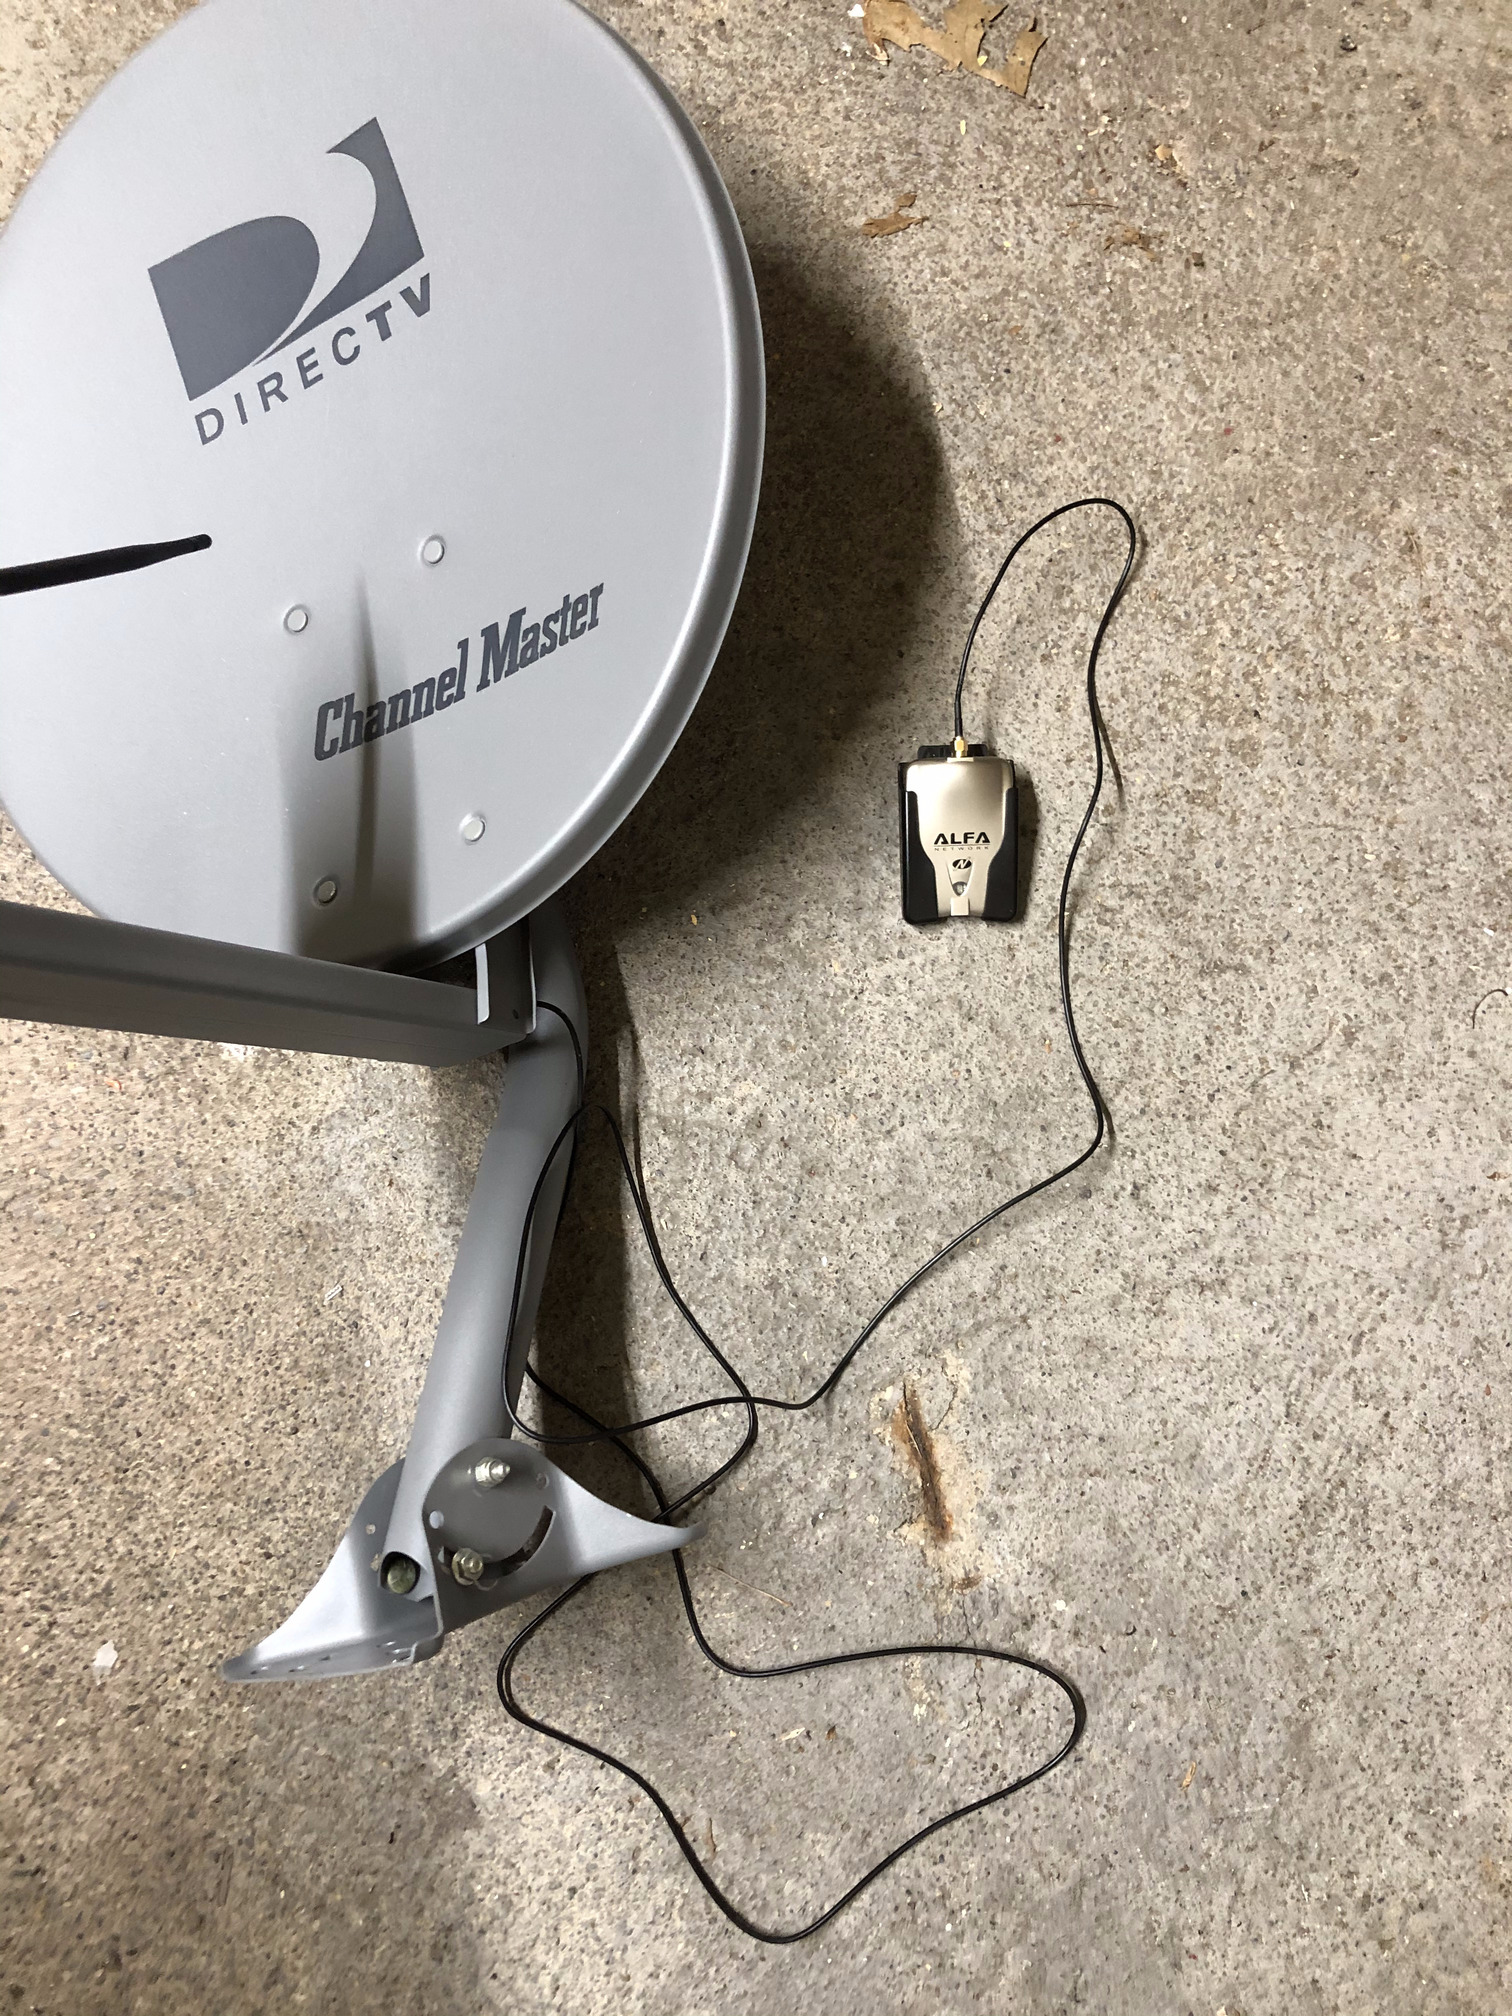 Figure 22. Satellite dish with the WiFi dongle attached
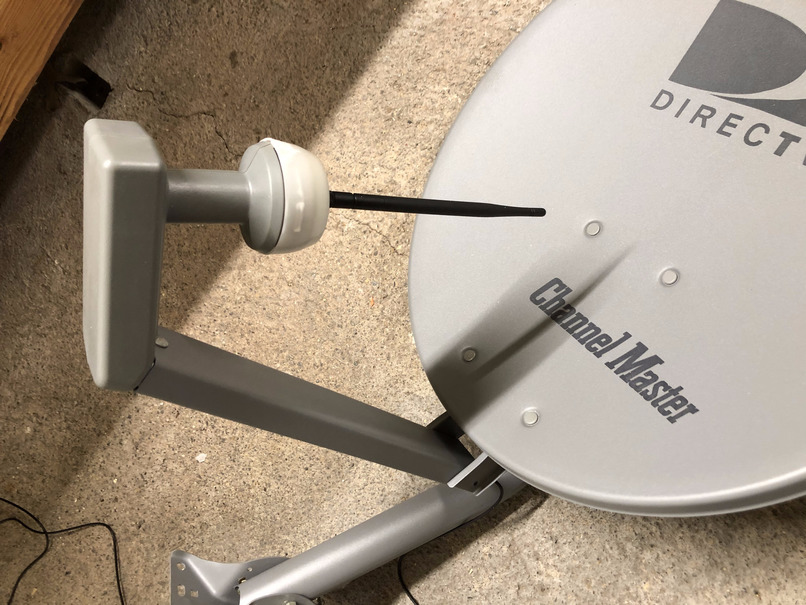
 Figure 23. Satellite dish with the omni-directional antenna
Step 14: Now attach the satellite dish mast to a block of wood and point it to a WiFi access point to receive better signal. See Figure 24 for some inspiration with leftover wood pieces.
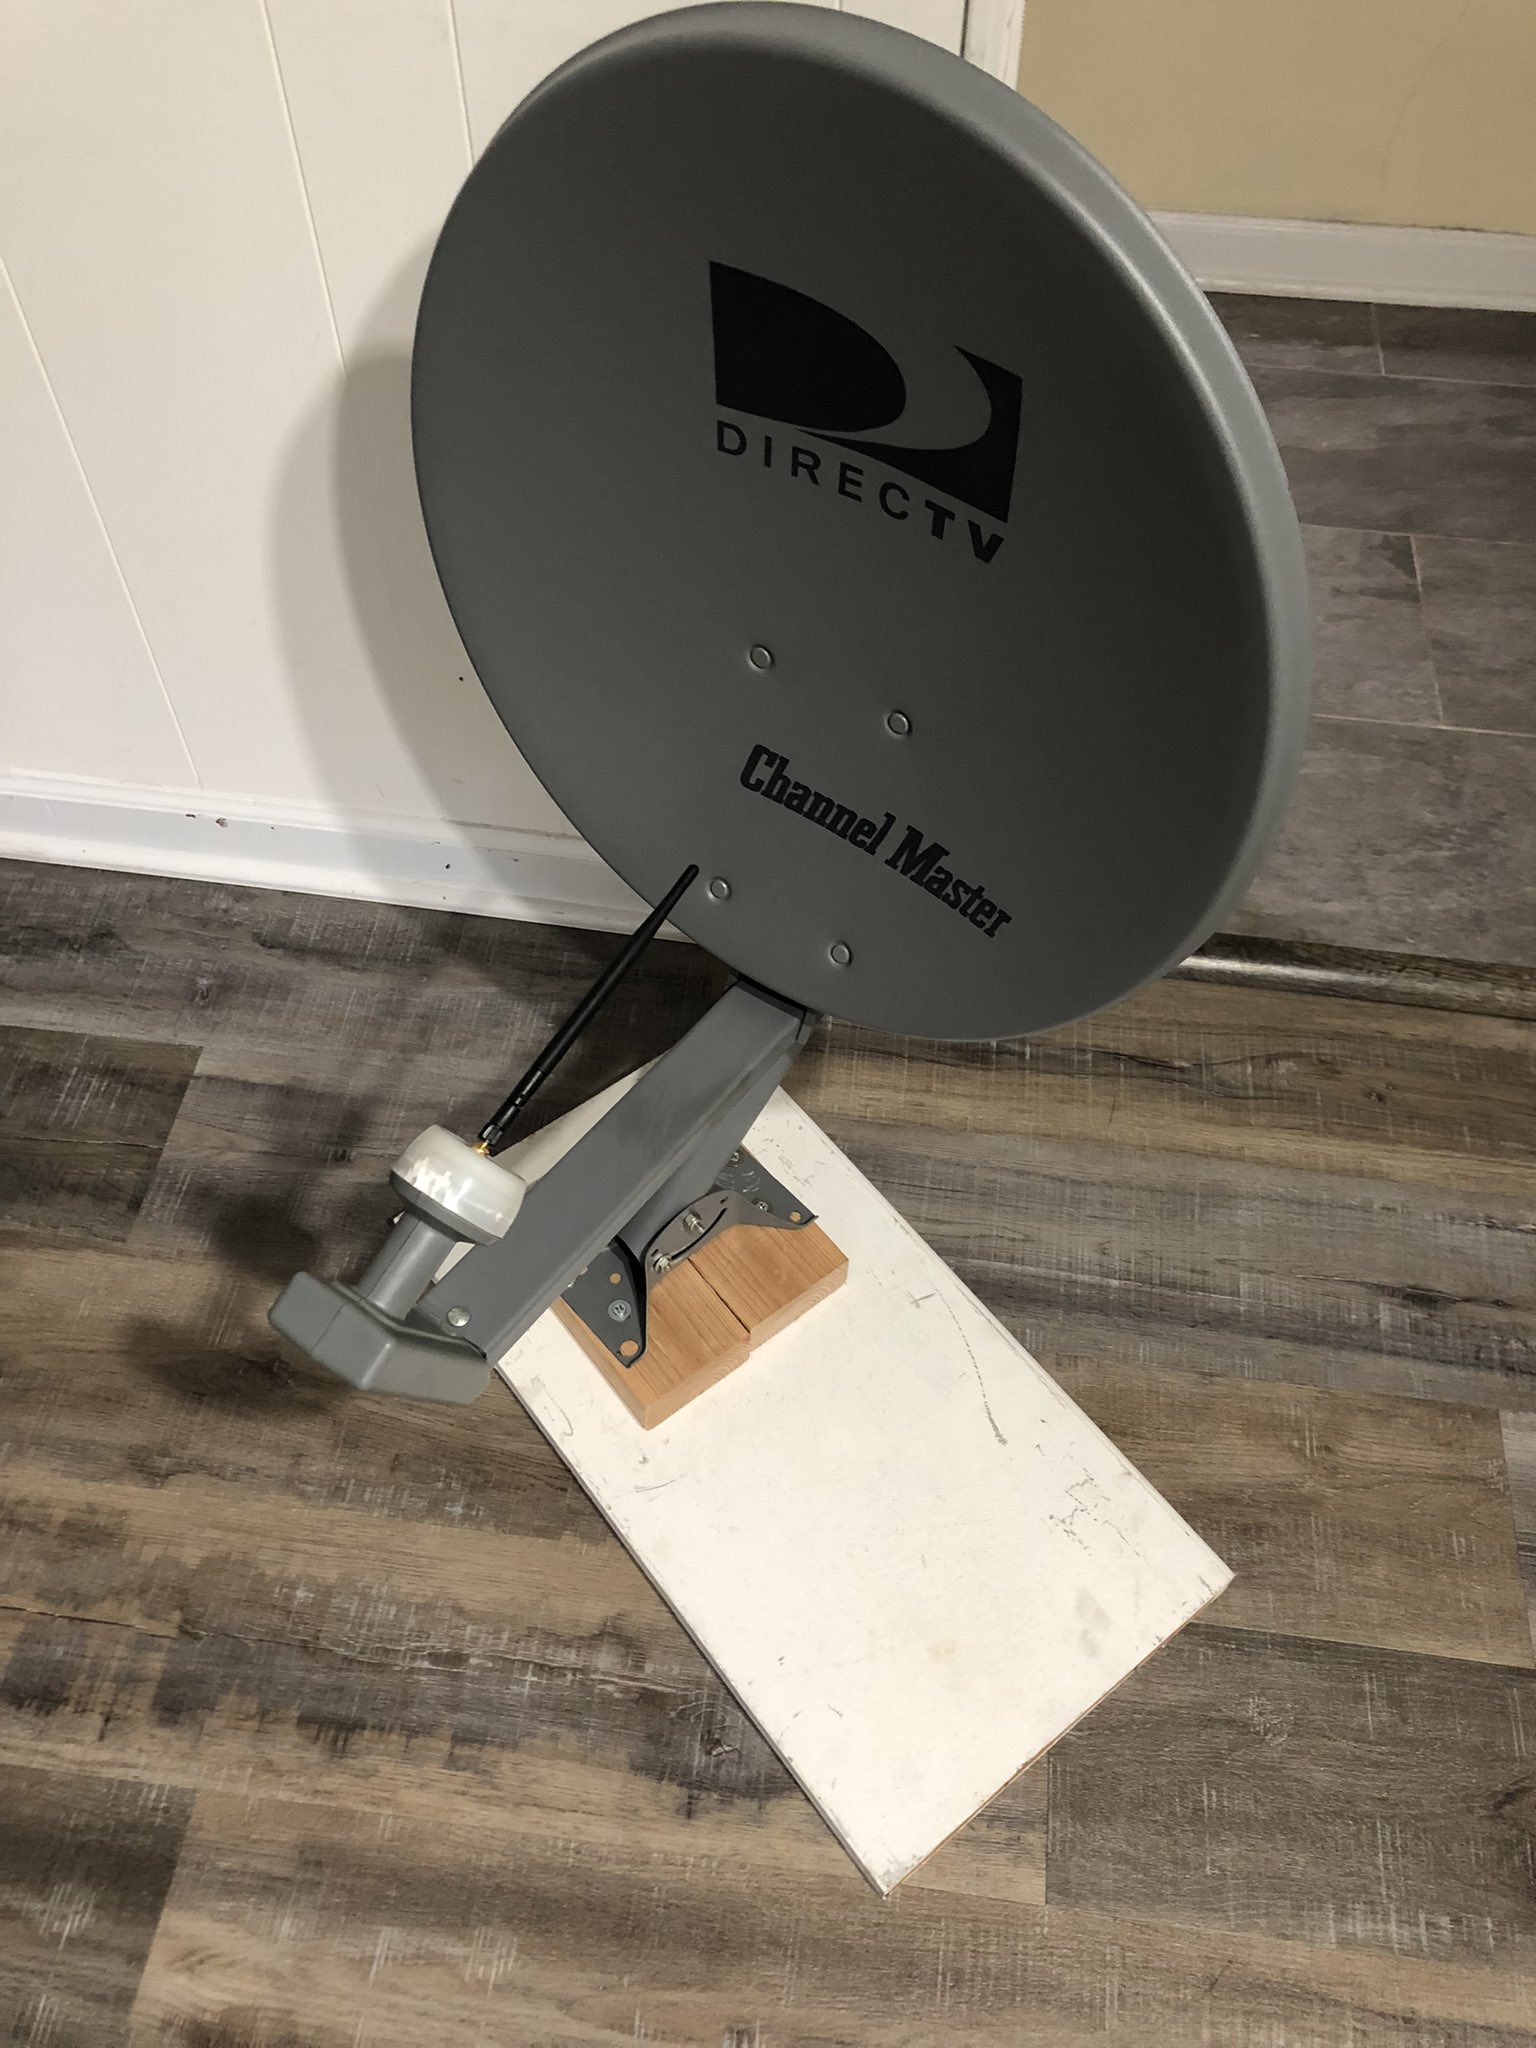 Figure 24. Satellite dish stand made with wood
Other Uses besides WiFi
Even though the WiFi is easiest to test, other uses in the Software Defined Radio (SDR) community may be more worthwhile since this is a generic parabolic antenna. If the reader owns a YardStick One or an RTL-SDR with an SMA connector then this parabolic antenna can be leveraged to get better quality reception.
All said and done, this may be more effort than usual, but nevertheless a professional looking parabolic antenna with an SMA connector can be made at home with basic tools and a cheap extension cable from Amazon or eBay.
 Donate BITCOIN to 19hrWWw1dPvBE1wVPfCnH8LqnUwsT3NsHW.