
LATEST POSTS
BUILD A MULTI-GPU CLUSTER FOR HASHCAT WITH LINUX AND NVIDIA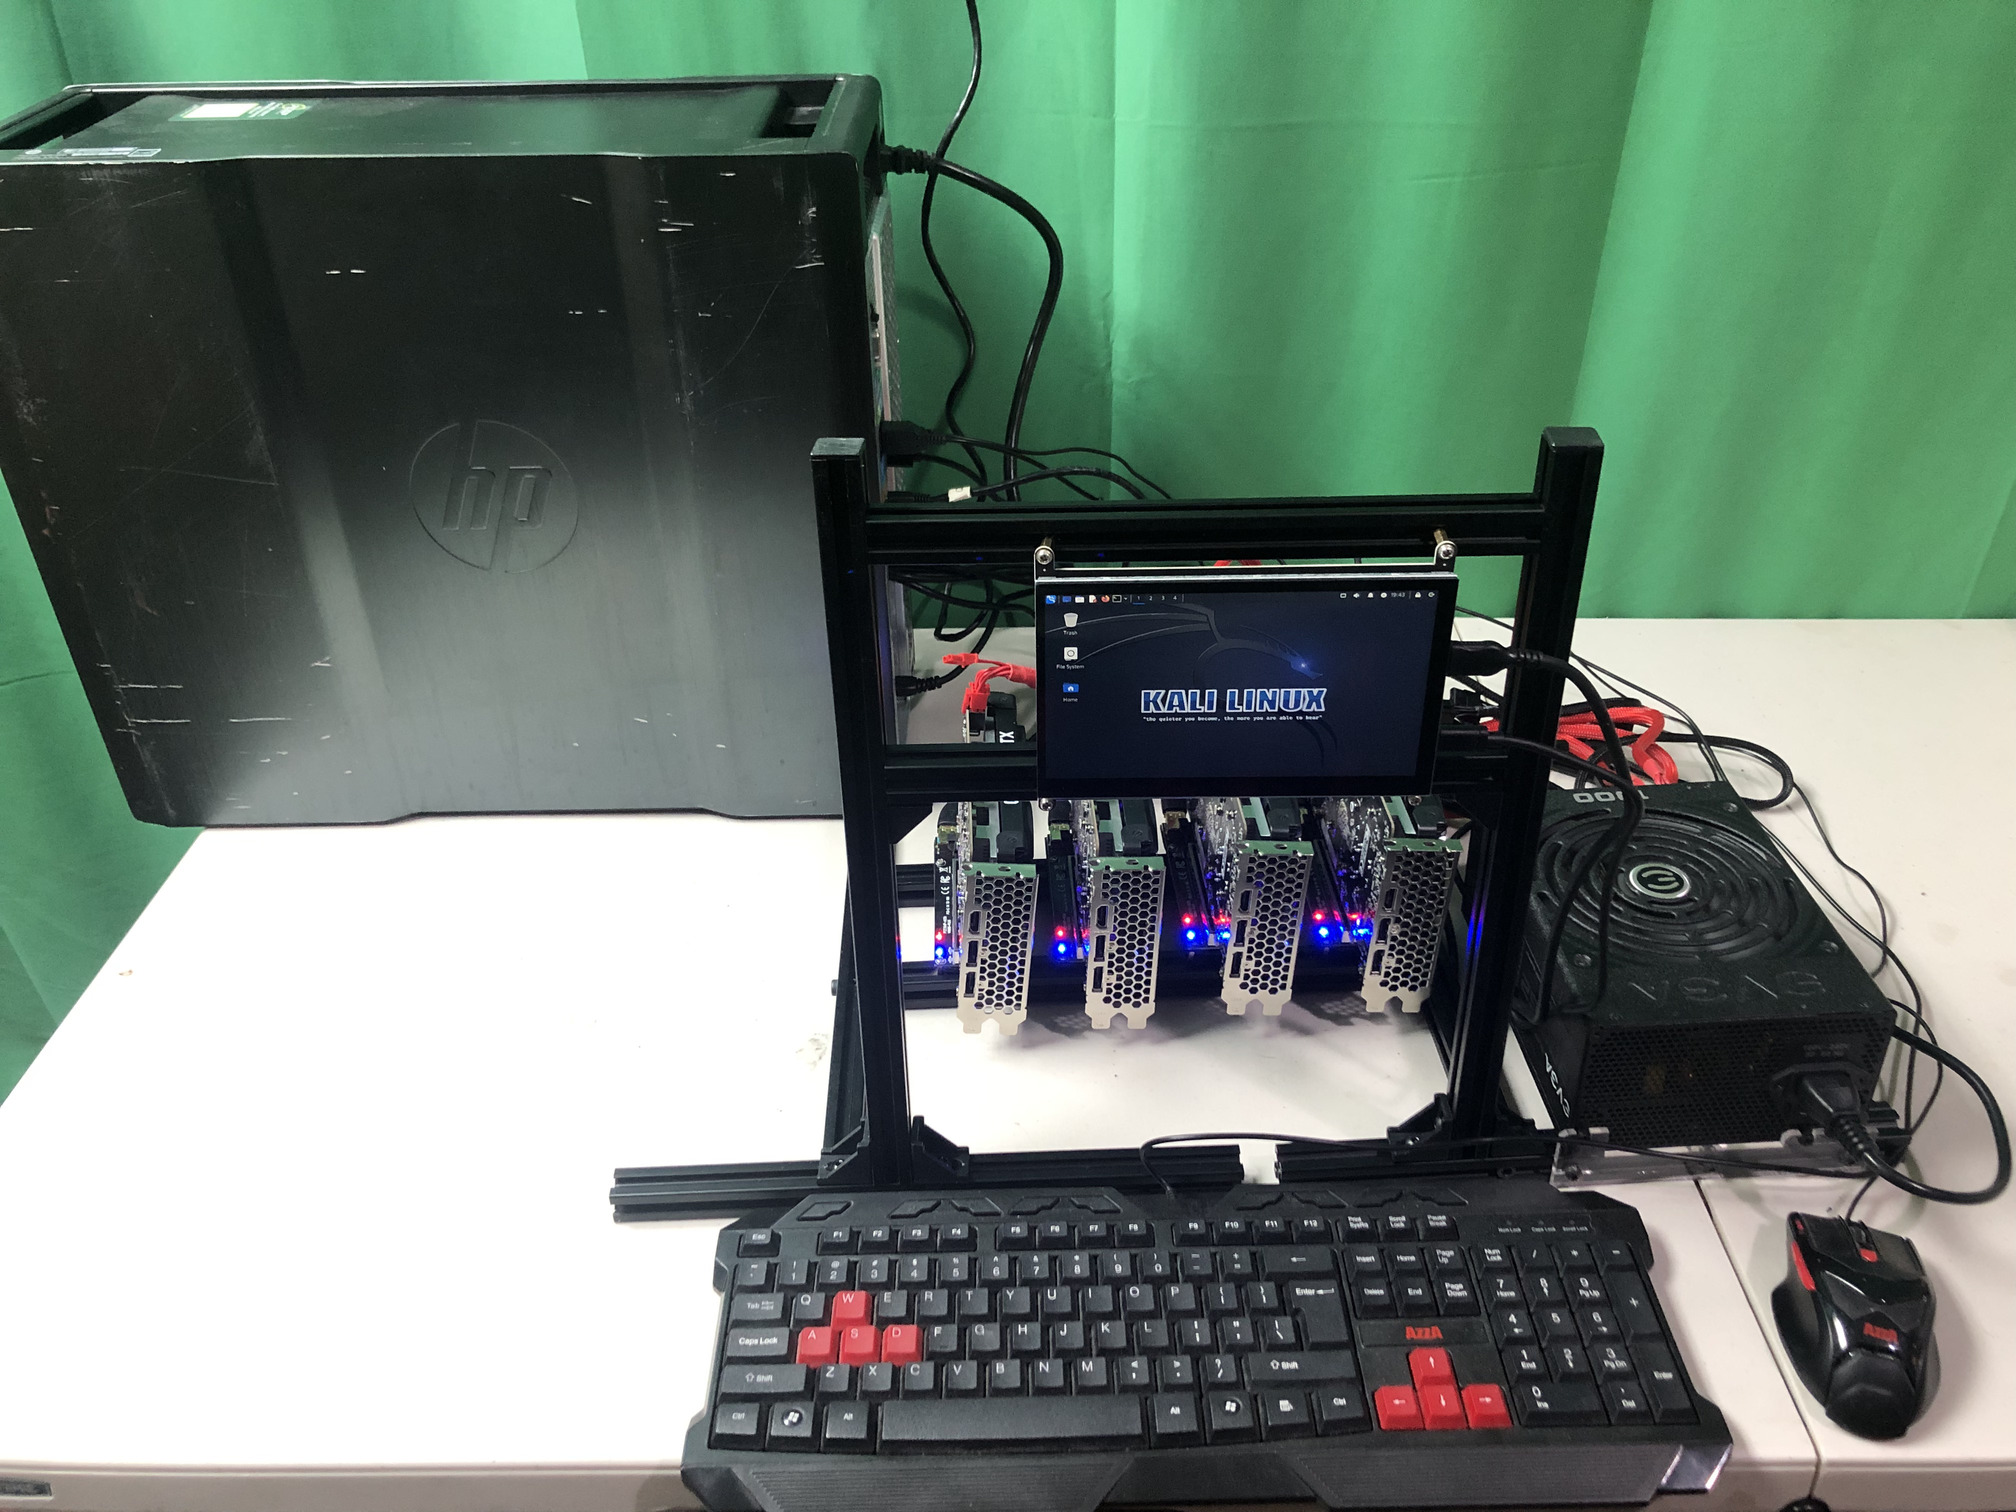
Building a multi-GPU Hashcat password cracking cluster can be very economical if you choose a combination of budget GPUs with a reasonable hash rate. Nowadays, due to the AI craze and before that due to the cryptocurrency craze, there has been a serious price inflation and price gouging by GPU vendors, such as NVIDIA, for graphics cards that can perform a lot of password cracking at scale. In this post, I show you how to build a multi-GPU cluster and achieve a better price/performance ratio with several budget GPUs as compared to buying one expensive one. The goal for my use case is to optimize on both price and risk. There is a risk that if you run a lot of password hash cracking on a GPU, that it may wear out earlier. When you use budget GPUs, you may wear them out but they are cheaper to replace, and hence, cost effective. Except for the GPUs, and their PCI-E risers, everything else I bought pre-owned on online marketplaces, since you don’t need some parts to be new. I used 5 GPUs for this cluster, and a 6th one can be added to it. This is a self-contained cluster and you do not need a monitor as I use an HDMI screen as part of it. NOTE: This cluster can be used for machine learning and other CUDA programming too! Read More → |
| Posted on by Vikas N. Kumar. |
UPGRADE SSD AND INSTALL LINUX ON INTEL MACBOOK AIR (mid-2011)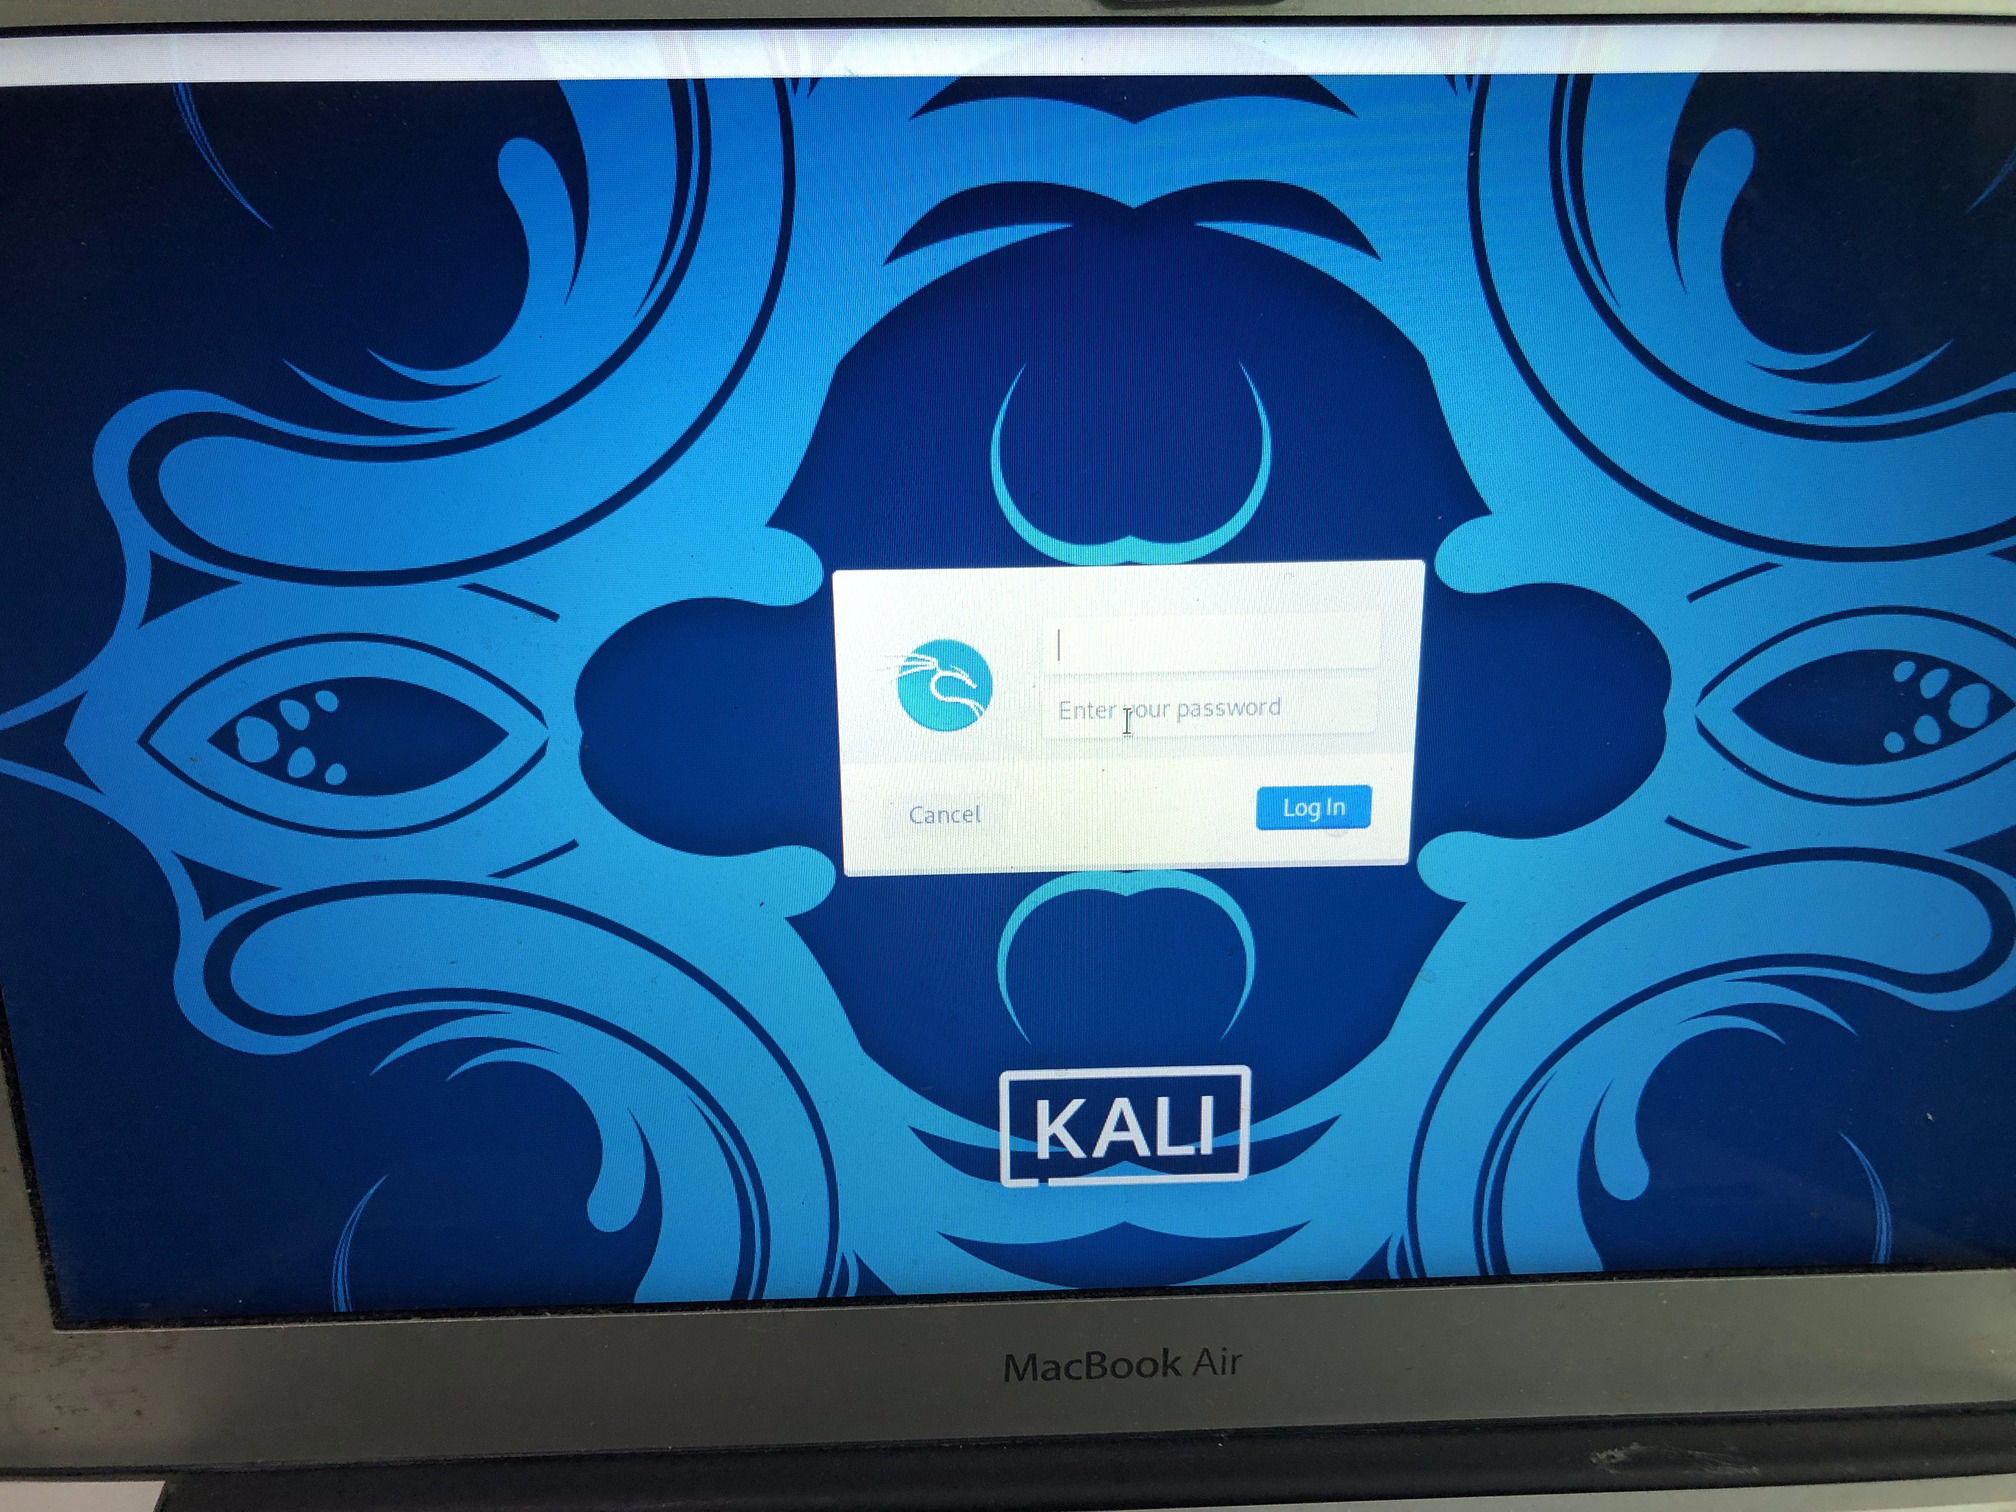
I purchased a MacBook Air in 2011, and it is the model A1370 with a 11-inch screen, Intel 64-bit i5 CPU 1.6GHz, 64GB NVMe solid state drive (SSD) and 2GB RAM. Apple has stopped supporting older Intel-based laptops with newer versions of Mac OSX for a few years now. However, soon browsers like Firefox will also stop supporting such old systems. You have two choices, either dispose of the device or install Linux on it. Since my device is working really well so far and is still a really thin laptop, it can continue to be a great travel companion. But it is old, so one of the options is to install Linux on it. The EFI support has come a long way that you can completely replace the old OSX with a Linux that supports EFI install out of the box. I chose Kali Linux but you may choose Ubuntu and the process is the same. But 64GB seems small and fills up quickly with today’s Linux operating systems, so I decided to upgrade the NVMe SSD to 250GB. This post describes how to perform the upgrade of the SSD and install Linux on the MacBook Air. This upgrade process will work on any Intel-based MacBook Airs that are from the 2010-2012 era, as far as I know. This can also be a way to create a burner laptop for traveling to various hacker conferences like DEFCON, although nothing beats a Live CD Linux in that scenario, sometimes you just want something that does not require a USB drive sticking out of the laptop. Read More → |
| Posted on by Vikas N. Kumar. |
SETUP SQUID WEB PROXY SERVER ON LINUX
Sometimes you need to setup a proxy server so that you can mask your IP address for making web requests using your browser. In some situations, you may want to intercept every web request and reject some requests such as rejecting social media websites at work. Sometimes you want only authorized users to access the internet at your workplace and want to monitor their web access. One may also need to cache web requests to build their own content delivery network. In such scenarios, you can install a web proxy like Squid on Linux. Setting it up on a Debian or Ubuntu system is very easy and this post will show you how. However, this post is limited to setting up the Squid proxy server only as a HTTP/FTP proxy and not for caching. That would be a different post for the future. Read More → |
| Posted on by Vikas N. Kumar. |
SETUP SOCKS PROXY SERVER ON LINUX
A SOCKS proxy server is useful to mask your IP address especially when you want to connect to TCP/UDP ports that are not running on ports 80 and 443, such as IRC or SSH or a cryptocurrency node such as Bitcoin, Ethereum or Dogecoin node. Setting it up on a Debian or Ubuntu system is very easy and this post will show you how. Read More → |
| Posted on by Vikas N. Kumar. |
SCREEN REPAIR OF SAMSUNG GALAXY S4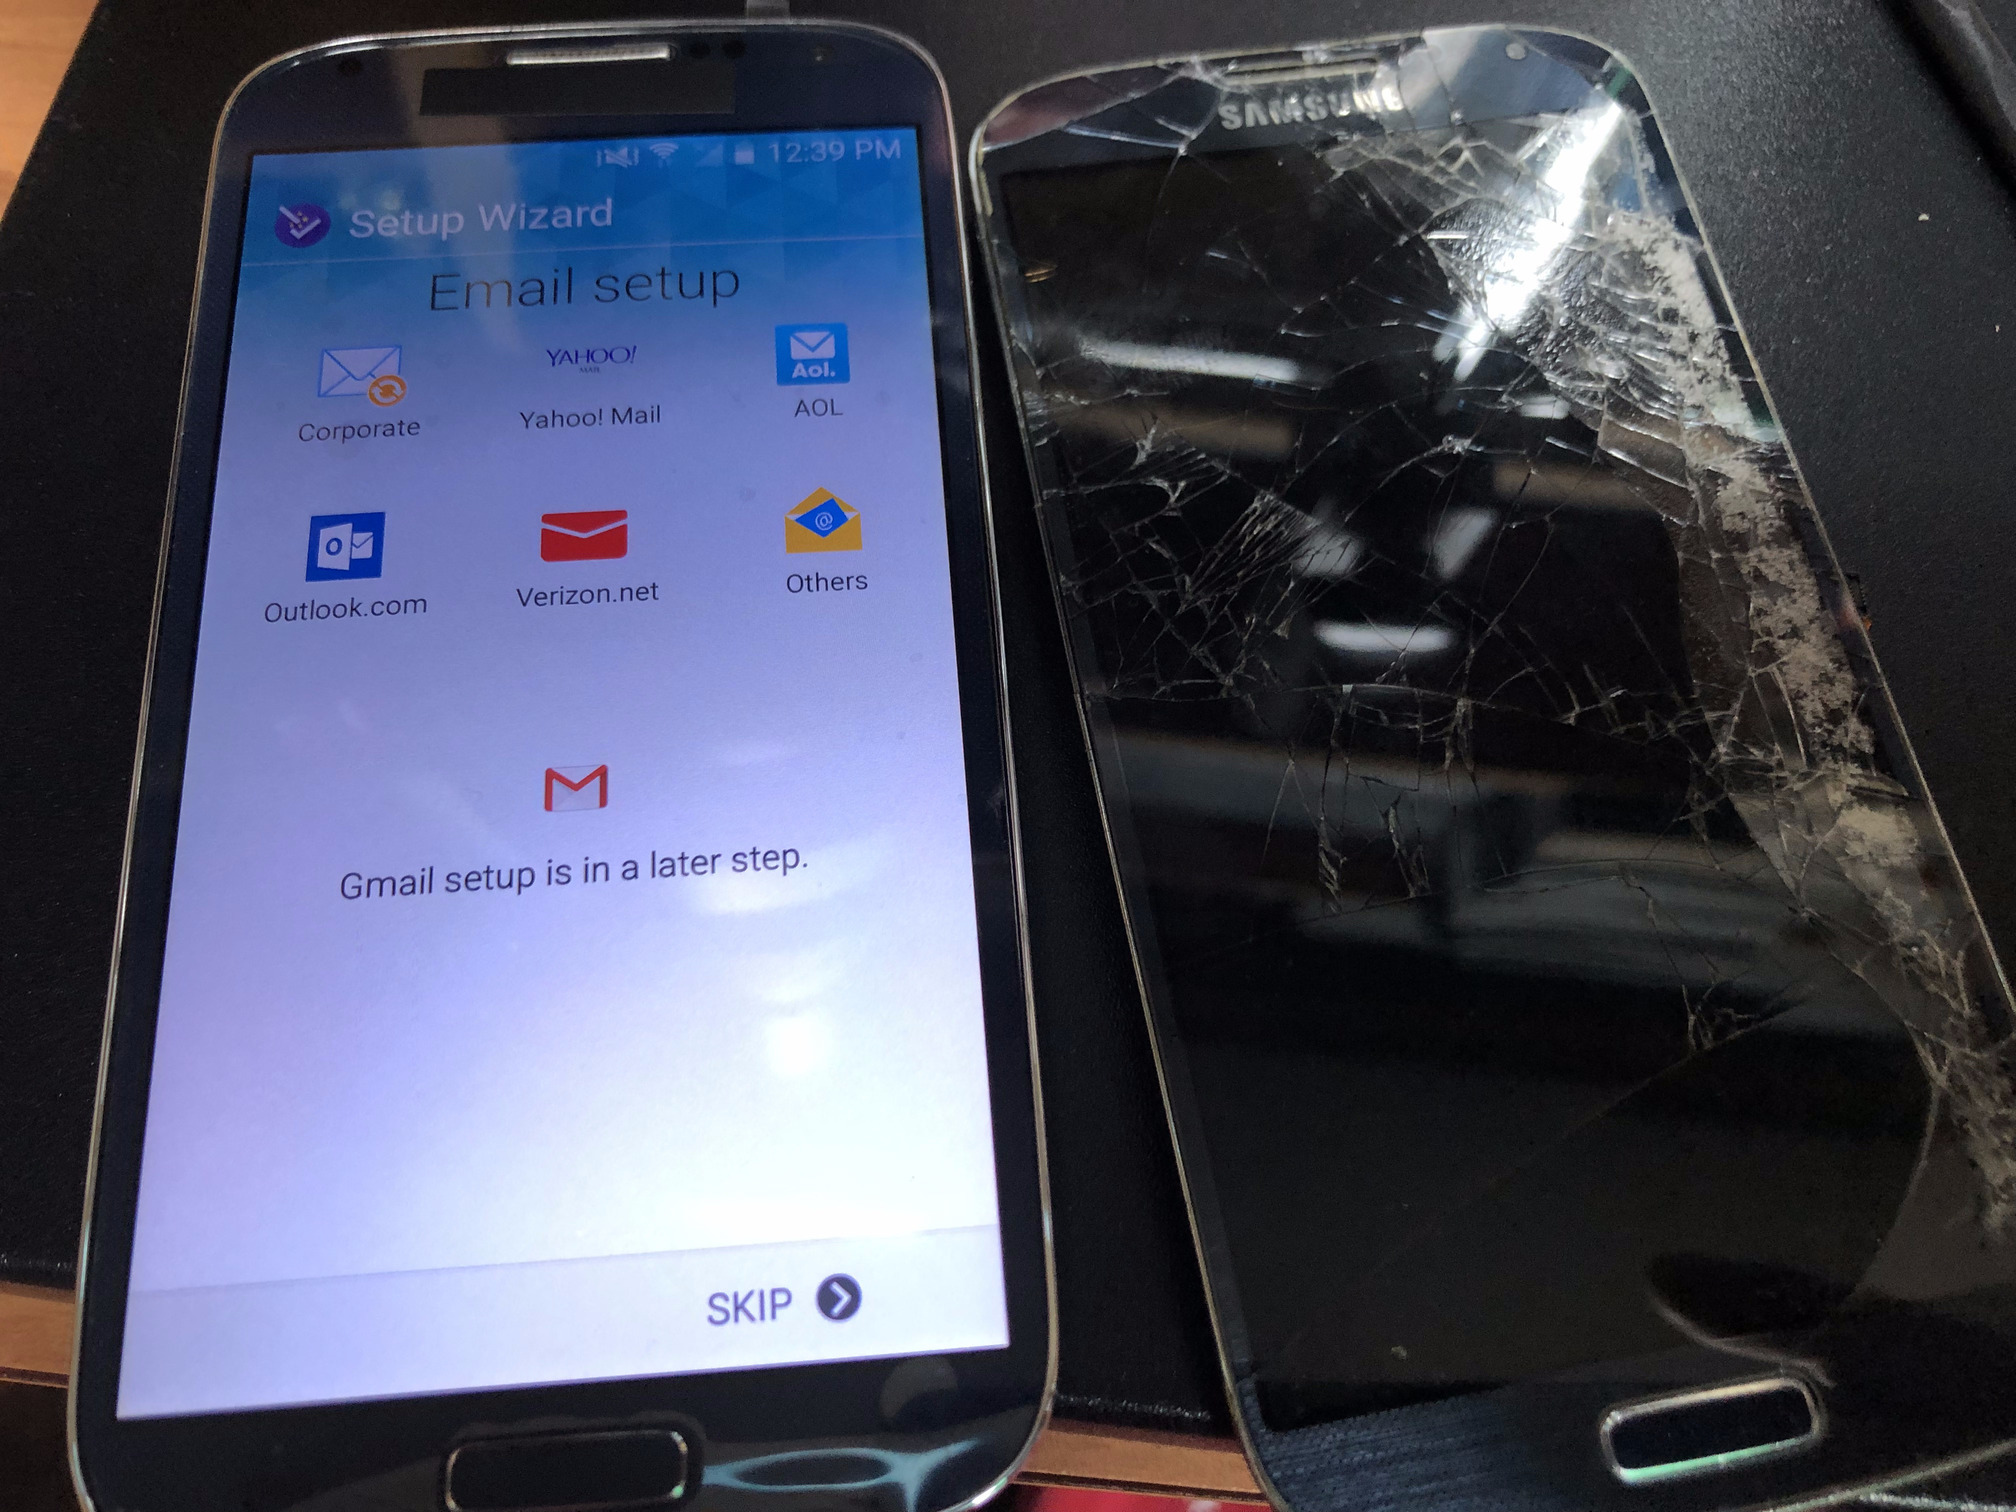
A Samsung Galaxy S4 (and also S5) is a fantastic device to use as a cheap burner phone for one simple reason — a removable battery. It is also well supported with a LineageOS port. Someone gave me an old Samsung Galaxy S4 a few years back that had a damaged display, and I kept it thinking that one day I may need it. A few days ago I decided I wanted to fix that display so I could build a burner phone from scratch with a single messenger app like Session, which has a custom APK file that you can download on to your Android without a Google Play Store or even an F-Droid store. This can be very useful if you do not want Google apps or any other app besides a default browser on your device. This post outlines how I went about repairing the screen of the S4 first, so that I can have a device that works which is step 1. These devices are really cheap to procure on eBay but nothing is cheaper than free. I will also demonstrate how to disable or remove the selfie camera. Read More → |
| Posted on by Vikas N. Kumar. |
| Pages: | | | 1 | | | 2 | | | 3 | | | 4 | | | 5 | | | Older → |
 Donate BITCOIN to 19hrWWw1dPvBE1wVPfCnH8LqnUwsT3NsHW.