
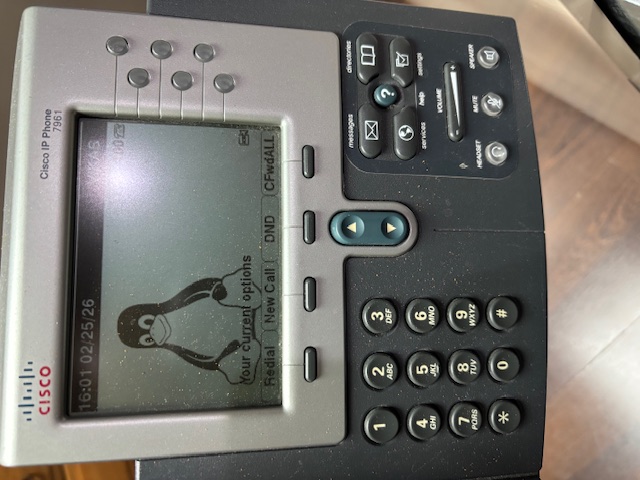
Previously we saw how to setup and internal phone system using Asterisk and old Cisco® phones with extensions. You could call any phone extension in the system directly. However, it did not do any outbound calling to actual phones or receive inbound calls from them.
This post explains how to use a VOIP provider like Twilio or Vonage or VOIP.ms using the concept of SIP Trunking.
By setting up the Asterisk system to use SIP trunking, the phone system can now make outbound calls and receive inbound calls from regular phones. Back in the day, the USA had analog telephones, commonly known as POTS or PSTN, but in the last ten years or so these telephones have completely disappeared and replaced with VOIP phones. Historically, you would have needed a custom PCI-E card to convert your VOIP to POTS technology, but today you do not need that anymore. You can use a VOIP service provider like Twilio or Vonage or VOIP.ms and be successful at doing calls to regular phones. All over the internet using your existing internet connection without paying too much extra.
TABLE OF CONTENTS
- 1. SIP Trunking With Twilio
- 2. Setting Up Asterisk Configuration
- 3. Setting Up Firewall Rules
- 4. References
SIP TRUNKING WITH TWILIO
I chose Twilio to do the SIP trunking, since I already had an external VOIP number with them which was not being used much over the years. The phone number that you can buy from Twilio can also receive text messages. I setup the text message forwarding using Twilio’s TwiML apps to forward to my actual cellphone and let the phone calls on that number be used for SIP trunking with Asterisk.
Here’s a summary of the steps you need to follow. All details are provided in their excellent documentation.
- Login to Twilio and access your Dashboard
- Create a new SIP Trunk
- Disable Secure Trunking for now.
- Create a username and password for the SIP trunk authentication from your Asterisk setup. Make sure the password is at least 24-32 characters.
- Add your Asterisk server’s external WAN IP address to the allow list. If you have a home IP address since you are setting Asterisk up at home like me, you may want to periodically check this IP address allow list, or allow all IPs (insecure). You may be able to use a Dynamic DNS FQDN here too.
- Note down the PSTN host name for your SIP trunk.
- Note down all the Twilio IP addresses for your region.
Once you have all this information you can proceed to update the Asterisk configuration to perform calls via the Twilio SIP Trunk.
The setup is identical if you instead choose to use Vonage or VOIP.ms SIP trunking. The only things that will change will be the PSTN hostname which will be unique to each SIP provider, the authentication credentials and the IP addresses.
Twilio notes in their Asterisk setup documentation that they only support ulaw codecs and not others.
SETTING UP ASTERISK CONFIGURATION
Make sure you have Asterisk setup as described in the previous post.
This section will describe adding to that configuration.
You want your Asterisk, which most likely is behind a NAT or Firewall in a LAN, to connect to Twilio over your network’s external IP address that you may have allowed in Twilio’s SIP Trunking setup above.
Asterisk will need to be told that information too.
In /etc/asterisk/sip.conf add the following lines to the [general] section. Remember from the previous post that we used chan_sip and not chan_pjsip in our Asterisk setup.
[general]
;add IP addresses
localnet=192.168.9.0/24
;externaddr=XXX.XXX.XXX.XXX
externhost=myhomeip.example.com
externrefresh=180
As you have seen in the previous post, the local LAN address is 192.168.9.0/24 for my system, and maybe different for yours. You have to set that to the localnet configuration option. If you have a known external IP address, you can set that using the externaddr option. If you have a Dynamic DNS setup, you can set that to the externhost option, with a refresh rate set to externrefresh in seconds.
Use either the externhost or the externaddr option, but not both. The externaddr takes precedence.
Now setup the Twilio outbound calling template and details in the sip.conf file at the bottom.
[twilio-trunk](!)
type=peer
context=from-twilio
canreinvite=no
insecure=port,invite
disallow=all
allow=ulaw
;;;NOTE: ENTER YOUR EXTERNAL IP HERE
externaddr=XXX.XXX.XXX.XXX

[twilio0](twilio-trunk)
;;;NOTE: CHANGE YOUR SIP TRUNK TO WHAT YOU SETUP
host=MYSIPTRUNK.pstn.us1.twilio.com
remotesecret=CHANGE_THIS_PASSWORD
secret=CHANGE_THIS_PASSWORD
defaultuser=MYSIPTRUNK_USERNAME

[twilio1](twilio-trunk)
host=54.172.60.0

[twilio2](twilio-trunk)
host=54.172.60.1
As you can see above, these settings will be custom to your SIP trunk setup. You will set your external IP address here optionally, you will setup your PSTN SIP Trunk URL from Twilio, the username and password credentials (as defaultuser, remotesecret and secret), and lastly set all the individual IP addresses as separate sections.
Twilio provides multiple IP addresses for each region, so I added all the IP addresses one at a time for all the US regions. I ended up with 8 such sections. Twilio says that the calls can be received from any such IP address, so it makes sense to add all of them due to load balancing on Twilio’s side.
You may have noticed the context name from-twilio. This has to be defined in the /etc/asterisk/extensions.conf file.
But first, we add an additional extension too. Taking the configuration from the previous post and adding an extra outgoing extension pattern as below.
[extensions]
exten => 100,1,Goto(call-extension,${EXTEN},1)
; Note the duplication of the hint peername
same => hint,SIP/100,SIP/100
exten => 101,1,Goto(call-extension,${EXTEN},1)
same => hint,SIP/101,SIP/101
exten => 102,1,Goto(call-extension,${EXTEN},1)
same => hint,SIP/102,SIP/102
;;; TWILIO SIP TRUNK OUTGOING
exten => _1NXXXXXXXXX,1,Set(CALLERID(all)="Vikas Kumar" <+18888888888>)
same => n,Dial(SIP/twilio0/+${EXTEN})

[from-twilio]
exten => _+1NXXXXXXXXX,1,Dial(SIP/100)
In the above configuration, from-twilio handles all inbound calls received on the SIP trunk phone number, shown above as +18888888888, and routes it to extension 100. It does not ring all the extensions in a round-robin fashion at the moment, just the 100 one.
The outbound calling is done based on the pattern _1NXXXXXXXXX which requires a 1 (US country code) to be dialed followed by 10 digits, and will then route that call to twilio0 as defined in sip.conf. It sets a caller ID, which shows my name and the phone number +18888888888. You should replace that with whatever caller ID name you want to be displayed along with the phone number you have purchased from your SIP provider.
That’s it. Now restart Asterisk or do a reload using the command line interface:
root$ asterisk -rvvvv
CLI> sip reload
CLI> dialplan reload
CLI> core reload
Now you should be able to make outbound calls and receive inbound calls successfully.
You can also use Twilio’s SIP trunk testing system.
But wait, you are behind a Firewall !! Your inbound calls are not coming in.
SETTING UP FIREWALL RULES
You have to let your firewall allow connections from Twilio’s dedicated IP addresses to connect to your Asterisk server’s SIP port 5060 and 5061.
In my case the Asterisk server runs on 192.168.9.99. So the firewall rule will be like below:
Allow Twilio IP range 54.172.60.0/30 and 54.244.51.0/30 on the WAN address at ports 5060 and 5061 to redirect all those connections to IP 192.168.9.99 on ports 5060 and 5061, respectively.
Also allow UDP ports 10000-20000 for RTP packets to enter the firewall and forward them to 192.168.9.99 which is our Asterisk IP. This is required in case you have an external SIP extension that needs to connect to your internal Asterisk IP. This also is required to run the Twilio tests.
Depending on your router, you will need to set this in their port forward setup screen.
That’s it. Now you should be able to call the Twilio number and see your Cisco® VOIP phone ring.
REFERENCES
I was helped by many references from the internet and I am listing all of them here, so they can be of reference to you too.
 Donate BITCOIN to 19hrWWw1dPvBE1wVPfCnH8LqnUwsT3NsHW.